在WPF中开启摄像头扫描二维码(Media+Zxing)
Posted lonelyxmas
tags:
篇首语:本文由小常识网(cha138.com)小编为大家整理,主要介绍了在WPF中开启摄像头扫描二维码(Media+Zxing)相关的知识,希望对你有一定的参考价值。
原文:在WPF中开启摄像头扫描二维码(Media+Zxing)
近两天项目中需要添加一个功能,是根据摄像头来读取二维码信息,然后根据读出来的信息来和数据库中进行对比显示数据。
选择技术Zxing、WPFMediaKit。基本的原理就是让WPFmediaKit来对摄像头进行操作,然后Zxing这个库对图片进行分析大致就是这样。
在后台中定义了定时器,用于解析当前摄像头的图像,然后直接读数据。
需要注意的是一定要引入 using WPFMediaKit.DirectShow.Controls; using ZXing;
public partial class YIDong : Page
    {
        public YIDong()
        {
            InitializeComponent();
            cb.ItemsSource = MultimediaUtil.VideoInputNames;//获得所有摄像头
            if (MultimediaUtil.VideoInputNames.Length > 0)
            {
                cb.SelectedIndex = 0;//第0个摄像头为默认摄像头
            }
            else
            {
                MessageBox.Show("电脑没有安装任何可用摄像头");
            }
            cameraTimer.IsEnabled = false;
            cameraTimer.Interval = new TimeSpan(200); //执行间隔0.2秒
            cameraTimer.Tick += cameraTimer_Tick; ;
        }

        /// <summary>
        /// ZXING 二维码扫描类
        /// </summary>
        BarcodeReader codeReader = new BarcodeReader();

        /// <summary>
        /// 定时器
        /// </summary>
        DispatcherTimer cameraTimer = new DispatcherTimer();

        private void cameraTimer_Tick(object sender, EventArgs e)
        {
            RenderTargetBitmap bmp = new RenderTargetBitmap((int)vce.ActualWidth, (int)vce.ActualHeight, 96, 96, PixelFormats.Default);
            vce.Measure(vce.RenderSize);
            vce.Arrange(new Rect(vce.RenderSize));
            bmp.Render(vce);
            BitmapEncoder encoder = new JpegBitmapEncoder();
            encoder.Frames.Add(BitmapFrame.Create(bmp));
            using (MemoryStream ms = new MemoryStream())
            {
                encoder.Save(ms);
                Bitmap btiMap = new Bitmap(ms);
                var result = codeReader.Decode(btiMap);//解析条码
                if (result != null)
                {
                    string shelve_index = result.ToString();
                    ObservableCollection<XModel.STORe_DetailVm> list = XDAL.STORE_goods_Detail.GetGoodsByShelve_Index(shelve_index);
                    Dialog.OpenWindow open = Lib.pubMethod.GetOpenWindow(this);
                    if (open != null)
                    {
                        Application.Current.Properties["SweepList"] = list;
                        open.CloseAsTrue();
                    }
                }
            }
        }

        private void btnCapture_Click(object sender, RoutedEventArgs e)
        {
            cameraTimer.Start();
        }

        private void Restart_Click(object sender, RoutedEventArgs e)
        {
            cameraTimer.Stop();
            vce.Play();
        }

        private void cb_SelectionChanged(object sender, SelectionChangedEventArgs e)
        {
            //控件制定摄像头
            vce.VideoCaptureSource = (string)cb.SelectedItem;
        }
前台布局很简单,
 <Grid>
        <Grid.ColumnDefinitions>
            <ColumnDefinition Width="86*"/>
            <ColumnDefinition Width="237*"/>
        </Grid.ColumnDefinitions>
        <Grid.RowDefinitions>
            <RowDefinition Height="5*"/>
            <RowDefinition Height="*"/>
            <RowDefinition Height="*"/>
        </Grid.RowDefinitions>
        <StackPanel Background="LightBlue" Grid.Row="0" Grid.ColumnSpan="2">
            <wpfmedia:VideoCaptureElement x:Name="vce" Stretch="Fill" Width="auto" Height="auto" Margin="0" Grid.Row="0" RenderTransformOrigin="0.5,0.5">
                <wpfmedia:VideoCaptureElement.RenderTransform>
                    <TransformGroup>
                        <ScaleTransform/>
                        <SkewTransform/>
                        <TranslateTransform/>
                    </TransformGroup>
                </wpfmedia:VideoCaptureElement.RenderTransform>
            </wpfmedia:VideoCaptureElement>
        </StackPanel>

        <Label x:Name="label" Content="摄像头:" Grid.Row="1" Grid.Column="0"  Width="49" HorizontalAlignment="Right" Margin="0,14,0,4" />
        <ComboBox x:Name="cb" Style="{StaticResource Query_Combo}" Grid.Row="1" Width="204" HorizontalAlignment="Left" Margin="2,13,0,8" SelectionChanged="cb_SelectionChanged" Grid.Column="1"  />
        <Button  Content="开始" x:Name="btnCapture" Style="{StaticResource Query_Button}" Click="btnCapture_Click"  Width="50" Grid.Row="2" Grid.Column="1" Height="20" HorizontalAlignment="Left" Margin="9,10,0,14"/>
        <Button  Content="暂停" x:Name="btnReStart" Style="{StaticResource Query_Button}" Click="Restart_Click" Width="50" Grid.Row="2" Grid.Column="1" Height="20" HorizontalAlignment="Left" Margin="67,11,0,15"/>

    </Grid>
需要注意的是xaml一定要引入 xmlns:wpfmedia="clr-namespace:WPFMediaKit.DirectShow.Controls;assembly=WPFMediaKit" 。
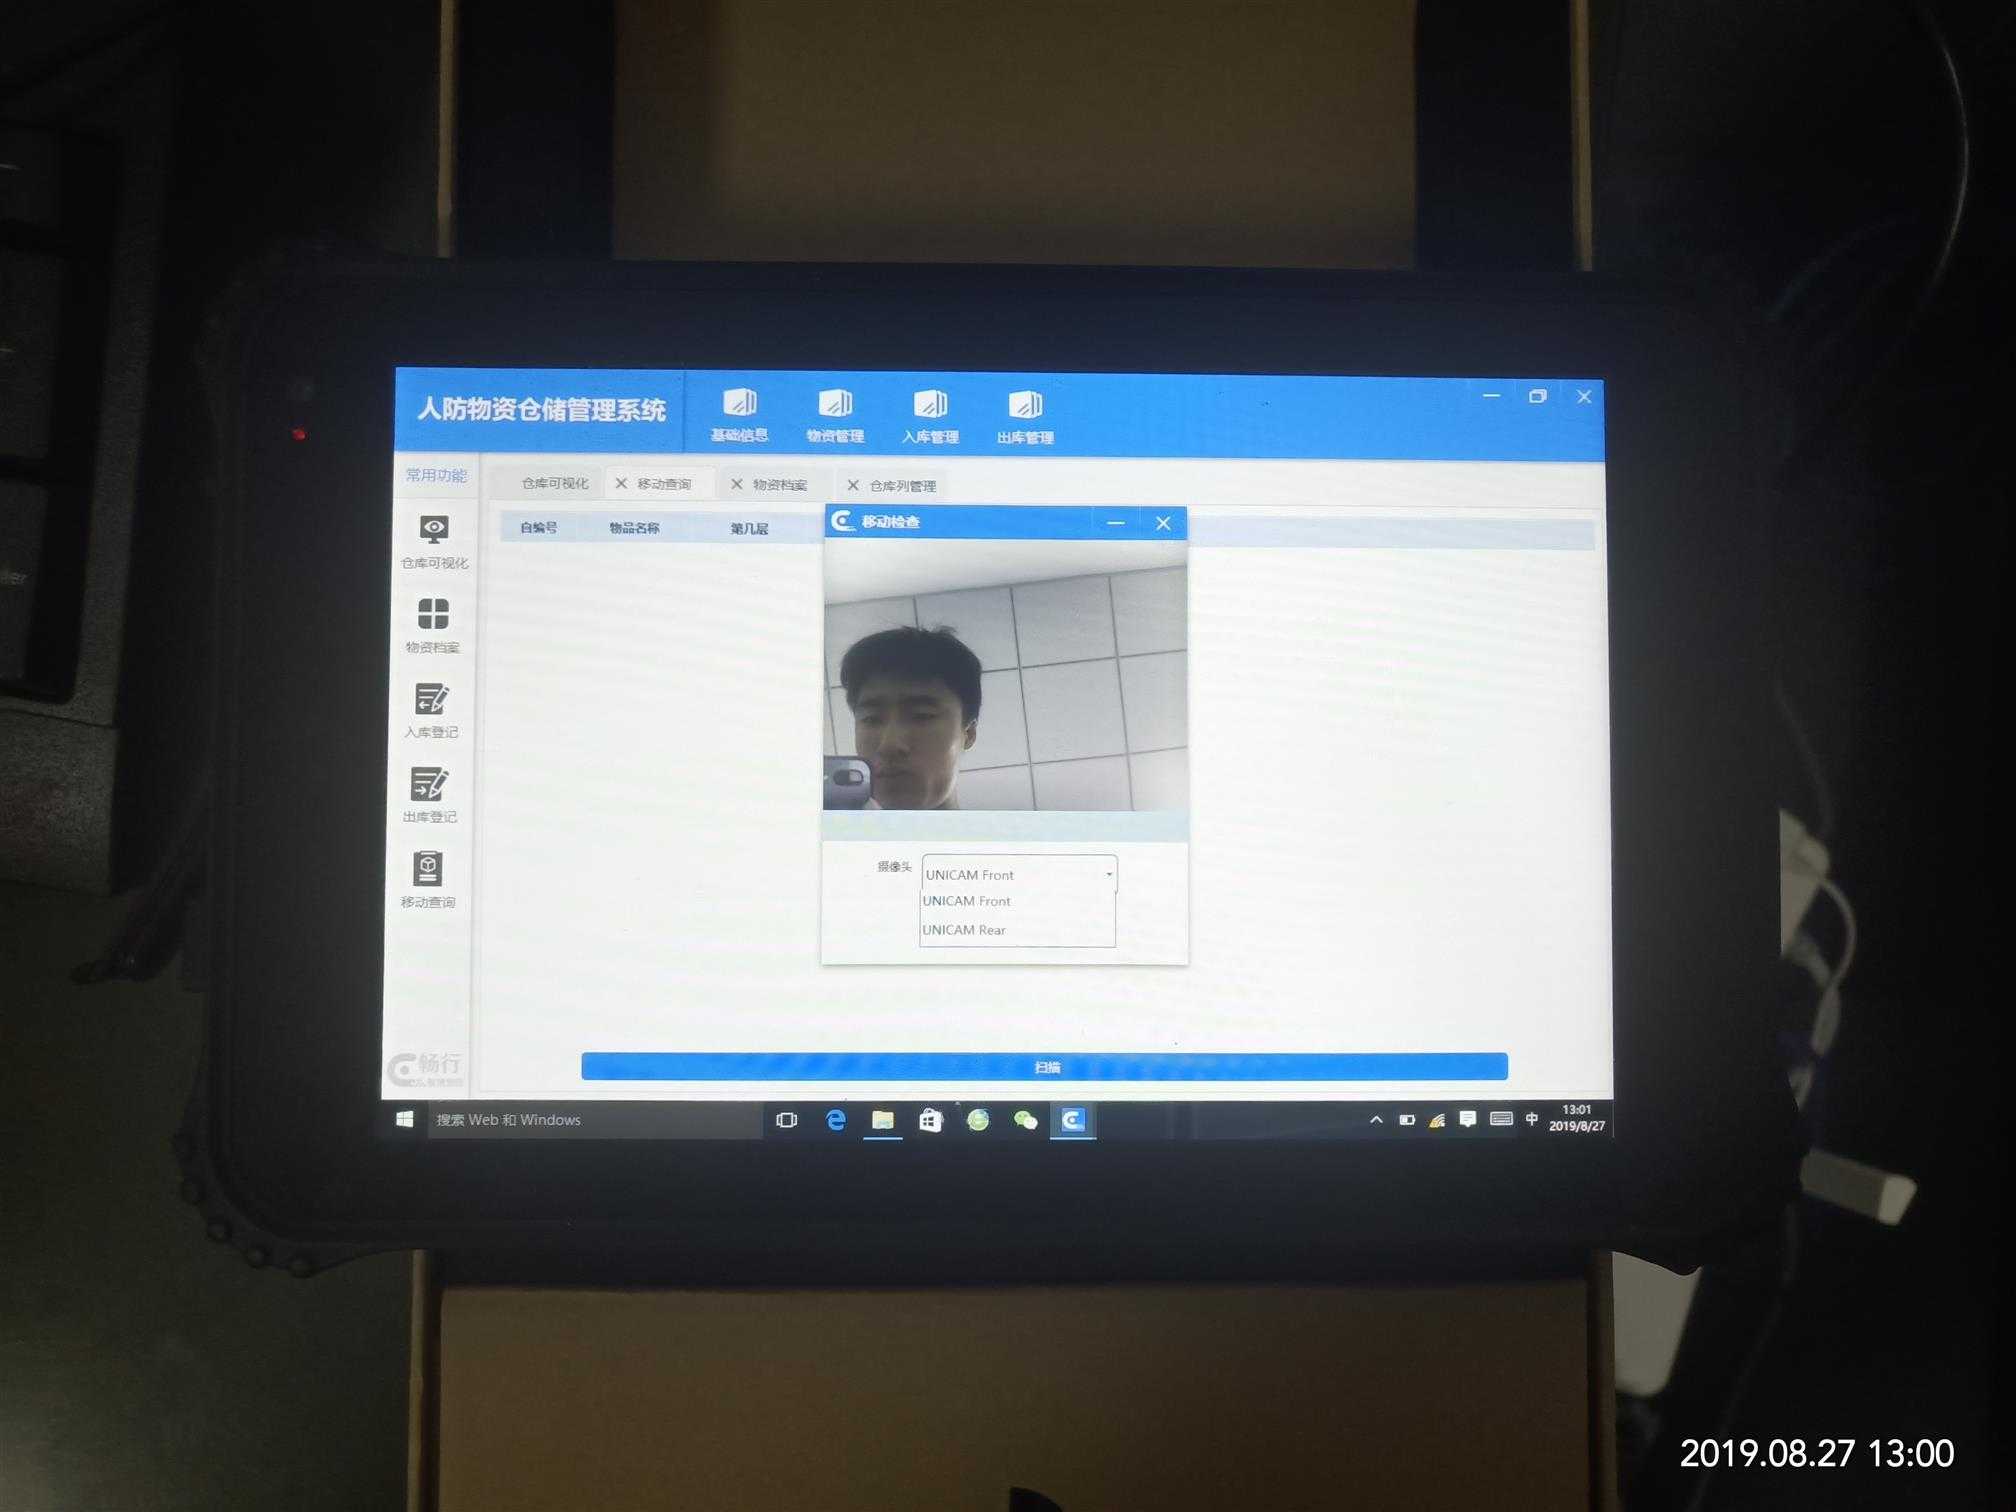
效果如下。
以上是关于在WPF中开启摄像头扫描二维码(Media+Zxing)的主要内容,如果未能解决你的问题,请参考以下文章

