zabbix安装
Posted wangzy-tongq
tags:
篇首语:本文由小常识网(cha138.com)小编为大家整理,主要介绍了zabbix安装相关的知识,希望对你有一定的参考价值。
系统版本:Centos 7.4
[root@localhost ~]# cat /etc/redhat-release
CentOS Linux release 7.4.1708 (Core)
1、环境配置:
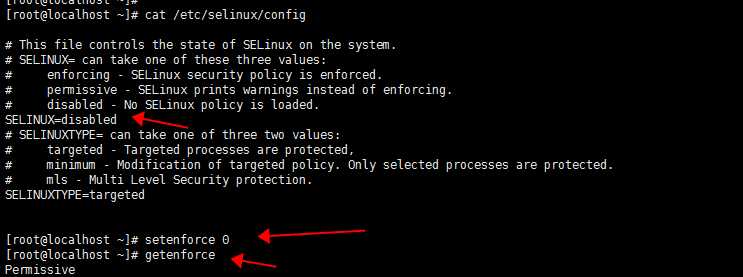
1.1 永久关闭SeLinux
vi /etc/selinux/config #将SELINUX=enforcing改为SELINUX=disabled 设置后需要重启才能生效
setenforce 0 #临时关闭
1.2 关闭防火墙
[root@localhost ~]# systemctl stop firewalld
[root@localhost ~]# systemctl disable firewalld
Removed symlink /etc/systemd/system/multi-user.target.wants/firewalld.service.
Removed symlink /etc/systemd/system/dbus-org.fedoraproject.FirewallD1.service.
2、搭建LAMP环境
yum install -y httpd mariadb-server mariadb php php-mysql php-gd libjpeg* php-ldap php-odbc php-pear php-xml php-xmlrpc php-mhash
[root@localhost ~]# rpm -qa httpd php mariadb  #查看版本信息
mariadb-5.5.56-2.el7.x86_64
httpd-2.4.6-67.el7.centos.x86_64
php-5.4.16-42.el7.x86_64
2.1 编辑php.ini配置文件
vi /etc/php.ini
; http://php.net/date.timezone
date.timezone = PRC # 配置时区
2.2 启动HTTP和maridb
systemctl start httpd && systemctl enable httpd  #启动并加入开机自启动httpd

systemctl start mariadb && systemctl enable mariadb #启动并加入开机自启动mysqld
2.3 查看80和3306端口是否存在(具体以实际配置为准)
[root@localhost ~]# ss -ntl

2.4 查看php是否成功
vi /var/www/html/index.php #创建一个测试页,并编辑
<?php
phpinfo()
?>

2.5 创建zabbix数据库
mysqladmin -u root password zabbix  #设置数据库root密码
mysql -uroot -pzabbix         #进入数据库
MariaDB [(none)]> CREATE DATABASE zabbix character set utf8 collate utf8_bin; #创建zabbix数据库(中文编码格式)
MariaDB [(none)]> GRANT ALL PRIVILEGES ON zabbix.* TO ‘zabbix‘@‘%‘ IDENTIFIED BY ‘zabbix‘; #授予zabbix用户zabbix数据库的所有权限,密码zabbix
MariaDB [(none)]> flush privileges; #刷新权限
MariaDB [(none)]> quit #退出数据库

2.6 连接数据库测试
vi /var/www/html/index.php
<?php
$link=mysql_connect(‘192.168.43.13‘,‘zabbix‘,‘zabbix‘);
if($link) echo "<h1>Success!!</h1>";   #显示Success表示连接数据库成功
 else echo "Fail!!";
mysql_close();
?>
连接成功显示如下

3、安装zabbix服务
3.1 安装依赖包 + 组件
yum -y install net-snmp net-snmp-devel curl curl-devel libxml2 libxml2-devel libevent-devel.x86_64 javacc.noarch javacc-javadoc.noarch javacc-maven-plugin.noarch javacc*
3.2
yum -y install php-bcmath php-mbstring #安装php支持zabbix组件
yum -y install zabbix-server-mysql zabbix-web-mysql #安装zabbix组件
3.3 导入zabbix初始化数据
方法一:一步解压到位:
zcat /usr/share/doc/zabbix-server-mysql-4.0.0/create.sql.gz | mysql -uzabbix -pzabbix -h 192.168.43.13 zabbix
方法二:分步执行
[root@localhost ] cd /usr/share/doc/zabbix-server-mysql-4.0.15
[root@localhost ] zabbix-server-mysql-4.0.15]# ls
AUTHORS  ChangeLog  COPYING  create.sql.gz  NEWS  README
[root@localhost ] zabbix-server-mysql-4.0.15]# gunzip create.sql.gz #解压压缩包
[root@localhost ] zabbix-server-mysql-4.0.15]# ls
AUTHORS ChangeLog COPYING create.sql NEWS README
[root@localhost ] opt]# mysql -uroot -pzabbix
Welcome to the MariaDB monitor. Commands end with ; or g.
Your MariaDB connection id is 24
Server version: 5.5.56-MariaDB MariaDB Server

Copyright (c) 2000, 2017, Oracle, MariaDB Corporation Ab and others.

Type ‘help;‘ or ‘h‘ for help. Type ‘c‘ to clear the current input statement.

MariaDB [(none)]> use zabbix
Database changed
MariaDB [zabbix]> source /usr/share/doc/zabbix-server-mysql-4.0.15/create.sql

3.4 修改配置文件
vi  /etc/zabbix/zabbix_server.conf   #配置数据库用户及密码
DBName=zabbix    #98行
DBUser=zabbix     #116行
DBPassword=zabbix #124行
vi /etc/httpd/conf.d/zabbix.conf   #修改时区
将# php_value date.timezone Europe/Riga 变更成php_value date.timezone Asia/Shanghai
systemctl enable zabbix-server # #启动并加入开机自启动zabbix-server
systemctl start zabbix-server
[root@localhost opt]# netstat -anpt | grep zabbix
tcp        0      0 0.0.0.0:10051           0.0.0.0:*               LISTEN      10169/zabbix_server
tcp6       0      0 :::10051                :::*                    LISTEN      10169/zabbix_server
查看日志:缺少数据库授权,添加即可
GRANT ALL PRIVILEGES ON zabbix.* TO ‘zabbix‘@‘localhost‘ IDENTIFIED BY ‘zabbix‘;

4、安装zabbix-agent服务
[root@localhost opt]# yum -y install zabbix-agent.x86_64 0:4.0.15-1.el7
。。。
已安装:
  zabbix-agent.x86_64 0:4.0.15-1.el7

完毕!
4.1 修改配置文件
[root@localhost opt]# vi /etc/zabbix/zabbix_agentd.conf
Server=192.168.43.13   #98行
ServerActive=192.168.43.12  #139行
Hostname=YMYG   #150行,zabbix创建主机时填写需与此选项一致
5、访问页面,若提示显示不出则重启服务器或httpd服务即可

正常显示如下
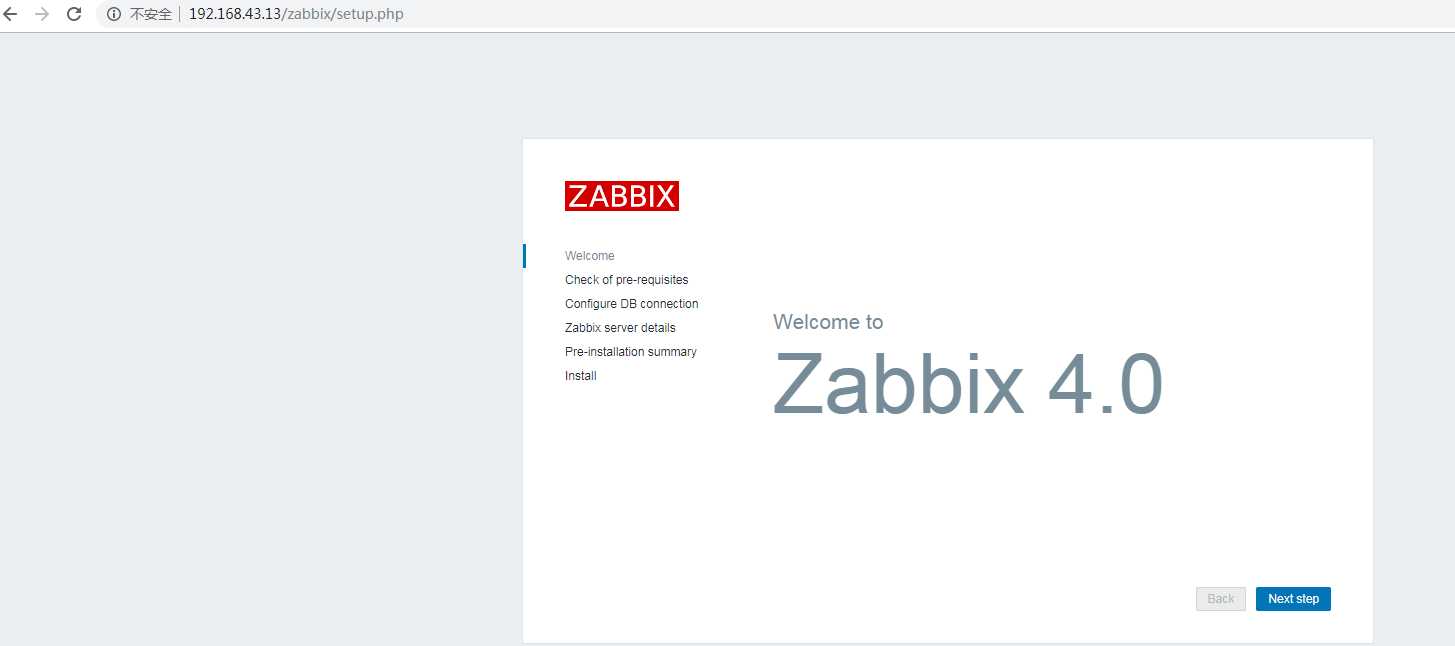
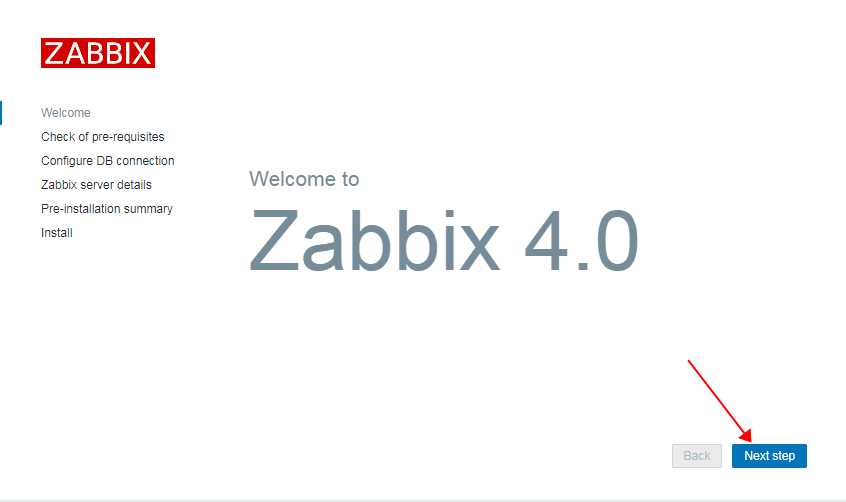
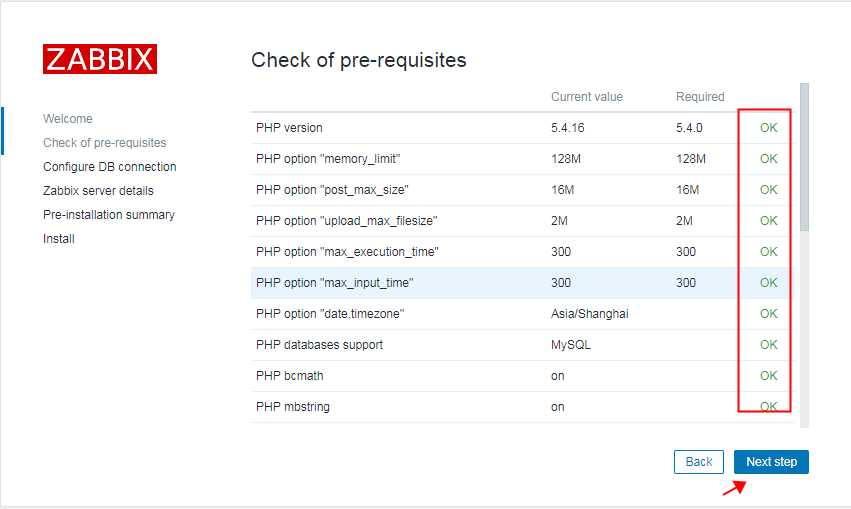
web界面安装设置:
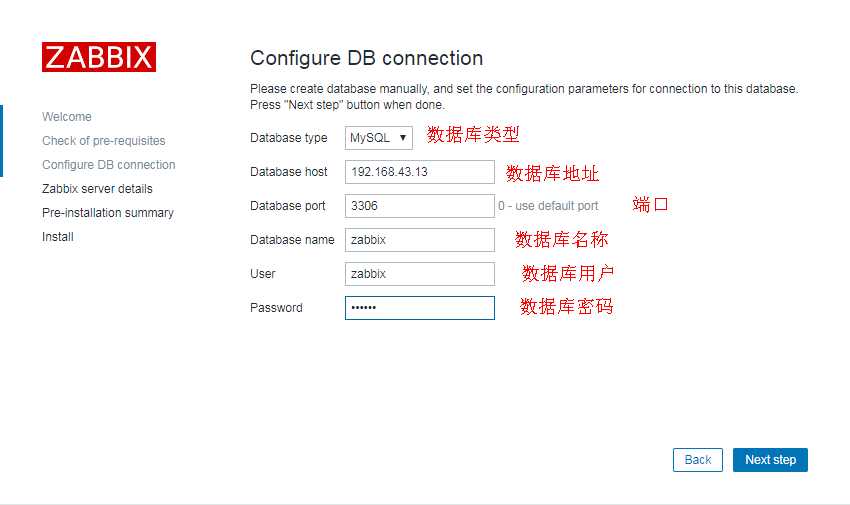
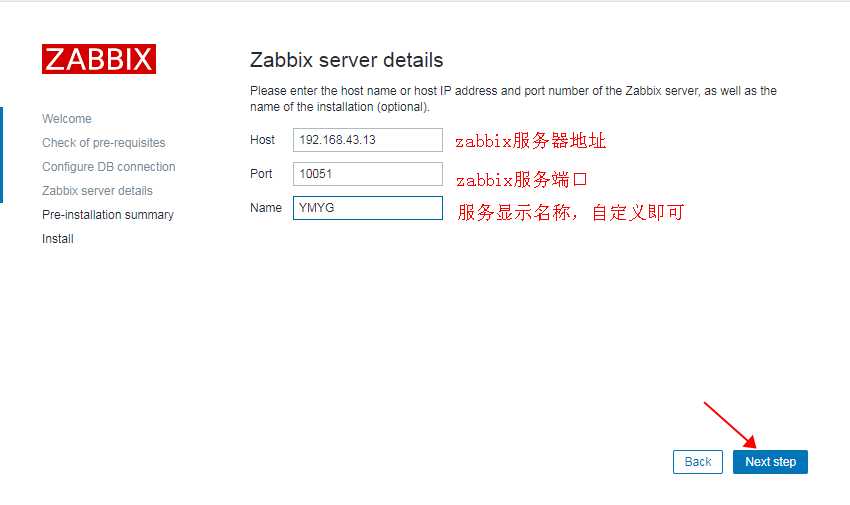
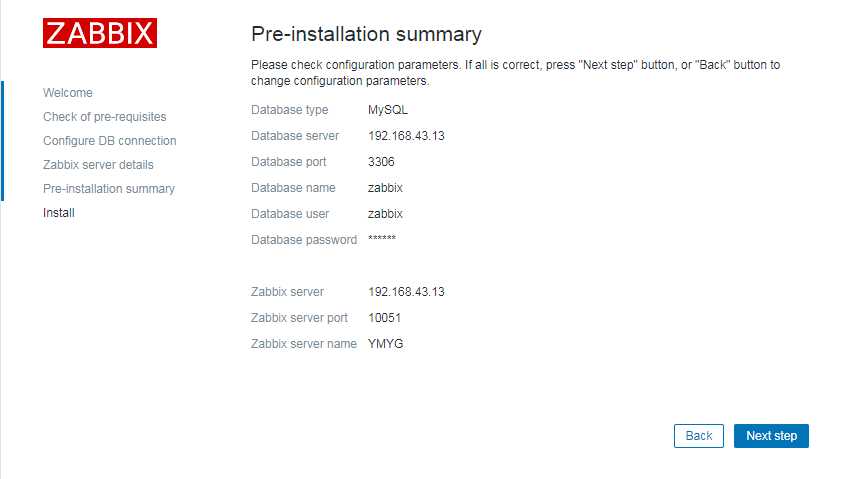
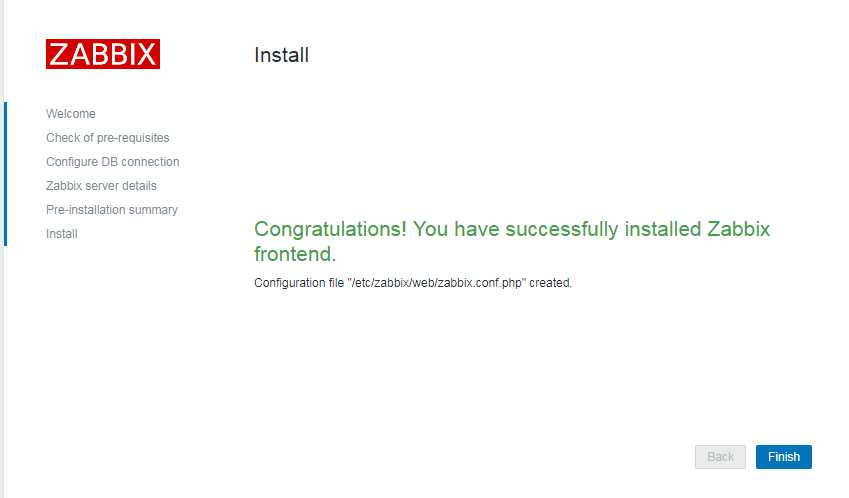
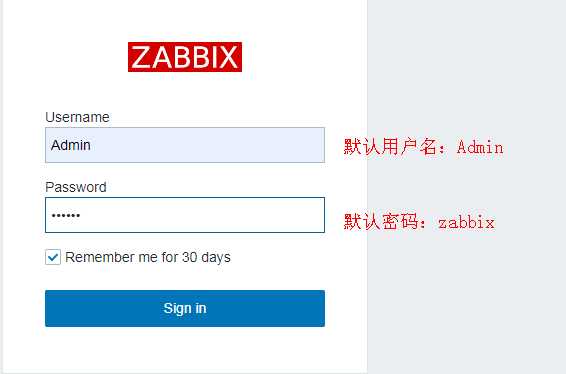
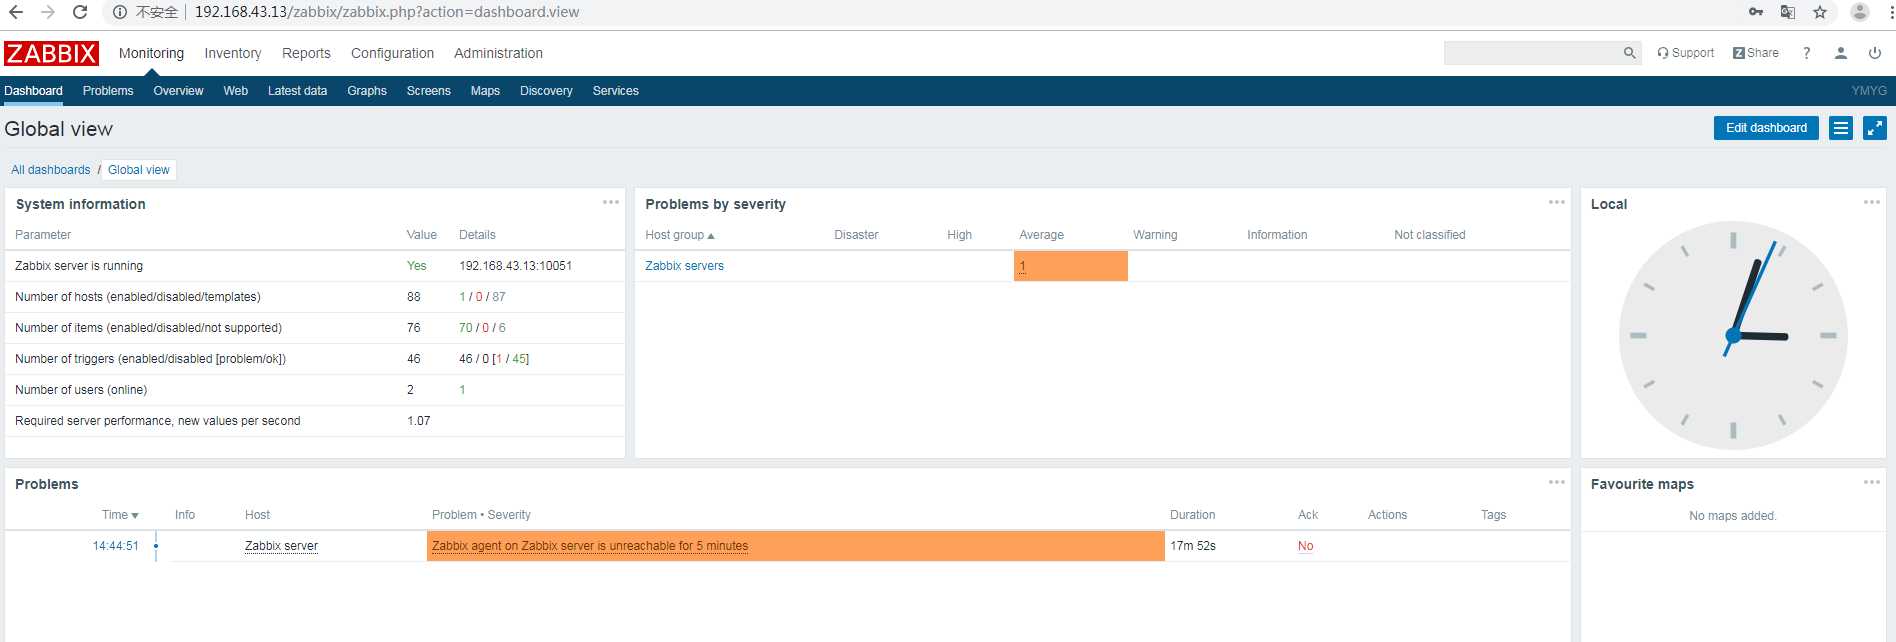
英文字体改成中文:

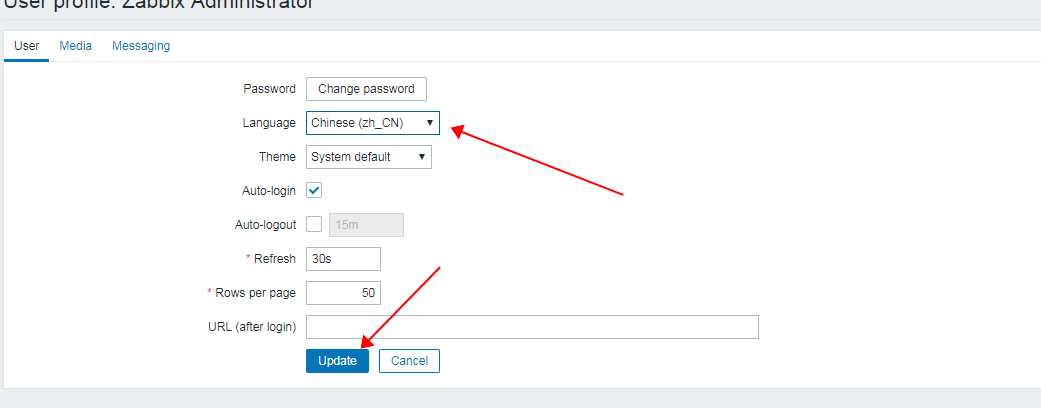
添加主机及中文乱码见另一个文档
以上是关于zabbix安装的主要内容,如果未能解决你的问题,请参考以下文章