项目架构
项目目录
├── build
├── config
├── dist
│?? └── static
│??     ├── css
│??     ├── fonts
│??     ├── images
│??     ├── js
│??     └── lib
├── src
│?? ├── api
│?? ├── assets
│?? │?? ├── global
│?? │?? └── images
│?? │??     └── footer
│?? ├── components
│?? │?? ├── common
│?? │?? ├── news
│?? │?? └── profile
│?? │??     └── charge
│?? ├── config
│?? ├── mixin
│?? ├── router
│?? ├── service
│?? ├── store
│?? └── util
└── static
    ├── images
    └── lib
项目目录是采用 vue-cli 自动生成,其它按需自己新建就好了。
开发实践
动态修改 document title
在不同的路由页面,我们需要动态的修改文档标题,可以将每个页面的标题配置在路由元信息 meta 里面带上,然后在 router.afterEach 钩子函数中修改:
import Vue from ‘vue‘;
import Router from ‘vue-router‘;

Vue.use(Router);
const router = new Router({
  mode: ‘history‘,
  routes: [
    { path: ‘/‘, component: Index, meta: { title: ‘推荐产品得丰厚奖金‘ } },
    {
      path: ‘/news‘,
      component: News,
      meta: { title: ‘公告列表‘ },
      children: [
        { path: ‘‘, redirect: ‘list‘ },
        { path: ‘list‘, component: NewsList },
        { path: ‘detail/:newsId‘, component: NewsDetail, meta: { title: ‘公告详情‘ } }
      ]
    },
    {
      path: ‘/guide‘,
      component: GuideProtocol,
      meta: {
        title: ‘新手指南‘
      }
    }
  ]
});

// 使用 afterEach 钩子函数,保证路由已经跳转成功之后修改 title
router.afterEach((route) => {
  let documentTitle = ‘xxx商城会员平台‘;
  route.matched.forEach((path) => {
    if (path.meta.title) {
      documentTitle += ` - ${path.meta.title}`;
    }
  });

  document.title = documentTitle;
});
根据 URL 的变化,动态更新数据
通常在一个列表集合页,我们需要做分页操作,同时分页数据需要体现在 URL 中,那么如何动态的根据 URL 的变动来动态的获取数据呢,我们可以使用 watch API,在 watch 里面监听 $route,同时使用 this.$router.replace API 来改变 URL 的值。下面是示例代码 common.js:
import qs from ‘qs‘;

export default {
  data() {
    return {
      queryParams: {
        currentPage: 1,
        pageSize: 10
      }
    };
  },
  methods: {
    handlePageNoChange(e) {
      this.queryParams.currentPage = e;
      this.replaceRouter();
    },

    replaceRouter() {
      const query = qs.stringify(this.queryParams);
      this.$router.replace(`${location.pathname}?${query}`);
    },

    routeChange() {
      this.assignParams();
      this.fetchData();
    },

    assignParams() {
      this.queryParams = Object.assign({}, this.queryParams, this.$route.query);
    }
  },
  mounted() {
    this.assignParams();
    this.fetchData();
  },
  watch: {
    $route: ‘routeChange‘
  }
};
我们将这部分代码抽取到一个公共的 mixin 中,在需要的组件那里引入它,同时实现自定义的同名 fetchData() 方法mixin API 文档:https://cn.vuejs.org/v2/guide...
export default DemoComponent {
  mixins: [common],
  data() {
    return {
      // 组件内部自定义同名查询参数,将会和 mixin 中的默认参数合并
      queryParams: {
        categoryId: ‘‘,
        pageSize: 12
      },
    }
  },
  methods: {
    fetchData() {
       // 发送请求
    }
  }
}
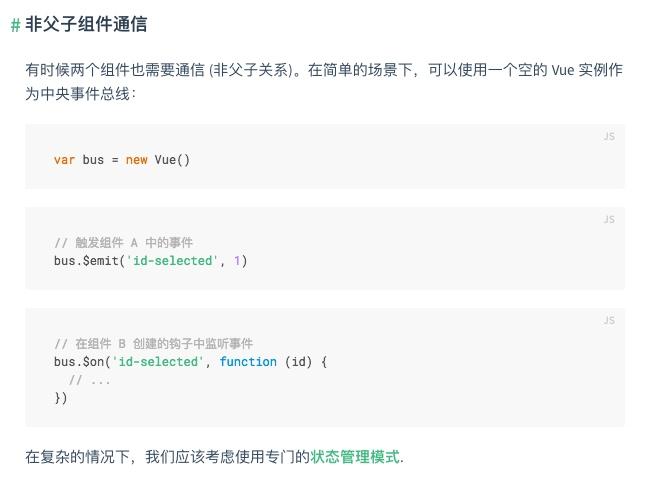
Event Bus 使用场景
我们在项目中引入了 vuex ,通常情况下是不需要使用 event bus 的,但是有一种情况下我们需要使用它,那就是在路由钩子函数内部的时,在项目中,我们需要在 beforeEnter 路由钩子里面对外抛出事件,在这个钩子函数中我们无法去到 this 对象。
beforeEnter: (to, from, next) => {
    const userInfo = localStorage.getItem(userFlag);
    if (isPrivateMode()) {
        EventBus.$emit(‘get-localdata-error‘);
        next(false);
        return;
    }
})
在 App.vue 的 mouted 方法中监听这个事件
EventBus.$on(‘get-localdata-error‘, () => {
    this.$alert(‘请勿使用无痕模式浏览‘);
});
自定义指令实现埋点数据统计
在项目中通常需要做数据埋点,这个时候,使用自定义指令将会变非常简单
在项目入口文件 main.js 中配置我们的自定义指令
// 坑位埋点指令
Vue.directive(‘stat‘, {
  bind(el, binding) {
    el.addEventListener(‘click‘, () => {
      const data = binding.value;
      let prefix = ‘store‘;
      if (OS.isandroid || OS.isPhone) {
        prefix = ‘mall‘;
      }
      analytics.request({
        ty: `${prefix}_${data.type}`,
        dc: data.desc || ‘‘
      }, ‘n‘);
    }, false);
  }
});
使用路由拦截统计页面级别的 PV
由于第一次在单页应用中尝试数据埋点,在项目上线一个星期之后,数据统计后台发现,首页的 PV 远远高于其它页面,数据很不正常。后来跟数据后台的人沟通询问他们的埋点统计原理之后,才发现其中的问题所在。
传统应用,一般都在页面加载的时候,会有一个异步的 js 加载,就像百度的统计代码类似,所以我们每个页面的加载的时候,都会统计到数据;然而在单页应用,页面加载初始化只有一次,所以其它页面的统计数据需要我们自己手动上报
解决方案
使用 vue-router 的 beforeEach 或者 afterEach 钩子上报数据,具体使用哪个最好是根据业务逻辑来选择。
const analyticsRequest = (to, from) => {
  // 只统计页面跳转数据,不统计当前页 query 不同的数据
  // 所以这里只使用了 path, 如果需要统计 query 的,可以使用 to.fullPath
  if (to.path !== from.path) {
    analytics.request({
      url: `${location.protocol}//${location.host}${to.path}`
    });
  }
};

router.beforeEach((to, from, next) => {
  if (to.matched.some(record => record.meta.requiresAuth)) {
    // 这里做登录等前置逻辑判断
    // 判断通过之后,再上报数据
    ...
    analyticsRequest(to, from);
  } else {
    // 不需要判断的,直接上报数据
    analyticsRequest(to, from);
    next();
  }
});
在组件中使用我们的自定义指令
使用过滤器实现展示信息格式化
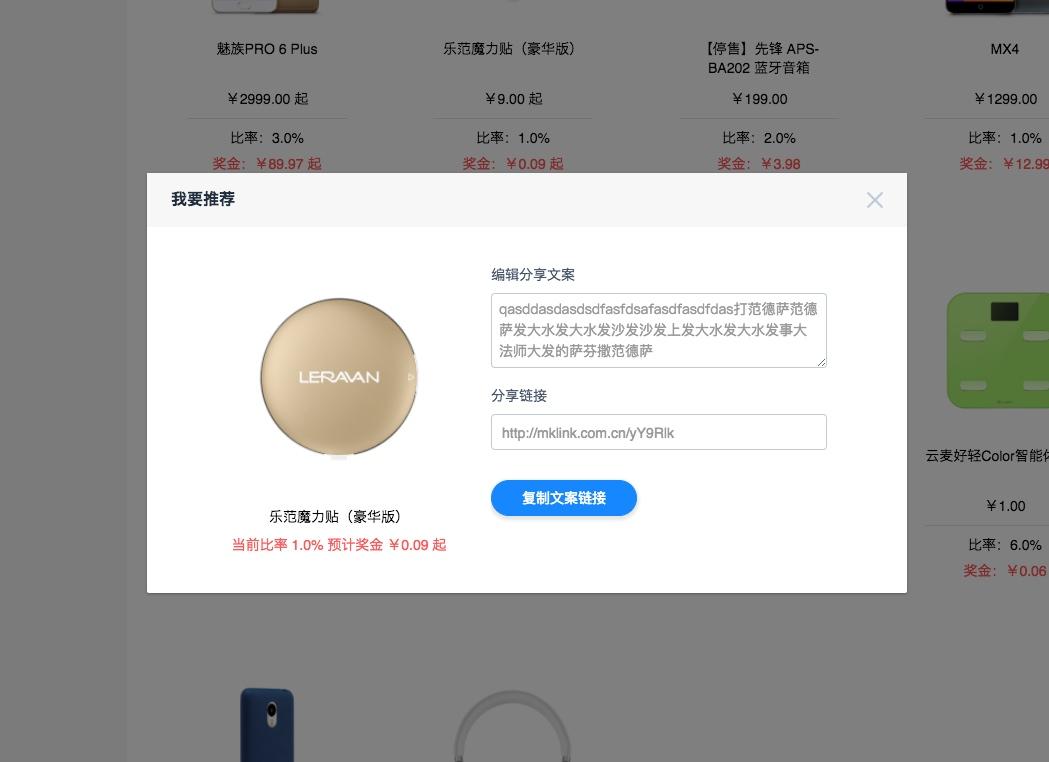
如下图中奖金数据信息,我们需要将后台返回的奖金格式化为带两位小数点的格式,同时,如果返回的金额是区间类型,需要额外加上 <span style="color:red;font-weight: bold;">起</span> 字和 <span style="color:red;font-weight: bold;">¥</span> 金额符号
在入口文件 main.js 中配置我们自定义的过滤器
Vue.filter(‘money‘, (value, config = { unit: ‘¥‘, fixed: 2 }) => {
  const moneyStr = `${value}`;
  if (moneyStr.indexOf(‘-‘) > -1) {
    const scope = moneyStr.split(‘-‘);
    return `${config.unit}${parseFloat(scope[0]).toFixed(config.fixed).toString()} 起`;
  } else if (value === 0) {
    return value;
  }

  return `${config.unit}${parseFloat(moneyStr).toFixed(config.fixed).toString()}`;
});
在组件中使用:
<p class="price">{{detail.priceScope | money}}</p>
<div :class="{singleWrapper: isMobile}">
    <p class="rate">比率:{{detail.commissionRateScope}}%</p>
    <p class="income">奖金:{{detail.expectedIncome | money}}</p>
</div>axios 使用配置
在项目中,我们使用了 axios 做接口请求
在项目中全局配置 /api/common.js
import axios from ‘axios‘;
import qs from ‘qs‘;
import store from ‘../store‘;

// 全局默认配置
// 设置 POST 请求头
axios.defaults.headers.post[‘Content-Type‘] = ‘application/x-www-form-urlencoded‘;
// 配置 CORS 跨域
axios.defaults.withCredentials = true;
axios.defaults.crossDomain = true;

// 请求发起前拦截器
axios.interceptors.request.use((config) => {
  // 全局 loading 状态,触发 loading 效果
  store.dispatch(‘updateLoadingStatus‘, {
    isLoading: true
  });

  // POST 请求参数处理成 axios post 方法所需的格式
  if (config.method === ‘post‘) {
    config.data = qs.stringify(config.data);
  }

  // 这句不能省,不然后面的请求就无法成功发起,因为读不到配置参数
  return config;
}, () => {
  // 异常处理
  store.dispatch(‘updateLoadingStatus‘, {
    isLoading: false
  });
});

// 响应拦截
axios.interceptors.response.use((response) => {
  // 关闭 loading 效果
  store.dispatch(‘updateLoadingStatus‘, {
    isLoading: false
  });

  // 全局登录过滤,如果没有登录,直接跳转到登录 URL
  if (response.data.code === 300) {
    // 未登录
    window.location.href = getLoginUrl();
    return false;
  }

  // 这里返回的 response.data 是被 axios 包装过的一成,所以在这里抽取出来
  return response.data;
}, (error) => {
  store.dispatch(‘updateLoadingStatus‘, {
    isLoading: false
  });
  return Promise.reject(error);
});

// 导出
export default axios;
然后我们在接口中使用就方便很多了 /api/xxx.js
import axios from ‘./common‘;

const baseURL = ‘/api/profile‘;
const USER_BASE_INFO = `${baseURL}/getUserBaseInfo.json`;
const UPDATE_USER_INFO = `${baseURL}/saveUserInfo.json`;

// 更新用户实名认证信息
const updateUserInfo = userinfo => axios.post(UPDATE_USER_INFO, userinfo);

// 获取用户基础信息
const getUserBaseInfo = () => axios.get(USER_BASE_INFO);
vuex 状态在响应式页面中的妙用
由于项目是响应式页面,PC 端和移动端在表现成有很多不一致的地方,有时候单单通过 CSS 无法实现交互,这个时候,我们的 vuex 状态就派上用场了,
我们一开始在 App.vue 里面监听了页面的 resize 事件,动态的更新 vuex 里面 isMobile 的状态值
window.onresize = throttle(() => {
 this.updatePlatformStatus({
   isMobile: isMobile()
 });
}, 500);
然后,我们在组件层,就能响应式的渲染不同的 dom 结构了。其中最常见的是 PC 端和移动端加载的图片需要不同的规格的,这个时候我们可以这个做
methods: {
  loadImgAssets(name, suffix = ‘.jpg‘) {
    return require(`../assets/images/${name}${this.isMobile ? ‘-mobile‘ : ‘‘}${suffix}`);
  },
}

<img class="feed-back" :src="loadImgAssets(‘feed-back‘)"

<img v-lazy="{src: isMobile ? detail.imgUrlMobile : detail.imgUrlPc, loading: placeholder}">

// 动态渲染不同规格的 dislog
<el-dialog :visible.sync="dialogVisible" :size="isMobile ? ‘full‘ : ‘tiny‘" top="30%" custom-class="unCertification-dialog">
</el-dialog>
下图分别是 PC 端和移动短的表现形式,然后配合 CSS 媒体查询实现各种布局
开发相关配置
反向代理
在项目目录的 config 文件下面的 index.js 配置我们的本地反向代理和端口信息
dev: {
  env: require(‘./dev.env‘),
  port: 80,
  autoOpenBrowser: true,
  assetsSubDirectory: ‘static‘,
  assetsPublicPath: ‘/‘,
  proxyTable: {
    ‘/api/profile‘: {
      target: ‘[真实接口地址]:[端口号]‘, // 例如: http://api.xxx.com
      changeOrigin: true,
      pathRewrite: {
        ‘^/api/profile‘: ‘/profile‘
      }
    }
    ...
  },
然后我们调用接口的形式就会变成如下映射,当我们调用 /api/profile/xxxx 的时候,其实是调用了 [真实接口地址]/profile/xxxx
/api/profile/xxxx => [真实接口地址]/profile/xxxxnginx 配置
upstream api.xxx.com
{
 #ip_hash;
  server [接口服务器 ip 地址]:[端口];
}

server {
  ...
  location ^~ /api/profile {
    index index.php index.html index.html;
    proxy_redirect off;
    proxy_set_header Host $host;
    proxy_set_header X-Real-IP $remote_addr;
    proxy_set_header X-Forwarded-For $proxy_add_x_forwarded_for;
    proxy_pass http://api.xxx.com;

    rewrite ^/api/profile/(.*)$ /profile/$1 break;
  }
  ...
}
线上部署
如果路由使用的是 history 模式的话,需要在 nginx 里面配置将所有的请求到转发到 index.html 去
在 nginx.conf 或者对应的站点 vhost 文件下面配置
location / {
    try_files $uri $uri/ /index.html;
}
优化
开启静态资源长缓存
location ~ .*.(gif|jpg|jpeg|png|bmp|swf|woff|ttf|eot|svg)$ {
    expires 1y;
}

location ~ .*.(js|css)$ {
    expires 1y;
}
开启静态资源 gzip 压缩
// 找到 nginx.conf 配置文件
vim /data/nginx/conf/nginx.conf

gzip on;
gzip_min_length  1k;
gzip_buffers     4 8k;
gzip_http_version 1.1;
gzip_types text/plain application/javascript application/x-javascript text/javascript text/xml text/css;
开启了 gzip 压缩之后,页面资源请求大小将大大减小,如下图所示,表示已经开启了 gzip 压缩
Q&A
文章到这就结束了,如果有遗漏或者错误的地方,欢迎私信指出。
希望这篇文章能带给大家一丝丝收获。


