supervisor安装的实例
Posted kriskris
tags:
篇首语:本文由小常识网(cha138.com)小编为大家整理,主要介绍了supervisor安装的实例相关的知识,希望对你有一定的参考价值。
在centos7上安装supervisor,直接用yum进行安装,若是不是的话,或者是其他,请准备好python2.4以上的版本环境
1. 在centos7系统上进行安装

2. 开启supervisor,设置supervisor的自动启动,查看supervisor

[root@ localhost ~]# systemctl start supervisord
[root@ localhost ~]# systemctl enable supervisord
[root@ localhost ~]# systemctl status supervisord
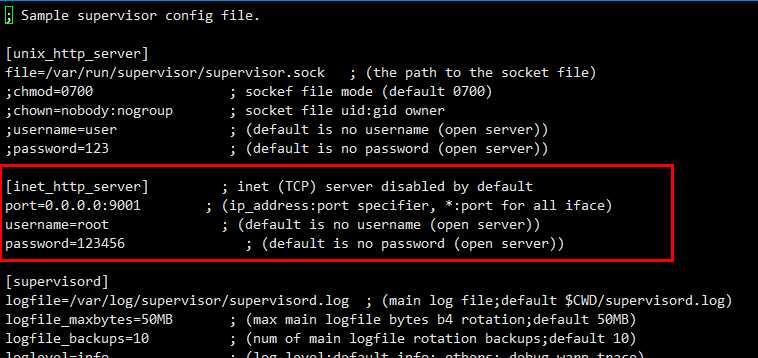
3. 修改配置文件 /etc/supervisord.conf,进入配置文件,把所标注处,给去了注释


[inet_http_server] ; inet (TCP) server disabled by default http服务器,提供web管理界面
port=0.0.0.0:9001 ; (ip_address:port specifier, *:port for all iface) web管理后台运行的IP和端口,如果开放到公网,需要注意安全性
username=root ; (default is no username (open server)) 登录管理后台的用户名
password=123456 ; (default is no password (open server)) 登录管理后台的密码
4. 重新加载配置文件,开启supervisor的默认端口9001
supervisorctl reload


firewall-cmd --zone=public --add-port=9001/tcp --permanent 【--zone 作用域,--add-port=80/tcp 添加端口,格式为:端口/通讯协议,--permanent 永久生效,每次参数后失效】
firewall-cmd --reload 【重新加载】
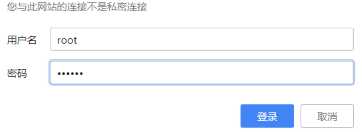
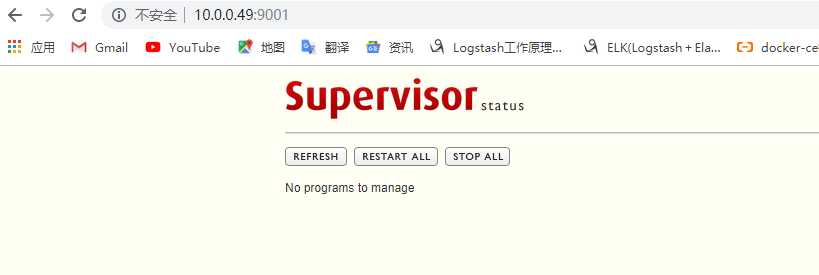
5. 访问页面 (因为我们这里给他设置了用户和密码所以要进行登录)


6. 再次进入配置文件,/etc/supervisord.conf,的最后一行,你可以改成以 (.conf来做成后缀)

7.
8.
9.
10.
11.
12.
13.
14.
15
16.
17.
18.
以上是关于supervisor安装的实例的主要内容,如果未能解决你的问题,请参考以下文章