实际开发常用的jquey事件类型,并运用到图片相册
Posted chenyingying0
tags:
篇首语:本文由小常识网(cha138.com)小编为大家整理,主要介绍了实际开发常用的jquey事件类型,并运用到图片相册相关的知识,希望对你有一定的参考价值。
鼠标事件
.click 鼠标单击
.dblclick 鼠标双击
    // 单击事件
    $("a").click(function(){
        $("img").eq($(this).index()) // 获取当前点击的a的index
                .css({"opacity":"1"})
                .siblings()
                .css({"opacity":"0"});
    });

    // 双击事件
    $("a").dblclick(function(){
        $("img").eq($(this).index()) // 获取当前点击的a的index
                .css({"opacity":"1"})
                .siblings()
                .css({"opacity":"0"});
    });
.mousedown() 鼠标按下
.mouseup() 鼠标松开
.mousedown+.mouseup=click
    // 鼠标按下
    $("a").mousedown(function(){
        console.log("鼠标按下");
    });

    // 鼠标松开
    $("a").mouseup(function(){
        console.log("鼠标松开");
    });
.mouseenter() 鼠标进入
.mouseleave() 鼠标移出
有点类似于hover的感觉
    // 鼠标移入
    $("a").mouseenter(function(){
        console.log("鼠标移入");
    });

    // 鼠标移出
    $("a").mouseleave(function(){
        console.log("鼠标移出");
    });
mouseenter+mouseleave=hover
.hover() 里面可以放两个函数,第一个函数为移入的状态,第二个函数为移出的状态,多用于移出时还原
    // 鼠标悬停
    $("a").hover(function(){
        $("img").eq($(this).index()) // 获取当前点击的a的index
                .css({"opacity":"1"})
                .siblings()
                .css({"opacity":"0"});
    });

    // 鼠标悬停(over和out)
    $("a").hover(function(){
        $("img").eq($(this).index())
                .css({"opacity":"1"})
                .siblings()
                .css({"opacity":"0"});
    },function(){
        $("img").eq($(this).index())
                .css({"opacity":"0"})
                .siblings()
                .css({"opacity":"1"});
    });
mouseover 鼠标进入(包括子元素)
mouseout 鼠标移出(包括子元素)
比较少用,因为有冒泡和捕获
    // 鼠标进入元素及其子元素
    $("a").mouseover(function(){
        $("img").eq($(this).index())
                .css({"opacity":"1"})
                .siblings()
                .css({"opacity":"0"});
    });
    // 鼠标离开元素及其子元素
    $("a").mouseout(function(){
        $("img").eq($(this).index())
                .css({"opacity":"1"})
                .siblings()
                .css({"opacity":"0"});
    });
mousemove 在元素内部移动
一有移动就会触发,因此非常消耗资源
    // 鼠标移动
    $("a").mousemove(function(){
        console.log("鼠标移动");
    });
scroll 鼠标拖拽滚动条
鼠标一滚动就会触发,因此消耗资源
    // 鼠标滚动
    $("a").scroll(function(){
        console.log("鼠标滚动");
    });
键盘事件
keydown 当键盘或者按键被按下时
参数为event,是键盘事件的属性
event.key 按下的键
event.keyCode 按下的键的键码(常用于识别左右上下箭头)
    // 键盘按下
    $(document).keydown(function(event){
        console.log(event);
        console.log(event.key);//a
        console.log(event.keyCode);//65
    });
鼠标不等于光标焦点
keydown只能在聚焦中有用
window 代表浏览器的窗口,document 是 html 文档的根节点
从常理上说,元素没有焦点是不能触发键盘事件的(除了window、document等,可以理解为只要在这个页面上,他们都是聚焦的)。
触发键盘事件常用的就是表单元素
keyup 按键被释放的时候,发生在当前获得焦点的元素上
keydown 键盘被按下即可(包括所有键,以及输入法输入的内容)
keypress 键盘按键被按下的时候(必须是按下字符键,不包括其他按键,也不包括输入法输入的文字)
<!DOCTYPE html>
<html lang="en">
<head>
    <meta charset="UTF-8">
    <title>Document</title>
    <script src="jquery.js"></script>
    <script>
        $(function(){
            $("input").keydown(function(e){
                console.log("keydown");
            });
        })
        $(function(){
            $("input").keypress(function(e){
                console.log("keypress");
            });
        })

    </script>
</head>
<body>

<form>
    <input type="text">
</form>

</body>
</html>

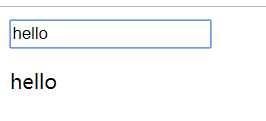
在input框中输入内容的时候同样显示在下面的p标签中
<!DOCTYPE html>
<html lang="en">
<head>
    <meta charset="UTF-8">
    <title>Document</title>
    <script src="jquery.js"></script>
    <script>
        $(function(){
            $("input").keydown(function(e){
                var text=$(this).val();
                $("p").text(text);
            });
        })

    </script>
</head>
<body>

<form>
    <input type="text">
</form>
<p></p>
</body>
</html>

其他事件
.ready() DOM加载完成
$(document).ready(function())
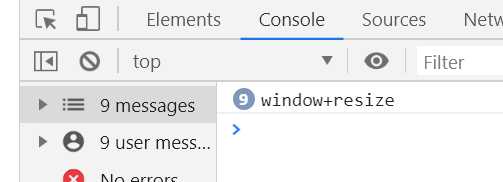
.resize() 调整浏览器窗口大小,只针对window对象
<!DOCTYPE html>
<html lang="en">
<head>
    <meta charset="UTF-8">
    <title>Document</title>
    <script src="jquery.js"></script>
    <script>
        $(function(){
            $(document).resize(function(){
                console.log("document+resize");
            });
            $(window).resize(function(){
                console.log("window+resize");
            });
        })

    </script>
</head>
<body>

<form>
    <input type="text">
</form>
<p></p>
</body>
</html>

.focus() 获取焦点
.blur() 失去焦点
<!DOCTYPE html>
<html lang="en">
<head>
    <meta charset="UTF-8">
    <title>Document</title>
    <script src="jquery.js"></script>
    <script>
        $(function(){
            $("input").focus(function(){
                console.log("(*^▽^*)");
            });
            $("input").blur(function(){
                console.log("o(╥﹏╥)o");
            });
        })

    </script>
</head>
<body>

<form>
    <input type="text">
</form>
<p></p>
</body>
</html>

.change() 元素的值发生改变,常用于input
有延迟机制,当快速改变内容时,不是实时跟着触发事件
在输入框中输入的过程中,不会触发.change事件,当光标离开或者手动点击时才会触发
<!DOCTYPE html>
<html lang="en">
<head>
    <meta charset="UTF-8">
    <title>Document</title>
    <script src="jquery.js"></script>
    <script>
        $(function(){
            $("input").change(function(){
                console.log("change");
            });
        })

    </script>
</head>
<body>

<form>
    <input type="number">
</form>
<p></p>
</body>
</html>
或者select列表的选择也会触发
<!DOCTYPE html>
<html lang="en">
<head>
    <meta charset="UTF-8">
    <title>Document</title>
    <script src="jquery.js"></script>
    <script>
        $(function(){
            $("select").change(function(){
                console.log("change");
            });
        })

    </script>
</head>
<body>

<form>
    <select name="" id="">
        <option value="">1</option>
        <option value="">2</option>
        <option value="">3</option>
    </select>
</form>
<p></p>
</body>
</html>

.select() 当input或者textarea中的文本被选中时触发,针对于可选中文字的输入框
<!DOCTYPE html>
<html lang="en">
<head>
    <meta charset="UTF-8">
    <title>Document</title>
    <script src="jquery.js"></script>
    <script>
        $(function(){
            $("input").select(function(){
                console.log("select");
            });
        })

    </script>
</head>
<body>

<form>
    <input type="text" value="这是文本哦">
</form>
<p></p>
</body>
</html>

.submit() 表单提交事件
button是html新增标签,在其他地方依然是普通按钮,但是在非IE浏览器中,在表单内部会起到提交表单的功能
用处:
1、提交表单
2、禁止提交表单(回调函数返回值为false)
3、提交表单时进行指定操作(表单验证)
<!DOCTYPE html>
<html lang="en">
<head>
    <meta charset="UTF-8">
    <title>Document</title>
    <script src="jquery.js"></script>
    <script>
        $(function(){
            // 给input[type="button"]添加提交表单的功能
            $("input[type=‘button‘]").click(function(){
                $("form").submit();//提交表单
            });
            //阻止表单提交
            $("button").click(function(){
                $("form").submit(function(){
                    return false;//只要回调函数的返回值是假,表单就不会被提交
                });
            });
            //表单验证
            $("form").submit(function(){
                if($("input[type=‘text‘]").val()!="cyy") return false;
            })
        })

    </script>
</head>
<body>

<form action="javascript:alert(‘我被提交啦~‘)">
    <input type="text">
    <input type="button" value="button按钮"><!-- 不能提交表单 -->
    <button>提交按钮</button><!-- 可以提交表单 -->
</form>
<p></p>
</body>
</html>

事件参数 event
event.keyCode 左37 右39 上38 下 40
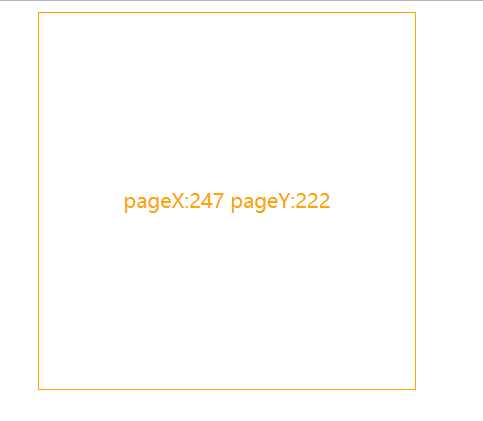
鼠标在div框移动时,获取鼠标在页面中的位置
<!DOCTYPE html>
<html lang="en">
<head>
    <meta charset="UTF-8">
    <title>Document</title>
    <script src="jquery.js"></script>
    <script>
        $(function(){
            $("div").mousemove(function(event){
                $(".span1").text(event.pageX);
                $(".span2").text(event.pageY);
            })
        })

    </script>
    <style>
    div{
        width:300px;
        height:300px;
        border:1px solid;
        margin:0 auto;
        text-align: center;
        line-height:300px;
        color:orange;
    }
    </style>
</head>
<body>

<div>
    pageX:<span class="span1"></span>
    pageY:<span class="span2"></span>
</div>

</body>
</html>

事件绑定与取消
.on(事件,[选择器],[值],函数) 绑定一个或多个事件
以下两种方式效果相同
    // 单击事件
    $("a").click(function(){
        index=$(this).index(); // 获取当前点击的a的index
        swiper();
    });

    //改写成on的绑定
    $(document).on("click","a",function(event){
        event.stopPropagation();//阻止冒泡
        index=$(this).index(); // 获取当前点击的a的index
        swiper();
    });
为什么使用on方法:
如果是动态生成的元素,使用.click这种方式是无法绑定的,因为会找不到该元素
需要使用live方法
从jquery1.7开始,把 bind delegate live 方法给移除,使用了 on 方法
这种方式可以获取到动态生成的元素,因为是从document开始搜索的
    $(document).on("click","a",function(event){
        event.stopPropagation();//阻止冒泡
        index=$(this).index(); // 获取当前点击的a的index
        swiper();
    });
也可用于绑定多个事件
    //绑定多个事件
    $("a").add(document).on({
        click:function(event){
            event.stopPropagation();//阻止冒泡
            index=$(this).index(); // 获取当前点击的a的index
            swiper();
        },
        mouseenter:function(event){
            event.stopPropagation();//阻止冒泡
            index=$(this).index(); // 获取当前点击的a的index
            swiper();
        },
        keydown:function(event){
            if(event.keyCode==37){//左
                index=index>0 ? --index : $("a").length-1;
            }else if(event.keyCode==39){//右
                index=index<$("a").length-1 ? ++index : 0;
            }else{
                return true;
            }
            swiper();
        }
    });
.off() 取消事件绑定
<!DOCTYPE html>
<html lang="en">
<head>
    <meta charset="UTF-8">
    <title>Document</title>
    <script src="jquery.js"></script>
    <script>
        $(function(){
            $(".bind").on("click",function(){
                $(".btn").on("click",flash)
                         .text("点击有效");
            });
            $(".unbind").on("click",function(){
                $(".btn").off("click",flash)
                         .text("点击无效");;
            });
            var flash=function(){
                $("div").show().fadeOut("slow");//先显示,再缓慢隐藏
            }
        })
    </script>
    <style>
        div{ display: none; }
    </style>
</head>
<body>

<button class="btn">点击无效</button>
<button class="bind">绑定</button>
<button class="unbind">取消绑定</button>
<div>按钮被点击了~</div>

</body>
</html>


.one() 绑定一次性的事件处理函数
<!DOCTYPE html>
<html lang="en">
<head>
    <meta charset="UTF-8">
    <title>Document</title>
    <script src="jquery.js"></script>
    <script>
        $(function(){
            $(".bind").on("click",function(){
                $(".btn").on("click",flash)
                         .text("点击有效");
            });
            $(".unbind").on("click",function(){
                $(".btn").off("click",flash)
                         .text("点击无效");;
            });
            $(".bindOne").on("click",function(){
                $(".btn").one("click",flash)
                         .text("仅一次点击有效");
            });
            var flash=function(){
                $("div").show().fadeOut("slow");//先显示,再缓慢隐藏
            }
        })
    </script>
    <style>
        div{ display: none; }
    </style>
</head>
<body>

<button class="btn">点击无效</button>
<button class="bind">绑定</button>
<button class="unbind">取消绑定</button>
<button class="bindOne">绑定一次</button>
<div>按钮被点击了~</div>

</body>
</html>

项目三大bug:
1、刷新后第一次按下左键无效,第二次按左键开始生效
原因:默认后面的覆盖前面的,因此显示的是第4张;但是index是0,因此第一次按左键时,index变成了最后一张;视觉上看是没有变化的
最简单的解决方法:将 index 改为默认显示的图片,使之同步( index=0 改成 $("a").length-1)
2、刷新后默认是最后一张,按下右键,出来的图片不是第一张,而是第二张
前面一个解决方法,同时解决了1和2两个bug
3、左右几次按键之后,轻轻一动鼠标,图片切换到了最后一张;鼠标移出再移入时又到了最后一张
原因:$("a").add(document) 这种写法导致程序无法判断什么时候是针对a,什么时候是针对document,导致鼠标在document上移动时也触发了mouseenter事件
解决方法:判断只有当触发事件的元素的标签名是a的时候,才进行切换
但是,一般项目中轮播图默认都是从0开始的
解决:函数封装需要初始化
项目index.html
<!DOCTYPE html>
<html lang="en">
<head>
    <meta charset="UTF-8">
    <meta name="viewport" content="width=device-width, initial-scale=1.0">
    <title>jquery</title>
    <link rel="stylesheet" href="style.css">
    <script src="jquery.js"></script>
    <script src="script.js"></script>
</head>
<body>
    <span class="top"></span>
    <nav>
        <a href="#">banner1</a>
        <a href="#">banner2</a>
        <a href="#">banner3</a>
        <a href="#">banner4</a>
    </nav>
    <div class="img-box">
        <img src="image/cat1.jpg">
        <img src="image/cat2.jpg">
        <img src="image/cat3.jpg">
        <img src="image/cat4.jpg">
    </div>
</body>
</html>
style.css
* { margin: 0; padding: 0; border: none; }
html, body { overflow: hidden;/*解决因为盒模型溢出造成的垂直方向滚动条*/ height: 100%; background-color: rgb(145, 176, 200); }
span.top { display: block; width: 16px; height: 16px; margin: 30px auto 40px; border-radius: 50%; background-color: #fff; }
nav { position: relative; display: flex;/*弹性盒模型*/ width: 40%; margin: 0 auto 45px; justify-content: space-between;/*实现元素在容器内左右均匀分布*/ }
nav:before { position: absolute; top: 20px; display: block; width: 100%; height: 10px; content: ‘‘;/*激活伪元素*/ background-color: #fff; }
nav > a { font-size: 14px; position: relative;    /*默认是static定位,会被绝对定位覆盖 修改为相对定位之后,会覆盖前面的元素*/ padding: 10px 20px; text-decoration: none; color: rgb(144, 146, 152); border: 2px solid rgb(144, 146, 152); background-color: #fff; }
.img-box { position: relative; overflow: hidden; width: 250px; height: 250px; margin: 0 auto; background-color: #fff; box-shadow: 0 0 30px 0 rgba(144, 146, 152, .3); }
.img-box img { position: absolute; top: 0; right: 0; bottom: 0; left: 0; width: 98%; margin: auto;/*以上5句实现绝对定位的居中*/ }
/*# sourceMappingURL=style.css.map */
script.js
$(function(){
    var index=$("a").length-1;

    //绑定多个事件
    $("a").add(document).on({
        click:function(event){
            event.stopPropagation();//阻止冒泡
            index=$(this).index(); // 获取当前点击的a的index
            swiper();
        },
        mouseenter:function(event){
            event.stopPropagation();//阻止冒泡
            console.log($(this)[0].nodeName);//当前对象的标签名
            if($(this)[0].nodeName=="A"){
                index=$(this).index(); // 获取当前点击的a的index
            }else{
                return true;
            }
            swiper();
        },
        keydown:function(event){
            if(event.keyCode==37){//左
                index=index>0 ? --index : $("a").length-1;
            }else if(event.keyCode==39){//右
                index=index<$("a").length-1 ? ++index : 0;
            }else{
                return true;
            }
            swiper();
        }
    });

    var swiper=function(){
        $("img").eq(index)
                .css({"opacity":"1"})
                .siblings()
                .css({"opacity":"0"});
    }

    //初始化
    var init=function(){
        index=0;
        swiper();
    }
    init();

});
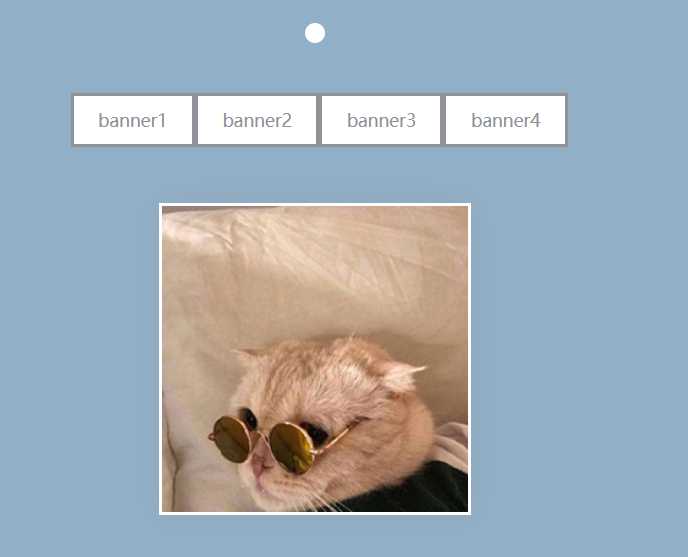
效果图

以上是关于实际开发常用的jquey事件类型,并运用到图片相册的主要内容,如果未能解决你的问题,请参考以下文章