Testlink环境搭建
Posted for-you
tags:
篇首语:本文由小常识网(cha138.com)小编为大家整理,主要介绍了Testlink环境搭建相关的知识,希望对你有一定的参考价值。
下载安装
压缩版纯净安装
下载压缩版纯净testlink,自己配置mysql , Apache
压缩版纯净安装
下载地址:http://sourceforge.net/projects/testlink/files/TestLink%201.9/
我这里是已经搭建好了Apache + php + mysql的环境,只需要将下载下来的testlink放入到Apache的网站根目录下,访问安装。
下载完解压后,放置到Apache的文档目录,我这里是D:webRoot。
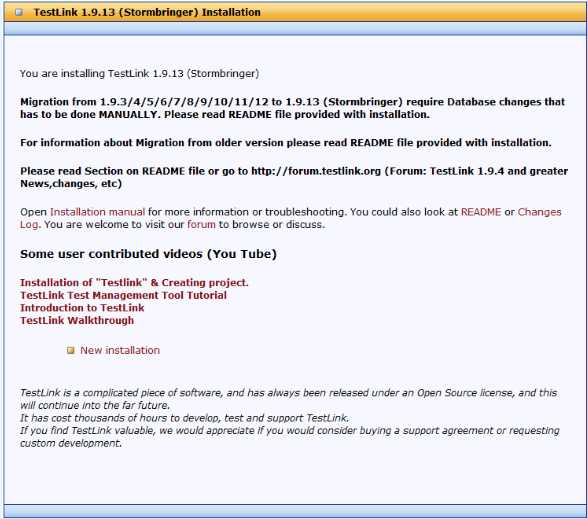
浏览器输入:localhost:8080/testlink_1.9.13/index.php,点击new installation,根据提示安装。

集成环境安装
可以使用bitnami-testlink的集成安装包,内带Apache,mysql,phpadmin。
Bitnami的集成安装程序,直接下载双击可视化界面安装,自带了Apache,mysql,php。
安装错误总结
错误1
checking max.execution time修改php安装目录中(E:php-5.6.12-Win32-VC11-x64)php.ini中的max_execution_time时间,修改为120,大概在372行
max_execution_time = 120错误2
maximum session idle time before timeout修改php安装目录中(E:php-5.6.12-Win32-VC11-x64)php.ini中的
session.gc_maxlifetime = 2400错误3
checking if testlink/logs/ directory exists
checking if upload_area directory exists
打开testlink下的config.inc.php文件:
修改logs路径
$tlCfg->log_path = '[tesklink安装目录]/logs/';修改upload_area路径
$g_repositoryPath = '[tesklink安装目录]/upload_area/';安装完后,提示配置mail:
*   copy from config.inc.php, [SMTP] Section into custom_config.inc.php.
*   complete correct data regarding email addresses and mail server.
完成后,跳转到http://localhost:8080/testlink_1.9.13/login.php
相关警告
显示的警告根据提示修改。
以上是关于Testlink环境搭建的主要内容,如果未能解决你的问题,请参考以下文章