WPF学习第五十六章 基于帧的动画
Posted peter-luo
tags:
篇首语:本文由小常识网(cha138.com)小编为大家整理,主要介绍了WPF学习第五十六章 基于帧的动画相关的知识,希望对你有一定的参考价值。
除基于属性的动画系统外,WPF提供了一种创建基于帧的动画的方法,这种方法只使用代码。需要做的全部工作是响应静态的CompositionTarge.Rendering事件,触发该事件是为了给每帧获取内容。这是一种非常低级的方法,除非使用标准的基于属性的动画模型不能满足需要(例如,构建简单的侧边滚动游戏、创建基于物理的动画式构建粒子效果模型(如火焰、雪花以及气泡)),否则不会希望使用这种方法。
构建基于帧的动画的基本技术很容易。只需要为静态的CompositionTarget.Rendering事件关联事件处理程序。一旦关联事件处理程序,WPF就开始不断地调用这个事件处理程序(只要渲染代码的执行速度足够快,WPF每秒将调用60次)。在渲染事件处理程序中,需要在窗口中相应地创建或调整元素。换句话说,需要自行管理全部工作。当动画结束时,分离事件处理程序。
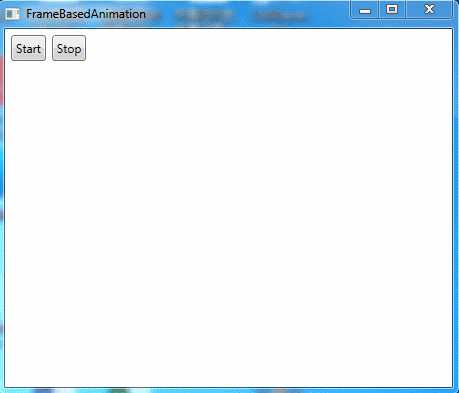
下图显示了一个简单示例。在此,随机数量的圆从Canvas面板的顶部向底部下落。它们(根据随机生成的开始速度)以不同速度下降,但一相同的速率加速。当所有的圆到达底部时,动画结束。

在这个示例中,每个下落的圆由Ellipse元素表示。使用自定义的EllipseInfo类保存椭圆的引用,并跟踪对于物理模型而言十分重要的一些细节。在这个示例中,只有如下信息很重要——椭圆沿X轴的移动速度(可很容易地扩张这个类,使其包含沿着Y轴运动的速度、额外的加速信息等)。
public class EllipseInfo
    {
        public Ellipse Ellipse
        {
            get;
            set;
        }

        public double VelocityY
        {
            get;
            set;
        }

        public EllipseInfo(Ellipse ellipse, double velocityY)
        {
            VelocityY = velocityY;
            Ellipse = ellipse;
        }
    }
应用程序使用集合跟踪每个椭圆的EllipseInfo对象。还有几个窗口级别的字段,它们记录计算椭圆下落时使用的各种细节。可很容易地使这些细节变成可配置的。
private List<EllipseInfo> ellipses = new List<EllipseInfo>();

private double accelerationY = 0.1;
private int minStartingSpeed = 1;
private int maxStartingSpeed = 50;
private double speedRatio = 0.1;
private int minEllipses = 20;
private int maxEllipses = 100;
private int ellipseRadius = 10;
当单击其中某个按钮时,清空集合,并将事件处理程序关联到CompositionTarget.Rendering事件:
        private bool rendering = false;
        private void cmdStart_Clicked(object sender, RoutedEventArgs e)
        {
            if (!rendering)
            {
                ellipses.Clear();
                canvas.Children.Clear();

                CompositionTarget.Rendering += RenderFrame;
                rendering = true;
            }
        }
        private void cmdStop_Clicked(object sender, RoutedEventArgs e)
        {
            StopRendering();
        }

        private void StopRendering()
        {
            CompositionTarget.Rendering -= RenderFrame;
            rendering = false;
        }
如果椭圆不存在,渲染代码会自动创建它们。渲染代码创建随机数量的椭圆(当前为20到100个),并使他们具有相同的尺寸和颜色。椭圆被放在Canvas面板的顶部,但他们沿着X轴随机移动:
 private void RenderFrame(object sender, EventArgs e)
        {
            if (ellipses.Count == 0)
            {
                // Animation just started. Create the ellipses.
                int halfCanvasWidth = (int)canvas.ActualWidth / 2;

                Random rand = new Random();
                int ellipseCount = rand.Next(minEllipses, maxEllipses + 1);
                for (int i = 0; i < ellipseCount; i++)
                {
                    Ellipse ellipse = new Ellipse();
                    ellipse.Fill = Brushes.LimeGreen;
                    ellipse.Width = ellipseRadius;
                    ellipse.Height = ellipseRadius;
                    Canvas.SetLeft(ellipse, halfCanvasWidth + rand.Next(-halfCanvasWidth, halfCanvasWidth));
                    Canvas.SetTop(ellipse, 0);
                    canvas.Children.Add(ellipse);

                    EllipseInfo info = new EllipseInfo(ellipse, speedRatio * rand.Next(minStartingSpeed, maxStartingSpeed));
                    ellipses.Add(info);
                }
            }
        }
如果椭圆已经存在,代码处理更有趣的工作,以便进行动态显示。使用Canvas.SetTop()方法缓慢移动每个椭圆。移动距离取决于指定的速度。
            else
            {
                for (int i = ellipses.Count - 1; i >= 0; i--)
                {
                    EllipseInfo info = ellipses[i];
                    double top = Canvas.GetTop(info.Ellipse);
                    Canvas.SetTop(info.Ellipse, top + 1 * info.VelocityY);
            }
为提高性能,一旦椭圆到达Canvas面板的底部,就从跟踪集合中删除椭圆。这样,就不需要再处理它们。当遍历集合时,为了能够工作而不会导致丢失位置,需要向后迭代,从集合的末尾向起始位置迭代。
如果椭圆尚未到达Canvas面板的底部,代码会提高速度(此外,为获得磁铁吸引效果,还可以根据椭圆与Canvas面板底部的距离来设置速度):
                    if (top >= (canvas.ActualHeight - ellipseRadius * 2 - 10))
                    {
                        // This circle has reached the bottom.
                        // Stop animating it.
                        ellipses.Remove(info);
                    }
                    else
                    {
                        // Increase the velocity.
                        info.VelocityY += accelerationY;
                    }
最后,如果所有椭圆都已从集合中删除,就移除事件处理程序,然后结束动画:
                    if (ellipses.Count == 0)
                    {
                        // End the animation.
                        // There‘s no reason to keep calling this method
                        // if it has no work to do.
                        StopRendering();
                    }
示例完整XAML标记如下所示:

<Window x:Class="Animation.FrameBasedAnimation"
        xmlns="http://schemas.microsoft.com/winfx/2006/xaml/presentation"
        xmlns:x="http://schemas.microsoft.com/winfx/2006/xaml"
        Title="FrameBasedAnimation" Height="396" Width="463.2">
    <Grid Margin="3">
        <Grid.RowDefinitions>
            <RowDefinition Height="Auto"></RowDefinition>
            <RowDefinition></RowDefinition>
        </Grid.RowDefinitions>

        <StackPanel Orientation="Horizontal">
            <Button Margin="3" Padding="3" Click="cmdStart_Clicked">Start</Button>
            <Button Margin="3" Padding="3" Click="cmdStop_Clicked">Stop</Button>
        </StackPanel>
        <Canvas Name="canvas" Grid.Row="1" Margin="3"></Canvas>
    </Grid>
</Window>

using System;
using System.Collections.Generic;
using System.Linq;
using System.Text;
using System.Threading.Tasks;
using System.Windows;
using System.Windows.Controls;
using System.Windows.Data;
using System.Windows.Documents;
using System.Windows.Input;
using System.Windows.Media;
using System.Windows.Media.Imaging;
using System.Windows.Shapes;

namespace Animation
{
    /// <summary>
    /// FrameBasedAnimation.xaml 的交互逻辑
    /// </summary>
    public partial class FrameBasedAnimation : Window
    {
        public FrameBasedAnimation()
        {
            InitializeComponent();
        }

        private bool rendering = false;
        private void cmdStart_Clicked(object sender, RoutedEventArgs e)
        {
            if (!rendering)
            {
                ellipses.Clear();
                canvas.Children.Clear();

                CompositionTarget.Rendering += RenderFrame;
                rendering = true;
            }
        }
        private void cmdStop_Clicked(object sender, RoutedEventArgs e)
        {
            StopRendering();
        }

        private void StopRendering()
        {
            CompositionTarget.Rendering -= RenderFrame;
            rendering = false;
        }

        private List<EllipseInfo> ellipses = new List<EllipseInfo>();

        private double accelerationY = 0.1;
        private int minStartingSpeed = 1;
        private int maxStartingSpeed = 50;
        private double speedRatio = 0.1;
        private int minEllipses = 20;
        private int maxEllipses = 100;
        private int ellipseRadius = 10;

        private void RenderFrame(object sender, EventArgs e)
        {
            if (ellipses.Count == 0)
            {
                // Animation just started. Create the ellipses.
                int halfCanvasWidth = (int)canvas.ActualWidth / 2;

                Random rand = new Random();
                int ellipseCount = rand.Next(minEllipses, maxEllipses + 1);
                for (int i = 0; i < ellipseCount; i++)
                {
                    Ellipse ellipse = new Ellipse();
                    ellipse.Fill = Brushes.LimeGreen;
                    ellipse.Width = ellipseRadius;
                    ellipse.Height = ellipseRadius;
                    Canvas.SetLeft(ellipse, halfCanvasWidth + rand.Next(-halfCanvasWidth, halfCanvasWidth));
                    Canvas.SetTop(ellipse, 0);
                    canvas.Children.Add(ellipse);

                    EllipseInfo info = new EllipseInfo(ellipse, speedRatio * rand.Next(minStartingSpeed, maxStartingSpeed));
                    ellipses.Add(info);
                }
            }
            else
            {
                for (int i = ellipses.Count - 1; i >= 0; i--)
                {
                    EllipseInfo info = ellipses[i];
                    double top = Canvas.GetTop(info.Ellipse);
                    Canvas.SetTop(info.Ellipse, top + 1 * info.VelocityY);

                    if (top >= (canvas.ActualHeight - ellipseRadius * 2 - 10))
                    {
                        // This circle has reached the bottom.
                        // Stop animating it.
                        ellipses.Remove(info);
                    }
                    else
                    {
                        // Increase the velocity.
                        info.VelocityY += accelerationY;
                    }

                    if (ellipses.Count == 0)
                    {
                        // End the animation.
                        // There‘s no reason to keep calling this method
                        // if it has no work to do.
                        StopRendering();
                    }
                }
            }
        }
    }
    public class EllipseInfo
    {
        public Ellipse Ellipse
        {
            get;
            set;
        }

        public double VelocityY
        {
            get;
            set;
        }

        public EllipseInfo(Ellipse ellipse, double velocityY)
        {
            VelocityY = velocityY;
            Ellipse = ellipse;
        }
    }
}
显然,可扩展的这个动画以使圆跳跃和分散等。使用的技术是相同的——只需要使用更复杂的公式计算速度。
当构建基于帧的动画时需要注意如下问题:它们不依赖与时间。换句话说,动画可能在性能好的计算机上运动更快,因为帧率会增加,会更频繁地调用CompositionTarget.Rendering事件。为补偿这种效果,需要编写考虑当前时间的代码。
开始学习基于帧的动画的最好方式是查看WPF SDK提供的每一帧动画都非常详细的示例。该例演示了几种粒子系统效果,并且使用自定义的TimeTracker类实现了依赖与时间的基于帧的动画。
以上是关于WPF学习第五十六章 基于帧的动画的主要内容,如果未能解决你的问题,请参考以下文章
