SDN环境下安装Wireshark 2.2.5(问题汇总)
Posted
tags:
篇首语:本文由小常识网(cha138.com)小编为大家整理,主要介绍了SDN环境下安装Wireshark 2.2.5(问题汇总)相关的知识,希望对你有一定的参考价值。
SDN环境下安装Wireshark 2.2.5(问题汇总)
本文用到的软件及其版本如下:
FVMware Workstation 12.5.5 build-5234757
F Mininet镜像:mininet-2.2.2-170321-ubuntu-14.04.4-server-amd64
FOpenDayLight(硼Boron版本0.5.2)即karaf-0.5.2-Boron-SR2
F Wireshark软件:wireshark-2.2.5
F操作系统:windows10
延续上一篇文章《Mininet+Opendaylight+Wireshark搭建SDN环境》继续wireshark 2.2.5的部署工作。
据说ubuntu自带的wireshark版本比较旧,无法直接支持OpenFlow,卸载旧的版本以及清除配置文件,安装最新版的wireshark。PS:软件我都喜欢最新的稳定版
(1)卸载旧版本及其配置文件
说实话,自带的版本我也打不开wireshark,干脆把它卸载了安装最新的
[email protected]:~$sudo apt-get remove wireshark
[email protected]:~$sudo apt-get purge wireshark
(2)安装依赖包
[email protected]:~$sudo apt-get install bison flex libpcap-dev gcc -y
(3)源码编译安装
Windows10从官网上(https://www.wireshark.org/download.html)下载最新的wireshark源码(wireshark-2.2.5.tar.bz2),跟上面一样,把它传输到ubunutu上,进行解压编译
[email protected]:~$sudo tar -vxjf wireshark-2.2.5.tar.bz2 -C /opt/
慢慢编译折腾长征路才刚开始
[email protected]:~$cd /opt/wireshark-2.2.5/
[email protected]:/opt/wireshark-2.2.5$sudo ./configure
报错1:configure: error: GLib 2.16.0 or later not found.
源码编译安装glib
无法直接用apt-get直接安装,好吧,又得源码编译
官网上(http://ftp.acc.umu.se/pub/GNOME/sources/glib/2.52/)下载源码(glib-2.52.0.tar.xz)导入到ubuntu上
不知道为什么,无法进行导入,好吧,换一种安装方法
[email protected]:/$sudo wget https://ftp.gnome.org/pub/gnome/sources/glib/2.52/glib-2.52.0.tar.xz
[email protected]:/$sudo tar -vxf glib-2.52.0.tar.xz -C /opt/
[email protected]:/$cd /opt/
[email protected]:/opt$cd ./glib-2.52.0/
[email protected]:/opt/glib-2.52.0$sudo ./configure
报错2:configure: error: Package requirements (libffi >= 3.0.0) were notmet:
No package ‘libffi‘ found
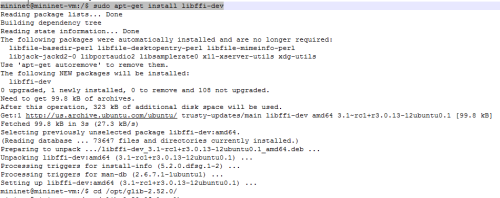
安装Libffi
[email protected]:/$sudo apt-get install libffi-dev
[email protected]:/$cd /opt/glib-2.52.0/
[email protected]:/opt/glib-2.52.0$sudo ./configure
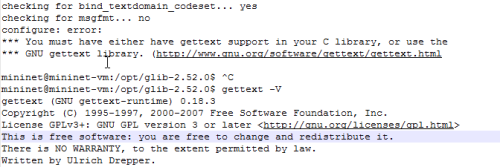
报错3:configure: error:
*** You must have either have gettext support in your Clibrary, or use the
*** GNU gettext library. (http://www.gnu.org/software/gettext/gettext.html
安装gettext,
[email protected]:/$sudo apt-get install gettext
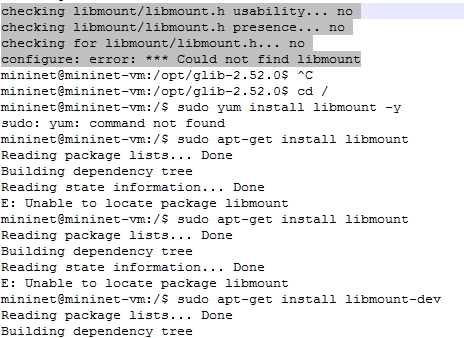
checkinglibmount/libmount.h usability... no
checkinglibmount/libmount.h presence... no
checkingfor libmount/libmount.h... no
configure:error: *** Could not find libmount
安装libmount-dev
报错4:好吧,apt-get安装还出错,安装libmount-dev,而不是libmount
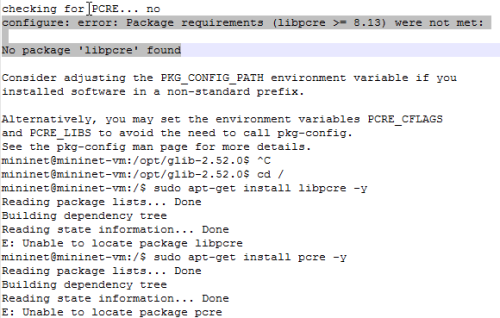
报错5:configure: error: Package requirements (libpcre >= 8.13) were notmet:
No package ‘libpcre‘ found
源码编译安装libpcre
由提示可知,少了libpcre,以为apt-get install安装个libpcre就可以了,结果它又有个依赖包pcre,打算再安装个pcre包好了,结果不支持apt-get安装,真矫情,又得源码编译安装。
源码编译安装pcre
[email protected]:/$sudo wget https://sourceforge.net/projects/pcre/files/pcre/8.40/pcre-8.40.tar.gz/
[email protected]:/$sudo tar -zxvf pcre-8.40.tar.gz -C /opt/
[email protected]:/$cd /opt/pcre-8.40/
[email protected]:/opt/pcre-8.40$sudo ./configure --enable-utf8 --enable-unicode-properties
这里必须要加上utf8和unicode的字符编码格式的参数,否则编译还是不会通过的
[email protected]:/$cd /opt/pcre-8.40/
[email protected]:/opt/pcre-8.40$sudo ./configure --enable-utf8 --enable-unicode-properties
[email protected]:/opt/pcre-8.40$sudo make
[email protected]:/opt/pcre-8.40$sudo make install
测试pcre是否正常安装:
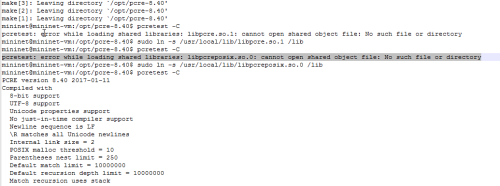
[email protected]:/opt/pcre-8.40$pcretest -C
报错6:pcretest: error while loading shared libraries: libpcre.so.1: cannotopen shared object file: No such file or directory
pcretest: error while loading shared libraries:libpcreposix.so.0: cannot open shared object file: No such file or directory
遇到以上两个错误,加上软链接就可以
[email protected]:/opt/glib-2.52.0$sudo ./configure
[email protected]:/opt/glib-2.52.0$sudo make
[email protected]:/opt/glib-2.52.0$sudo make install
至此,glib已经安装完毕
重新编译wireshark,
[email protected]:/opt/wireshark-2.2.5$sudo ./configure
又报错,缺少QT以及GTK
报错7:“configure: error: Neither Qt nor GTK+ are available, so Wiresharkcan‘t be compiled”
QT5系列安装
ubuntu下安装的时候直接sudo apt-get install libqt4-dev
但是apt-get安装的是4.6.2,而wireshark最低要求是4.7.0,所以此处采用QT5
A、源码编译安装
官网(http://download.qt.io/official_releases/qt/)下载进行安装,如下:
[email protected]:/$sudo wget http://download.qt.io/official_releases/qt/5.8/5.8.0/single/qt-everywhere-opensource-src-5.8.0.tar.gz
解压编译安装
[email protected]:/$sudo tar -zxvf qt-everywhere-opensource-src-5.8.0.tar.gz -C /opt/
[email protected]:/$cd /opt/qt-everywhere-opensource-src-5.8.0/
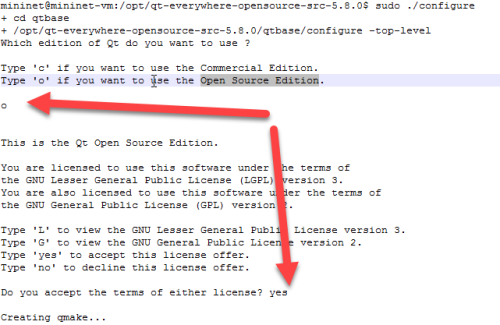
[email protected]:/opt/qt-everywhere-opensource-src-5.8.0$sudo ./configure
(依据提示输入“o”选择“Open Source Edition”版本进行安装)
到这里时,出现以下错误信息,打算放弃了,google了好久没找到合适答案,若有其他兄弟遇到请分享一下,谢谢
报错8:Note: No wayland-egl support detected. Cross-toolkit compatibilitydisabled.
ERROR: The OpenGL functionality tests failed!
B、最简单的安装方式
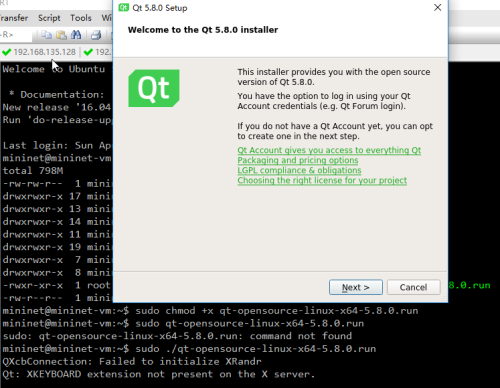
自从secureCRT与Xmanager Passive完美结合以后,发现QT5安装也可以实现跟windows一样的傻瓜式安装方法
在QT官网上下载基于linux图形界面安装的版本qt-opensource-linux-x64-5.8.0.run,如下图
[email protected]:/$sudo wget http://download.qt.io/official_releases/qt/5.8/5.8.0/qt-opensource-linux-x64-5.8.0.run
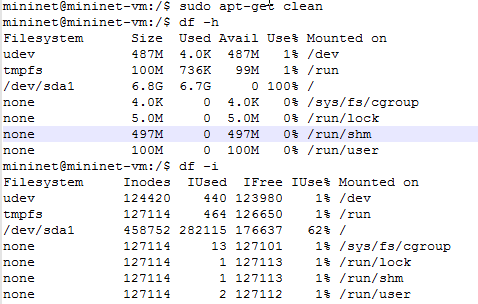
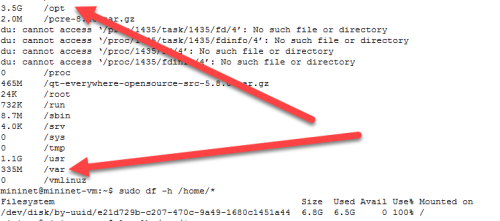
报错1:此时我遇到了一个问题,磁盘无空余空间写入,怎么办?
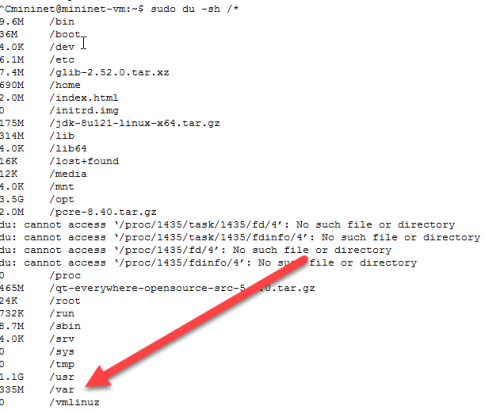
尝试着去处理,发现确实硬盘的根目录无空间了,网上有一种说法是/var/目录下的日志文件占用太大空间了,inode被写满了,
但我这里不是(/var只占到355M,且第一天使用)
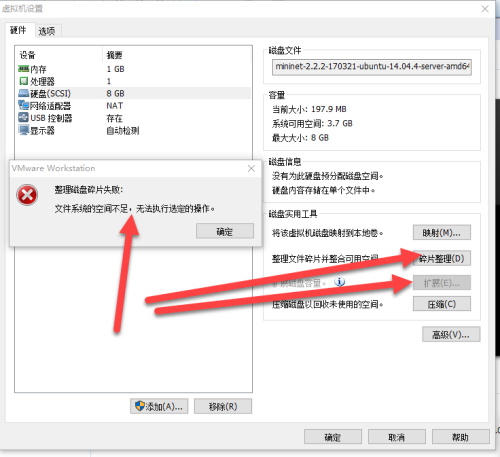
网上有种做法是增加硬盘挂接到根目录下,或者通过虚拟机(VMware workstation)去扩充硬盘空间,于是关闭虚拟机,在“虚拟机设置”里通过“磁盘整理”和“扩展”两个功能去处理,无果,提示“文件系统空间硬盘”,难道就这样了吗?
最后尝试在当前用户根目录下以及/opt/目录下去删除临时保存的压缩文件、以及解压文件,终于解决了。
[email protected]:~$rm -rf distribution-karaf-0.5.2-Boron-SR2.zip
[email protected]:~$rm -rf jdk-8u121-linux-x64.tar.gz
发现跟我猜想一样,于是把/opt/目录下其他无关文件也一起删除了
[email protected]:~$rm -rf qt-everywhere-opensource-src-5.8.0.tar.gz
继续前面QT5的安装
如下图,添加可执行权限,像windows一样傻瓜式安装及可
报错9:接下继续安装wireshark,发现还是同样的错误
[email protected]:/opt/wireshark-2.2.5$sudo ./configure
这时候重新configurewireshark还是找不到Qt,这是因为configure找不到QT相关的“.pc”文件(默认在/usr/lib64中查找)。找到安装目录下*.pc文件的位置,将该目录添加到PKG_CONFIG_PATH环境变量中,即在/etc/profile文件最后加上以下内容
exportQT_PC=/home/mininet/Qt5.8.0/5.8/gcc_64/lib/pkgconfig(这是因为我的*.pc文件是存储目录,一般都是安装目录**/gcc_64/lib/pkgconfig地方)
export PKG_CONFIG_PATH=$QT_PC
最后安装一下GTK3
[email protected]:/$sudo apt-get install libgtk-3-dev
见证奇迹的时刻:
[email protected]:/opt/wireshark-2.2.5$sudo ./configure
看到如下设置即可进行一下操作
[email protected]:/opt/wireshark-2.2.5$sudo make
[email protected]:/opt/wireshark-2.2.5$sudo make install
至此以为大功告成,准备试验一把时,发现不管我输入“wireshark”或者“sudowireshark”都是提示我存在,找了网上的资料,有人提到说要在安装目录下输入才可以,我也跟着在安装目录/opt/wireshark-2.2.5/bin以及软件默认安装目录/usr/local/bin做了尝试还是说我没安装wireshark或者命令不存在,难道我没有安装成功,由重新编译安装了一遍,发现还是不行。
报错10:
最后发现新版本不是直接输入wireshark或者sudo wireshark,而是wireshark-gtk,因为我发现只有/usr/local/bin/wireshark-gtk和/opt/wireshark-2.2.5/bin/wireshark-gtk而没有/usr/local/bin/wireshark和/opt/wireshark-2.2.5/bin/wireshark,原来如此,把自己坑了
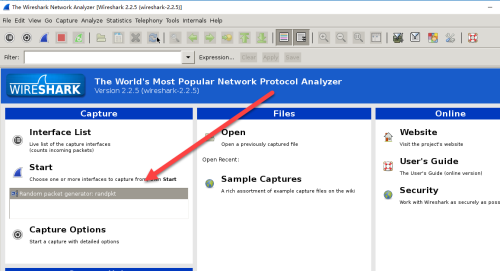
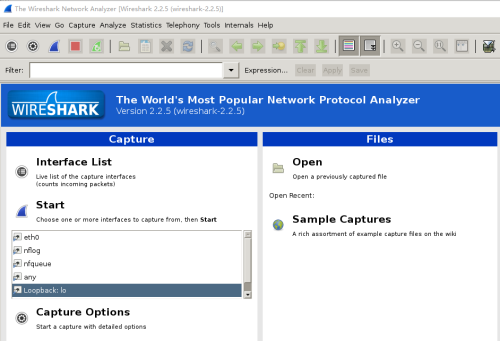
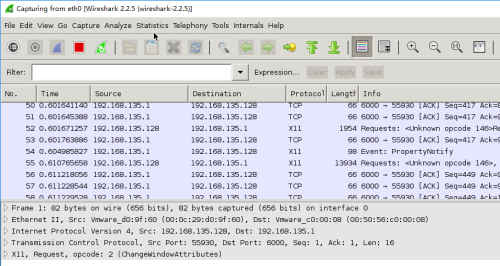
但是为什么没有网卡信息呢?可能是bug吧,只有先开启wireshark下,再开启mininet以及opendaylight是才会正常。且必须采用sudo wireshark-gtk的方式开启
熟悉的画面,大功告成。
本文出自 “万休乐” 博客,请务必保留此出处http://wanxiule.blog.51cto.com/6181351/1913056
以上是关于SDN环境下安装Wireshark 2.2.5(问题汇总)的主要内容,如果未能解决你的问题,请参考以下文章


