pygame实现的《躲小球》
Posted truedragon
tags:
篇首语:本文由小常识网(cha138.com)小编为大家整理,主要介绍了pygame实现的《躲小球》相关的知识,希望对你有一定的参考价值。
pygame安装 pip install pygame
在CMD中输入python -m pygame.examples.aliens可以看到一个自带的pygame的演示小游戏
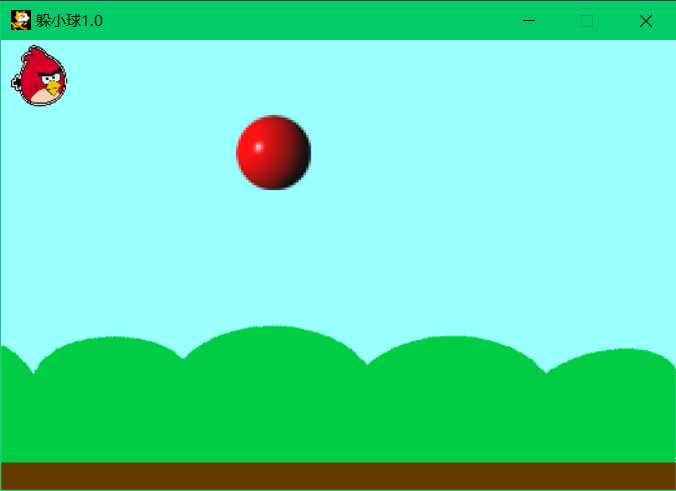
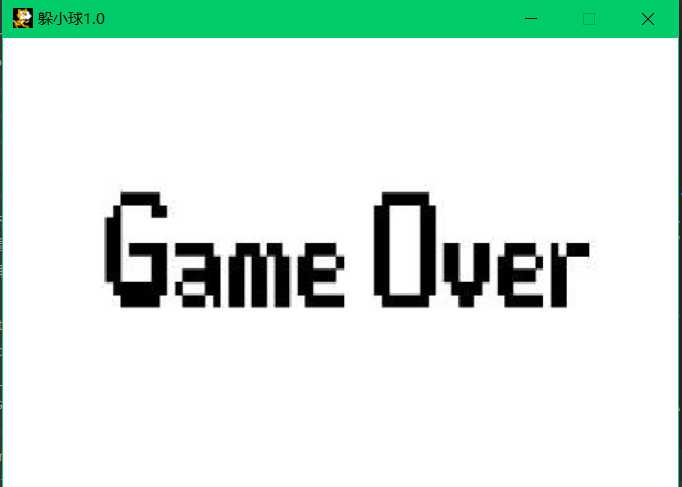
学了几天pygame,那就实践一下吧,如图实现玩家操控小鸟躲避小球的游戏,当碰撞到小球游戏结束,关闭游戏


所以我们需要实现以下几个功能:
1.操控小鸟
2.小球移动
3.碰撞检测
4.结束游戏
一. 控制小鸟我们用pygame.KEYDOWN来检测,当用户敲击下键盘上下左右时,改变鸟的位置坐标,并消除之前的图片
 1 #键盘敲击事件
 2         elif event.type == pygame.KEYDOWN:
 3             #上
 4             if event.key == pygame.K_UP:
 5                 if imageRect.top != 0:
 6                     pygame.draw.rect(screen,THECOLORS[‘white‘],imageRect)
 7                     imageRect = imageRect.move(0,birdspeed[0])
 8                     count = count + 1
 9             #下
10             elif event.key == pygame.K_DOWN:
11                 if imageRect.bottom != 360:
12                     pygame.draw.rect(screen, THECOLORS[‘white‘], imageRect)
13                     imageRect = imageRect.move(0,birdspeed[1])
14                     count = count + 1
15             #左
16             elif event.key == pygame.K_LEFT:
17                 if imageRect.left != 0:
18                     pygame.draw.rect(screen, THECOLORS[‘white‘], imageRect)
19                     imageRect = imageRect.move(birdspeed[3],0)
20             #右
21             elif event.key == pygame.K_RIGHT:
22                 if imageRect.right != 540:
23                     pygame.draw.rect(screen, THECOLORS[‘white‘], imageRect)
24                     imageRect = imageRect.move(birdspeed[2],0)
25             #按ESC退出游戏
26             elif event.key == pygame.K_ESCAPE:
27                 sys.exit()
二.我们先设置小球的初始位置,然后让小球从右向左移动,并用draw.rect画掉之前的图像,当小球到达屏幕最左端的时候,我们让它重新出现,并且修改纵坐标为鸟的同一行
 1 replace_rect = pygame.draw.rect(screen, THECOLORS[‘white‘], ballRect)
 2     #小球自右向左移动
 3     if ballLocation[0] > -60:
 4         if count > 10 and count < 8:
 5             ballLocation[0] = ballLocation[0] + ballspeed[count//10]
 6         else:
 7             ballLocation[0] = ballLocation[0] + ballspeed[0]
 8     else:
 9         ballLocation[0] = 540
10     #小球移动到最左端时改变出现的位置
11     if ballLocation[0]  == -60:
12         ballLocation[1] = imageRect.top
13     #纵坐标超出范围时修改
14     if ballLocation[1] > 359:
15         ballLocation[1] = ballLocation_change[random.randint(1,6)]
三.碰撞检测和结束
我将鸟的图像创建一个Rect对象,相当于这个rect对象帮我获取的鸟这个图像的上下左右的坐标,这样我们就可以用来判断它的位置信息,这里我用ballLocation来存储球的位置
 1 #碰撞检测的实现
 2     if imageRect.bottom == ballLocation[1]+60 and imageRect.top == ballLocation[1] :
 3         if imageRect.left-ballLocation[0] < 60 and imageRect.left-ballLocation[0] > 0 :
 4             #如果碰撞就结束游戏
 5             print("Game Over")
 6             pygame.mixer.music.load(gameOver_musci)
 7             pygame.mixer.music.play()
 8             screen.blit(game_over_image,[0,0])
 9             pygame.display.update()
10             pygame.time.delay(1500)
11             sys.exit()
完整代码如下,注释还挺多的,图片和音乐资源网上自己都能找到,用自己喜欢的图片就行了,最好是透明的图片,如果和我一样图片不是透明的而是白色背景,就得加这个了不然就不用
将透明色设置为白色
control_image = pygame.image.load(‘资源/img/bird.png‘).convert()
control_image.convert_alpha()
control_image.set_colorkey(ALPHA)
  1     #导入和常量设置
  2 import pygame,sys
  3 from pygame.color import THECOLORS
  4 import random
  5 size = wdith , height = 540 ,360#设置屏幕尺寸
  6 birdspeed = [-60,60,60,-60]
  7 ballspeed = [-8,-9,-10,-11,-12,-13,-14,-15,-16]
  8 ballLocation = [540,60]
  9 ballLocation_change = [0,60,120,180,240,300,360]
 10 ALPHA = (255,255,255)#设置透明色
 11 fps = 120#屏幕刷新率
 12 count = 1#用于统计操控次数来改变游戏难度
 13     #初始化界面
 14 pygame.init()
 15 fclock = pygame.time.Clock()
 16 screen = pygame.display.set_mode(size)
 17 pygame.display.set_caption(‘躲小球1.0‘)
 18     #音乐载入
 19 music = ‘资源/music/letter.mp3‘
 20 gameOver_musci = ‘资源/music/gameover2.mp3‘
 21 pygame.mixer.music.load(music)
 22 pygame.mixer.music.play()
 23     #图片载入
 24 imag = ‘资源/img/cat1.png‘
 25 imag = pygame.image.load(imag)
 26 pygame.display.set_icon(imag)
 27 #将透明色设置为白色
 28 control_image = pygame.image.load(‘资源/img/bird.png‘).convert()
 29 control_image.convert_alpha()
 30 control_image.set_colorkey(ALPHA)
 31
 32 game_over_image = pygame.image.load(‘资源/img/gameover.jpg‘)
 33 game_over_image = pygame.transform.scale(game_over_image,[540,360])#设置为指定大小的图片
 34 ball_image = pygame.image.load(‘资源/img/ball.png‘)
 35 background = pygame.image.load(‘资源/img/sky.png‘)
 36 background = pygame.transform.scale(background,[540,360])
 37 control_image = pygame.transform.scale(control_image,[60,60])#设定为指定大小的图片
 38 ball_image = pygame.transform.scale(ball_image,[60,60])
 39 ballRect = ball_image.get_rect()
 40 imageRect = control_image.get_rect()
 41     #背景色和贴图片
 42 screen.fill(THECOLORS[‘white‘])
 43 screen.blit(control_image,imageRect)
 44 screen.blit(ball_image,ballLocation)
 45     #事件循环响应队列
 46 while True:
 47     for event in pygame.event.get():
 48         if event.type == pygame.QUIT:
 49             sys.exit()
 50         #键盘敲击事件
 51         elif event.type == pygame.KEYDOWN:
 52             #上
 53             if event.key == pygame.K_UP:
 54                 if imageRect.top != 0:
 55                     pygame.draw.rect(screen,THECOLORS[‘white‘],imageRect)#将前一个图像覆盖掉
 56                     imageRect = imageRect.move(0,birdspeed[0])
 57                     count = count + 1
 58             #下
 59             elif event.key == pygame.K_DOWN:
 60                 if imageRect.bottom != 360:
 61                     pygame.draw.rect(screen, THECOLORS[‘white‘], imageRect)
 62                     imageRect = imageRect.move(0,birdspeed[1])
 63                     count = count + 1
 64             #左
 65             elif event.key == pygame.K_LEFT:
 66                 if imageRect.left != 0:
 67                     pygame.draw.rect(screen, THECOLORS[‘white‘], imageRect)
 68                     imageRect = imageRect.move(birdspeed[3],0)
 69             #右
 70             elif event.key == pygame.K_RIGHT:
 71                 if imageRect.right != 540:
 72                     pygame.draw.rect(screen, THECOLORS[‘white‘], imageRect)
 73                     imageRect = imageRect.move(birdspeed[2],0)
 74             #按ESC退出游戏
 75             elif event.key == pygame.K_ESCAPE:
 76                 sys.exit()
 77     #抹除操作前的图像
 78     replace_rect = pygame.draw.rect(screen, THECOLORS[‘white‘], ballRect)
 79     #小球自右向左移动
 80     if ballLocation[0] > -60:
 81         if count > 10 and count < 8:
 82             ballLocation[0] = ballLocation[0] + ballspeed[count//10]
 83         else:
 84             ballLocation[0] = ballLocation[0] + ballspeed[0]
 85     else:
 86         ballLocation[0] = 540
 87     #小球移动到最左端时改变出现的位置
 88     if ballLocation[0]  == -60:
 89         ballLocation[1] = imageRect.top
 90     #纵坐标超出范围时修改
 91     if ballLocation[1] > 359:
 92         ballLocation[1] = ballLocation_change[random.randint(1,6)]
 93     #碰撞检测的实现
 94     if imageRect.bottom == ballLocation[1]+60 and imageRect.top == ballLocation[1] :
 95         if imageRect.left-ballLocation[0] < 60 and imageRect.left-ballLocation[0] > 0 :
 96             #如果碰撞就结束游戏
 97             print("Game Over")
 98             pygame.mixer.music.load(gameOver_musci)
 99             pygame.mixer.music.play()
100             screen.blit(game_over_image,[0,0])
101             pygame.display.update()
102             pygame.time.delay(1500)
103             sys.exit()
104     #背景
105     screen.blit(background,(0,0))
106     #小球
107     screen.blit(ball_image,ballLocation)
108     #控制对象
109     screen.blit(control_image,imageRect)
110
111     pygame.display.update()#刷新
112     fclock.tick(fps)
以上是关于pygame实现的《躲小球》的主要内容,如果未能解决你的问题,请参考以下文章