生命周期
Posted poki
tags:
篇首语:本文由小常识网(cha138.com)小编为大家整理,主要介绍了生命周期相关的知识,希望对你有一定的参考价值。
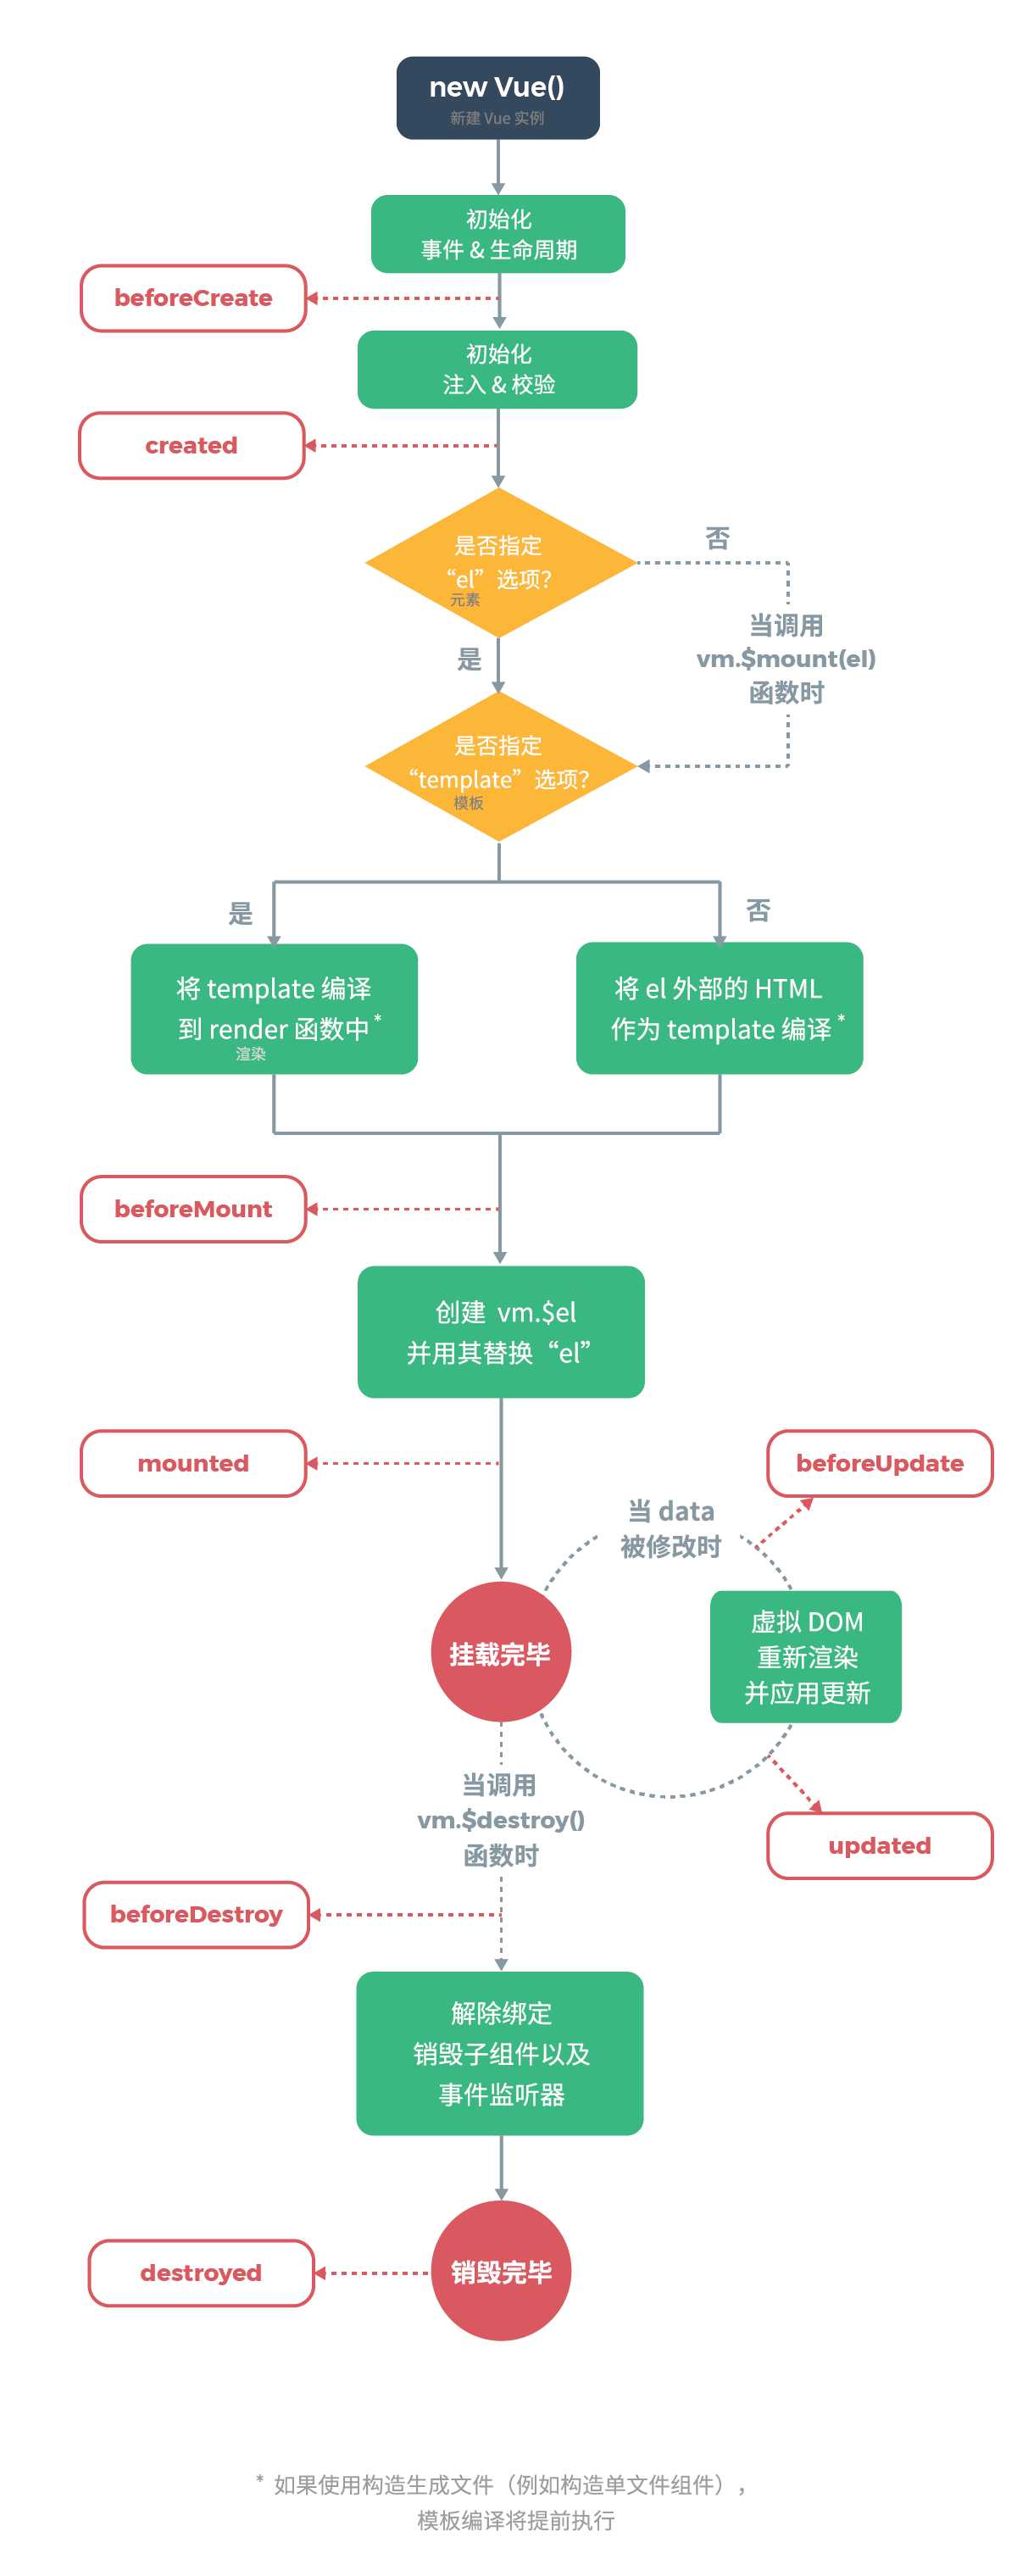
1. 什么是生命周期?
生命周期,就是实例或组件的生命周期,也就是实例或组件从创建到销毁的过程。组件的生命周期大致可以分为三个阶段:初始化、运行中、销毁。
初始化阶段: beforeCreate created beforeMount mounted
运行中阶段: beforeUpdate updated
销毁阶段: beforeDestroy destroyed
2. 什么是钩子函数?
钩子函数是在实例或组件命周期中某事件发生时所触发的函数,事件被触发后对应的状态执行对应的钩子函数。例如:创建一个实例会发生一创建实例的事件,这个事件包含两种状态,创建前:beforeCreate、创建完成:created;由于事件的发生,就会有状态,状态产生就会执行对应状态的钩子函数,这时就会执行beforeCreate() 和 created() 钩子函数。
3. 生命周期钩子函数的作用
给用户在不同阶段添加自己的代码的机会,也就是说可以在不同的钩子函数里面书写代码,在不同的状态下做想要做的操作。
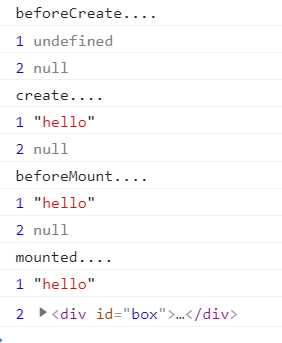
4. 以创建组件为例,演示组件生命周期中的一些情况
    <div id="app">
        <component1></component1>
    </div>

     <template id="component1">
         <!-- 模板标签只能有一个根元素 -->
        <div id="box">
            hello component!
            <p><input type="text" v-model="msg"></p>
            <p>--------------{{msg}}</p>
            <button @click="destroy">销毁</button>

        </div>

    </template>

    <script src="./base/vue.js"></script>
    <script>
     // 创建组件
     Vue.component("component1", {
            template:"#component1",
            data(){
                return {
                    msg:"hello"
                }
            },
            methods:{
                destroy(){
                    vm.$destroy();
                }
            },
            // 1. beforeCreate 初始化   事件和生命周期
            beforeCreate(){
                console.log("beforeCreate....");
                console.log(01, this.msg);
                console.log(02, document.getElementById(‘box‘));
            },
            // 2. create    初始化  注入和校验
            created(){
                console.log("create....");
                console.log(01, this.msg, );
                console.log(02, document.getElementById(‘box‘));

            },
            // 3. beforeMount   挂载前         mount 挂载,安装
            beforeMount(){
                console.log("beforeMount....");
                console.log(01, this.msg, );
                console.log(02, document.getElementById(‘box‘));
            },
            // 3.1 内部执行render() 函数把虚拟dom 渲染成真实dom

            // 4. mounted   挂载完毕
            mounted(){
                console.log("mounted....");
                console.log(01, this.msg, );
                console.log(02, document.getElementById(‘box‘));
            },

            // 5. beforeUpdate  当 data 被修改时
            beforeUpdate(){
                console.log("beforeUpdate....");
                console.log(01, this.msg, );
                console.log(02, document.getElementById(‘box‘));
            },

            // 6. Updated   data修改完毕
            updated(){
                console.log("updated....");
                console.log(01, this.msg, );
                console.log(02, document.getElementById(‘box‘));
            },
            // 7. beforeDestroy 当调用vm.$destroy() 函数时
            beforeDestroy(){
                console.log(‘beforeDestroy...‘);
                console.log(01,this.msg);
                console.log(02, document.getElementById(‘box‘));
            },
            // 8. destroyed  销毁完毕
            destroyed(){
                console.log(‘destoryed...‘);
                console.log(01,this.msg);
                console.log(02, document.getElementById(‘box‘));
            }
        })


        // 创建实例
        var vm = new Vue({
            el:"#app"
        })

    </script>
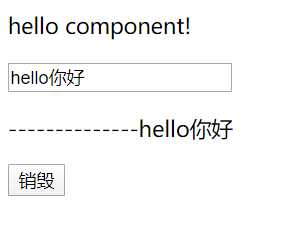
界面如图所示:
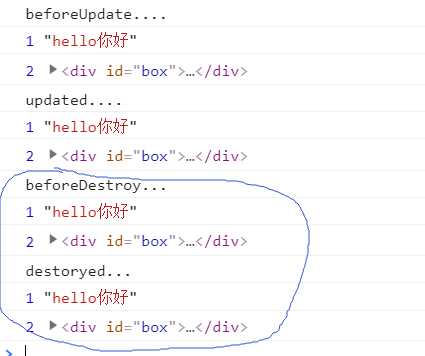
执行结果:
-
创建组件完成后才可以拿到组件的data数据。
-
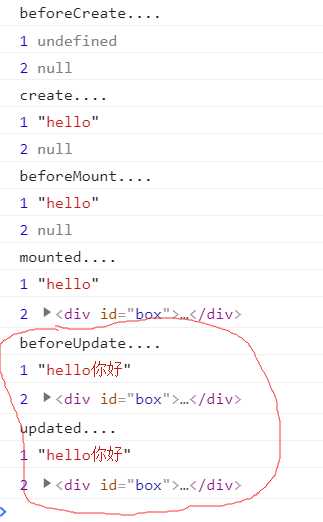
点击销毁按钮销毁组件,这时可以知道:
1. 组件销毁后会触发destory(销毁)事件。
以上是关于生命周期的主要内容,如果未能解决你的问题,请参考以下文章
