jenkins pipeline job实战
Posted weiyiming007
tags:
篇首语:本文由小常识网(cha138.com)小编为大家整理,主要介绍了jenkins pipeline job实战相关的知识,希望对你有一定的参考价值。
1、编写playbook
还是接着上一节的内容,在windows本地的repo目录中已经有了ansible-playbook-repo项目;
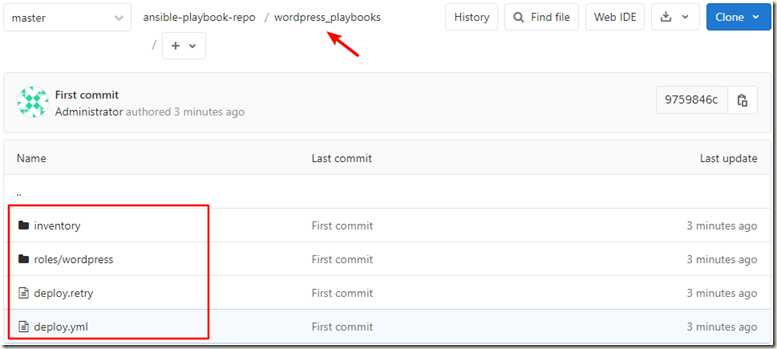
在ansible-playbook-repo中,再复制一份playbook出来:
然后修改wordpress_playbooks中的内容:
cd wordpress_playbooks/

#-----
vim deploy.yml
- hosts: "wordpress"
  gather_facts: true
  remote_user: root
  roles:
    - wordpress

#-----
cd inventory/

#-----
# 并在文件末尾添加gitlab的用户名和密码
vim dev
[wordpress]
test.example.com

[wordpress:vars]
server_name=test.example.com
port=8080
user=deploy
worker_processes=2
max_open_file=30000
root=/data/www
gitlab_user=‘root‘
gitlab_pass=‘12345678‘

#-----
# dev和prod是两个环境的意思,如:开发环境和生产环境
#可以更改内容,如更改端口、工作进程数、文件描述符数...
cp -rf dev prod

#-----
vim dev
[wordpress]
test.example.com

[wordpress:vars]
server_name=test.example.com
port=80
user=deploy
worker_processes=4
max_open_file=65505
root=/data/www
gitlab_user=‘root‘
gitlab_pass=‘12345678‘


#-----
cd .. && cd roles/
mv nginx wordpress
cd wordpress && cd files/

#-----
vim health_check.sh
#!/bin/bash
URL=$1
PORT=$2

curl -Is http://$URL:$PORT/info.php > /dev/null && echo "The remote side is healthy" || echo "The remote side is failed,please check"

#-----
vim info.php
<?php phpinfo(); ?>

#-----
vim www.conf

www.conf具体内容:
链接:https://pan.baidu.com/s/1JIgSoW3Mn_Ekyjst5Qs29g
  提取码:ju5h

#-----
cd .. &&  cd templates/

vim nginx.conf.j2   #内容如下
# For more information on configuration, see:
user              {{ user }};
worker_processes  {{ worker_processes }};

error_log  /var/log/nginx/error.log;

pid        /var/run/nginx.pid;

events {
    worker_connections  {{ max_open_file }};
}


http {
    include       /etc/nginx/mime.types;
    default_type  application/octet-stream;

    log_format  main  ‘$remote_addr - $remote_user [$time_local] "$request" ‘
                      ‘$status $body_bytes_sent "$http_referer" ‘
                      ‘"$http_user_agent" "$http_x_forwarded_for"‘;

    access_log  /var/log/nginx/access.log  main;

    sendfile        on;
    #tcp_nopush     on;

    #keepalive_timeout  0;
    keepalive_timeout  65;

    #gzip  on;

    # Load config files from the /etc/nginx/conf.d directory
    # The default server is in conf.d/default.conf
    #include /etc/nginx/conf.d/*.conf;
    server {
        listen       {{ port }} default_server;
        server_name  {{ server_name }};
        root         {{ root }};
        #charset koi8-r;

        location / {
            index  index.html index.htm index.php;
        }

        location ~ .php$ {
            try_files $uri =404;
            fastcgi_pass unix:/var/run/php-fpm/php-fpm.sock;
            fastcgi_index index.php;
            fastcgi_param SCRIPT_FILENAME $document_root$fastcgi_script_name;
            include fastcgi_params;
        }

    }

}


#-----
cd .. && cd tasks

vim main.yml    #内容如下
- name: Update yum dependency
  shell: ‘yum update -y warn=False‘

- name: Disable system firewall
  service: name=firewalld state=stopped

- name: Disable SELINX
  selinux: state=disabled

- name: Setup epel yum source for nginx and mariadb(mysql)
  yum: pkg=epel-release state=latest

- name: Setup webtatic yum source for php-fpm
  yum: name=https://mirror.webtatic.com/yum/el7/webtatic-release.rpm

- name: Ensure nginx is at the latest version
  yum: pkg=nginx state=latest

- name: Write the nginx config file
  template: src=roles/wordpress/templates/nginx.conf.j2 dest=/etc/nginx/nginx.conf

- name: Create nginx root folder
  file: ‘path={{ root }} state=directory owner={{ user }} group={{ user }} mode=0755‘

- name: Copy info.php to remote
  copy: ‘remote_src=no src=roles/wordpress/files/info.php dest=/data/www/info.php mode=0755‘

- name: Restart nginx service
  service: name=nginx state=restarted

- name: Setup php-fpm
  command: ‘yum install -y php70w php70w-fpm php70w-common php70w-mysql php70w-gd php70w-xml php70w-mbstring php70w-mcrypt warn=False‘

- name: Restart php-fpm service
  service: name=php-fpm state=restarted

- name: Copy php-fpm config file to remote
  copy: ‘remote_src=no src=roles/wordpress/files/www.conf dest=/etc/php-fpm.d/www.conf mode=0755 owner={{ user }} group={{ user }} force=yes‘

- name: Restart php-fpm service
  service: name=php-fpm state=restarted

- name: Run the health check locally
  shell: "sh roles/wordpress/files/health_check.sh {{ server_name }} {{ port }}"
  delegate_to: localhost
  register: health_status

- debug: msg="{{ health_status.stdout }}"

- name: Setup mariadb(mysql)
  command: "yum install -y mariadb mariadb-server warn=False"

- name: Backup current www folder
  shell: ‘mv {{ root }} {{ backup_to }}‘

- name: Close git ssl verification
  shell: ‘git config --global http.sslVerify false‘

- name: Clone WordPress repo to remote
  git: "repo=https://{{ gitlab_user | urlencode }}:{{ gitlab_pass | urlencode }}@gitlab.example.com/root/Wordpress-project.git dest=/data/www version={{ branch }}"
  when: project == ‘wordpress‘

- name: Change www folder permission
  file: "path=/data/www mode=0755 owner={{ user }} group={{ user }}"
2、上传到gitlab
# 回到wordpress_playbooks目录下

git add .
git commit -m"First commit"
git push origin master    #可能要输入用户名、密码
3、jenkins 任务
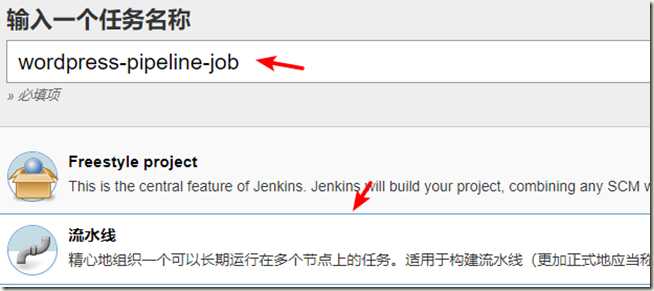
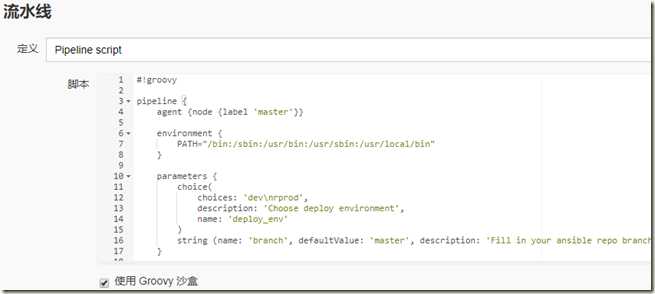
添加任务
#!groovy

pipeline {
    agent {node {label ‘master‘}}

    environment {
        PATH="/bin:/sbin:/usr/bin:/usr/sbin:/usr/local/bin"
    }

    parameters {
        choice(
            choices: ‘dev
rprod‘,
            description: ‘Choose deploy environment‘,
            name: ‘deploy_env‘
        )
        string (name: ‘branch‘, defaultValue: ‘master‘, description: ‘Fill in your ansible repo branch‘)
    }

    stages {
        stage ("Pull deploy code") {
            steps{
                sh ‘git config --global http.sslVerify false‘
                dir ("${env.WORKSPACE}"){
                    git branch: ‘master‘, credentialsId: ‘deeba975-e535-402b-b2e6-f9d7104389c7‘, url: ‘http://gitlab.example.com/root/ansible-playbook-repo.git‘
                }
            }

        }

        stage ("Check env") {
            steps {
                sh """
                set +x
                user=`whoami`
                if [ $user == deploy ]
                then
                    echo "[INFO] Current deployment user is $user"
                    source /home/deploy/.py3-a2.5-env/bin/activate
                    source /home/deploy/.py3-a2.5-env/ansible/hacking/env-setup -q
                    echo "[INFO] Current python version"
                    python --version
                    echo "[INFO] Current ansible version"
                    ansible-playbook --version
                    echo "[INFO] Remote system disk space"
                    ssh root@test.example.com df -h
                    echo "[INFO] Rmote system RAM"
                    ssh root@test.example.com free -m
                else
                    echo "Deployment user is incorrect, please check"
                fi

                set -x
                """
            }
        }

        stage ("Anisble deployment") {
            steps {
                input "Do you approve the deployment?"
                dir("${env.WORKSPACE}/wordpress_playbooks"){
                    echo "[INFO] Start deployment"
                    sh """
                    set +x
                    source /home/deploy/.py3-a2.5-env/bin/activate
                    source /home/deploy/.py3-a2.5-env/ansible/hacking/env-setup -q
                    ansible-playbook -i inventory/$deploy_env ./deploy.yml -e project=wordpress -e branch=$branch -e env=$deploy_env
                    set -x
                    """
                    echo "[INFO] Deployment finished..."
                }
            }
        }

    }

}
应用&&保存
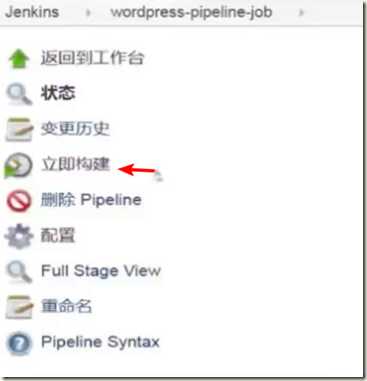
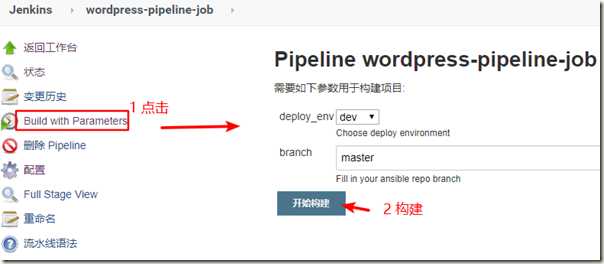
点击开始构建:
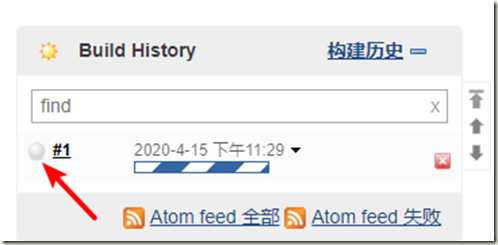
然后去查看构建信息:
进入构建信息后,选择Proceed :
此时任务失败了,返回任务界面;
再次构建:
再去查看构建信息,进入构建信息后,选择Proceed ;
稍等片刻,等待构建完成;
去测试机上开启mariadb,并初始化:
systemctl start mariadb

mysql_secure_installation   #创建数据库密码

mysql -uroot -p    #连接上数据库,创建一个库
create databases wordpress character set utf8;
浏览器访问test.example.com:8080 完成WordPress的安装;
以上是关于jenkins pipeline job实战的主要内容,如果未能解决你的问题,请参考以下文章
jenkins 2 pipeline怎么获取各个阶段的log

