react 高阶组件的实现
Posted nimon-hugo
tags:
篇首语:本文由小常识网(cha138.com)小编为大家整理,主要介绍了react 高阶组件的实现相关的知识,希望对你有一定的参考价值。
由于强大的mixin功能,在react组件开发过程中存在众多不理于组件维护的因素,所以react社区提出了新的方法来替换mixin,那就是高阶组件;
首先在工程中安装高阶组件所需的依赖:
npm install @babel/plugin-proposal-decorators
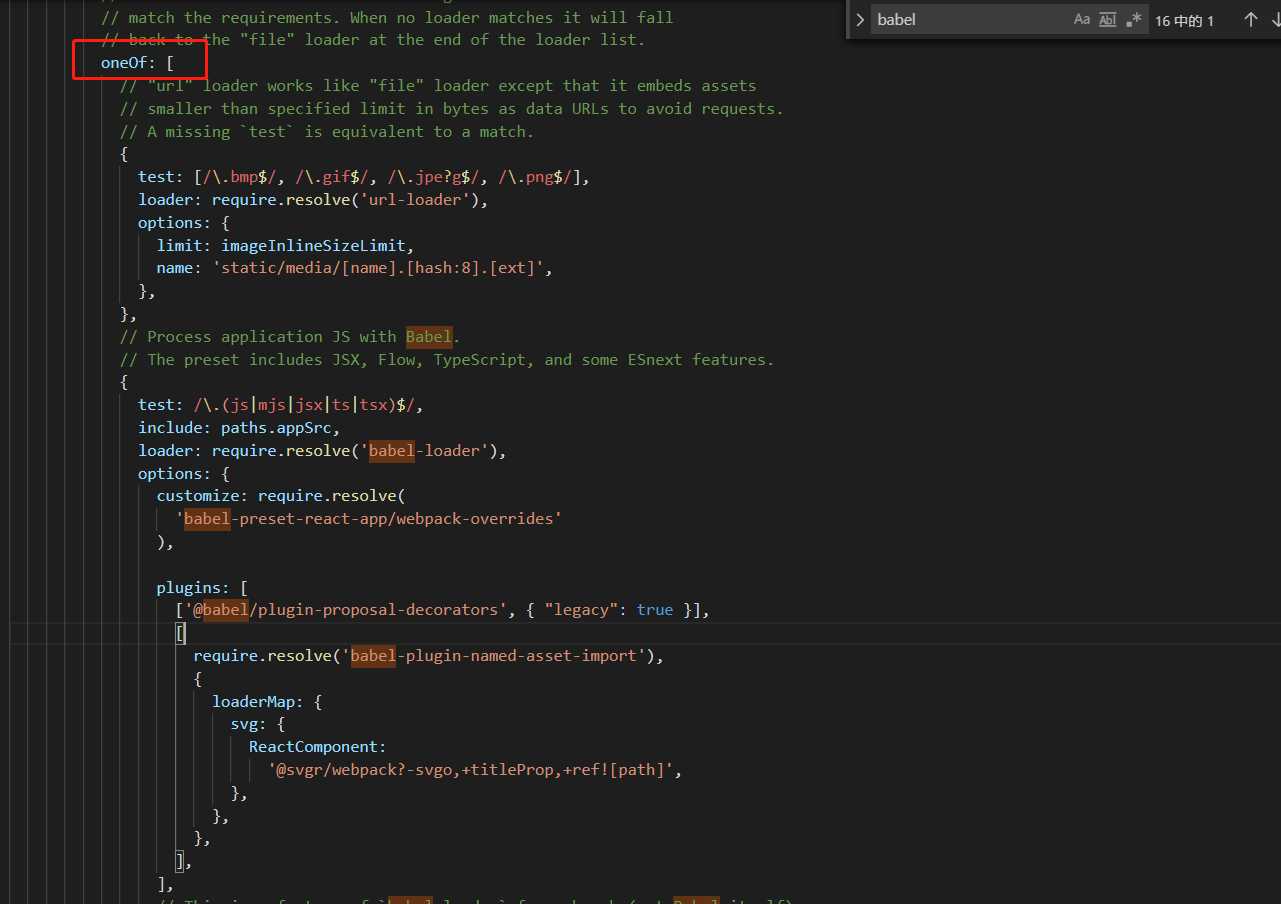
然后输入命令npm eject,接着在工程中找到webpack.config.js,找到下图中的位置:

//在plugins数组里添加下面这个元素,保存即可
[‘@babel/plugin-proposal-decorators‘, { "legacy": true }],
配置好之后:创建两个组件:(MyContainer:高阶组件)、(MyComponent:普通组件)
高阶组件:MyContainer/index.js
// 高阶组件 myContainer
import React,{Component} from ‘react‘;

const MyContainer =(WrappedComponent)=>{
  return class extends Component{
    constructor(props){
      super(props);
      this.state={
        name:‘‘,
      };
      this.onNameChange=this.onNameChange.bind(this);

    }
    onNameChange(event){
      console.log(event.target.value);
      this.setState({
        name:event.target.value,
      })
    }
    render(){
      const newProps={
        name:{
          value:this.state.name,
          onChange:this.onNameChange
        }
      }
      return <WrappedComponent {...this.props} {...newProps}></WrappedComponent>
    }
  }
}
export default MyContainer;
普通组件:MyComponent/index.js
//需要用高阶组件中的peops的组件
import React,{Component} from ‘react‘;
import MyContainer from ‘../Mycontainer/index‘;

@MyContainer
class MyComponent extends Component{
  componentDidMount=()=>{
    console.log(this.props)
  }
  render(){
    return <input name="MyComponent" {...this.props.name} onChange={this.props.name.onChange}></input>
  }
}
export default MyComponent;
到这里,MyComponent组件就可以使用高阶组件里面的公共属性和方法了,提高了代码的复用性;
以上是关于react 高阶组件的实现的主要内容,如果未能解决你的问题,请参考以下文章