vue中 拖动元素边框 改变元素宽度
Posted wangnothings
tags:
篇首语:本文由小常识网(cha138.com)小编为大家整理,主要介绍了vue中 拖动元素边框 改变元素宽度相关的知识,希望对你有一定的参考价值。
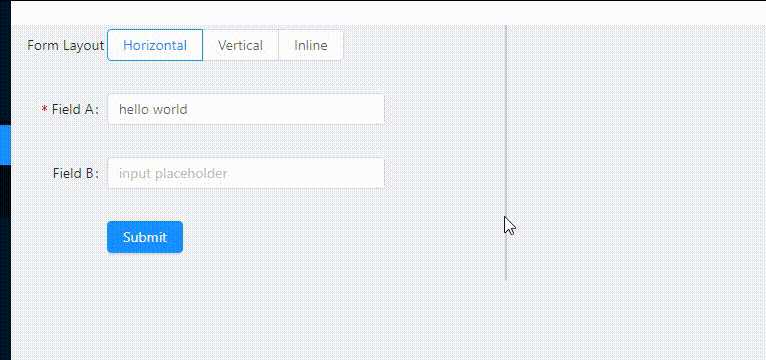
先上效果图:

如图所示,通过拖动来改变表单的宽度。
但实际上,这边并不是表单的边框,而是一个单独的组件。通过监听鼠标的down,move以及up事件。
我们可以单独的写个组件handle.vue。
<template>
  <div class="x-handle" @mousedown="mouseDown"></div>
</template>

<script>
export default {
  name: "XHandle",
  data() {
    return {
      lastX: ""
    };
  },

  created() {
    document.addEventListener("mouseup", this.mouseUp);
  },

  destroyed() {
    document.removeEventListener("mouseup", this.mouseUp);
  },

  methods: {
    mouseDown(event) {
      document.addEventListener("mousemove", this.mouseMove);
      this.lastX = event.screenX;
    },
    mouseMove(event) {
      this.$emit("widthChange", this.lastX - event.screenX);
      this.lastX = event.screenX;
      console.log(this.lastX, "...", event.screenX);
    },
    mouseUp() {
      this.lastX = "";
      document.removeEventListener("mousemove", this.mouseMove);
    }
  }
};
</script>
<style lang="less">
.x-handle {
  width: 2px;
  cursor: w-resize;
  z-index: 10;
  background: #ccc;
}
</style>
监听事件并this.$emit将值传给父组件,父组件通过传过来的值来动态的修改需要改变宽度的元素。
如效果图所示,写一个有需求组件,并引入handle组件
<div class=‘sss‘>
  <div  :style="{ width: width + ‘px‘ }" ></div> // 这里是你自己需要改变宽度的组件
  <XHandle class="myxhandle" @widthChange="widthChange" />
</div>
<script>
import XHandle from "@/components/Xhandle";
export default {
  data() {
    return {
      width: 700,
    };
  },
  components: {
    XHandle
  },

  methods: {
    widthChange(movement) {
      console.log(movement, "~~~");
      this.width -= movement;
      if (this.width < 300) {
        this.width = 300;
      }
      if (this.width > 700) {
        this.width = 700;
      }
    }
  }
};
</script>

<style lang="less" scoped>
.sss {
  display: flex;
}
</style>
这里将需要改变宽度的元素给一个双向绑定的值,然后通过子组件传来的值修改。再将两个元素弹性布局,相当于hanle组件就会
贴着我们需要拖动的元素,看上去是再拖动我们要改变宽度的元素,其实是在拖动我们的handle。
以上是关于vue中 拖动元素边框 改变元素宽度的主要内容,如果未能解决你的问题,请参考以下文章