WPF 透视相机的UpDirection(向上方向)
Posted lonelyxmas
tags:
篇首语:本文由小常识网(cha138.com)小编为大家整理,主要介绍了WPF 透视相机的UpDirection(向上方向)相关的知识,希望对你有一定的参考价值。
原文:WPF 透视相机的UpDirection(向上方向)
透视相机的updirection,是具有三个参数的的属性(X,Y,Z),不过Z属性是没有作用的。
也就是说这一个立体中的平面坐标系。
那么X,Y是什么呢?
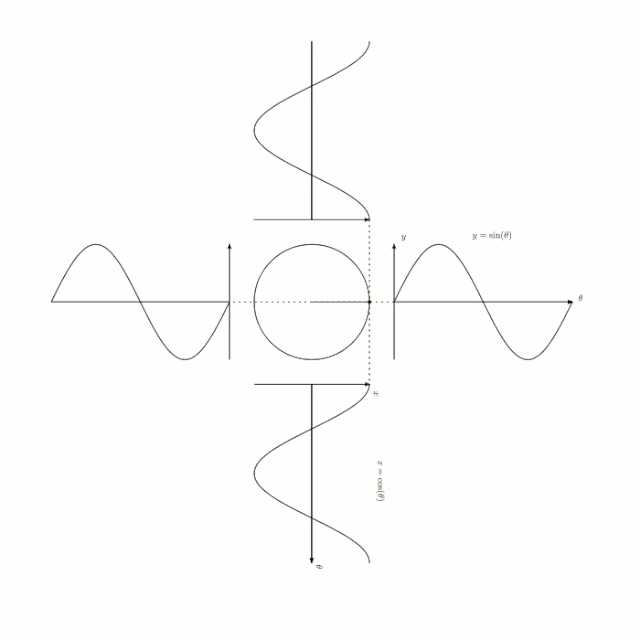
我们知道在X,Y坐标轴系内单位圆上的点,都是可以用的cosX,sinY来表示。
网上找的图

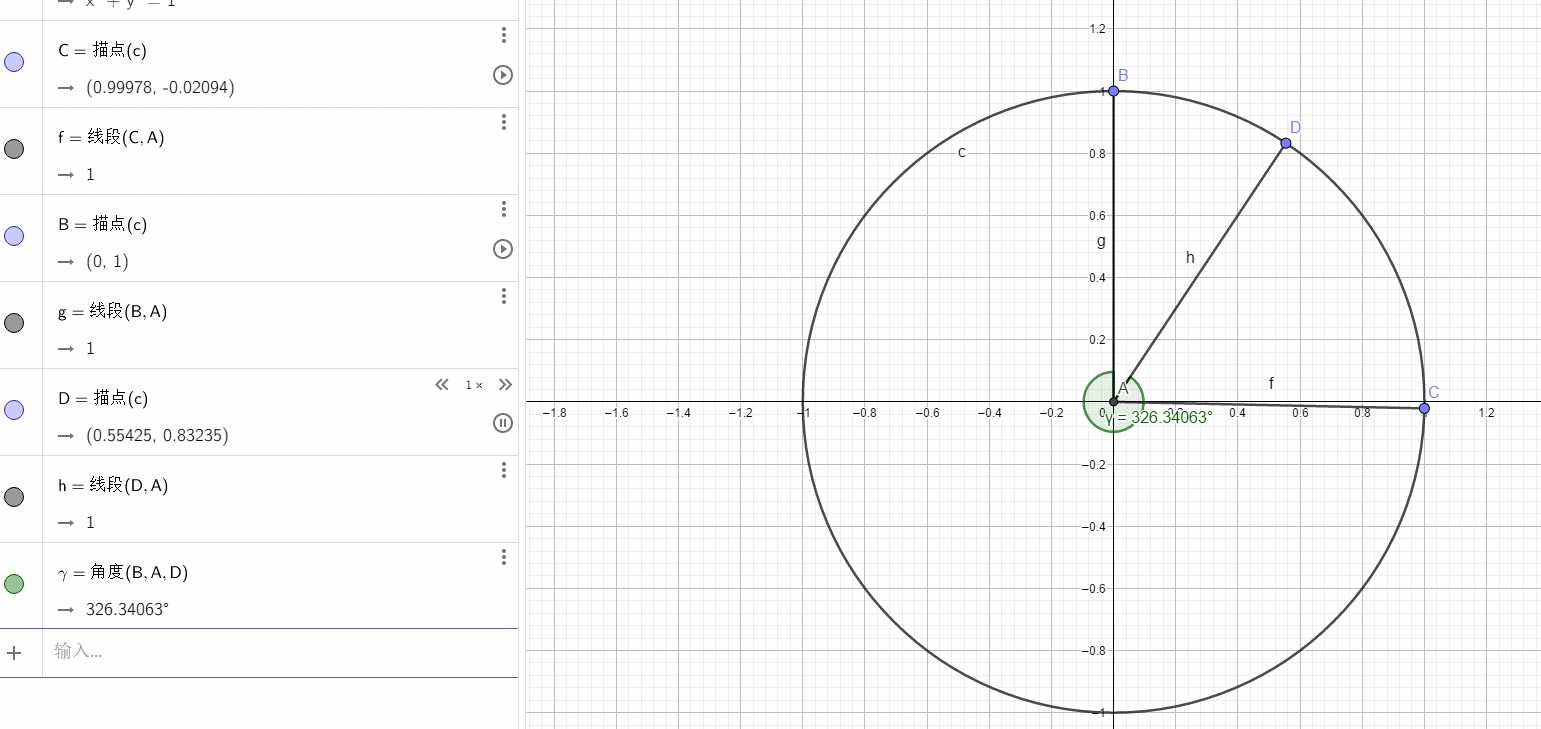
假设,XY坐标系内画一个直径为1的圆(圆心[0,0])
确定好圆上的点连接圆心之后和Y轴之间的夹角之后再用反三角函数求出角度即可
比如说我用sin函数
当确定X,Y值后,点连接圆心,长度为1,圆心角的对边长度为X坐标,斜边长度为1(不知道为什么直接写1不好使,必须用勾股定理求一下斜边),之后再arcsin函数转角度就好了。
转换器
 class MC : IMultiValueConverter
    {
        public object Convert(object[] values, Type targetType, object parameter, CultureInfo culture)
        {
            var v = Activator.CreateInstance(targetType,values);
            return v;
       //     throw new NotImplementedException();
        }

        public object[] ConvertBack(object value, Type[] targetTypes, object parameter, CultureInfo culture)
        {
            throw new NotImplementedException();
        }
    }
    class Deg : IMultiValueConverter
    {
        public object Convert(object[] values, Type targetType, object parameter, CultureInfo culture)
        {
            double a = double.Parse(values[0].ToString());
            double b = double.Parse(values[1].ToString());
            var d = Math.Sqrt(a * a + b * b);
            Debug.WriteLine(d);
            var c = (Math.Asin(a/d )/Math.PI) * 180.0;
            return c.ToString();
        }

        public object[] ConvertBack(object value, Type[] targetTypes, object parameter, CultureInfo culture)
        {
            throw new NotImplementedException();
        }
    }
<Window.Resources>
        <local:MC x:Key="mc"/>
        <local:Deg x:Key="dc"/>
    </Window.Resources>
    <Grid>
        <Grid.RowDefinitions>
            <RowDefinition/>
            <RowDefinition/>
        </Grid.RowDefinitions>
        <Viewport3D>
            <Viewport3D.Camera>
                <PerspectiveCamera Position="0,0,10"   LookDirection="0,0,-10">
                    <PerspectiveCamera.UpDirection>
                        <MultiBinding  Converter="{StaticResource mc}">
                            <Binding ElementName="s1" Path="Value"/>
                            <Binding ElementName="s2" Path="Value"/>
                            <Binding ElementName="s3" Path="Value"/>
                        </MultiBinding>
                    </PerspectiveCamera.UpDirection>
                </PerspectiveCamera>
            </Viewport3D.Camera>
            <ModelVisual3D>
                <ModelVisual3D.Content>
                    <DirectionalLight Color="White" Direction="-1,-1,-1"/>
                </ModelVisual3D.Content>
            </ModelVisual3D>
            <ModelVisual3D>
                <ModelVisual3D.Content>

                    <GeometryModel3D>
                        <GeometryModel3D.Geometry>
                            <MeshGeometry3D Positions="-1,0,0  0,1,0  1,0,0" TriangleIndices="0,2,1"/>
                        </GeometryModel3D.Geometry>
                        <GeometryModel3D.Material>
                            <DiffuseMaterial Brush="Red"   />
                        </GeometryModel3D.Material>
                    </GeometryModel3D>
                </ModelVisual3D.Content>
            </ModelVisual3D>
        </Viewport3D>
        <Grid Grid.Row="1">
            <Grid.ColumnDefinitions>
                <ColumnDefinition/>
                <ColumnDefinition/>
            </Grid.ColumnDefinitions>
            <StackPanel >
                <Slider LargeChange="0.1" Maximum="1" Minimum="-1" Value="{Binding ElementName=c1, Path=Text,UpdateSourceTrigger=PropertyChanged}" x:Name="s1"/>
                <Slider  LargeChange="0.1" Maximum="1" Minimum="-1" Value="{Binding ElementName=c2, Path=Text,UpdateSourceTrigger=PropertyChanged}" x:Name="s2"/>
                <Slider Maximum="10" Minimum="-10" Value="0" x:Name="s3"/>

            </StackPanel>
            <StackPanel Grid.Column="1">
                <TextBlock Text="{Binding ElementName=s1,Path=Value}"/>
                <TextBlock  Text="{Binding ElementName=s2,Path=Value}"/>
                <TextBlock Text="{Binding ElementName=s3,Path=Value}"/>
                <TextBlock >
                    <TextBlock.Text>
                        <MultiBinding Converter="{StaticResource dc}">
                            <Binding ElementName="s1" Path="Value"/>
                            <Binding ElementName="s2" Path="Value"/>
                        </MultiBinding>
                    </TextBlock.Text>
                </TextBlock>
                <TextBox x:Name="c1"/>
                <TextBox  x:Name="c2"/>
            </StackPanel>
        </Grid>
    </Grid>
值得注意的是 这个是旋转的是摄像机旋转,物体是不动的,也就是左右方向是反的。
最后上传
其他软件的对照角度和XY坐标,可以自己验证一下

以上是关于WPF 透视相机的UpDirection(向上方向)的主要内容,如果未能解决你的问题,请参考以下文章
