SSM环境搭建回顾
Posted llf7
tags:
篇首语:本文由小常识网(cha138.com)小编为大家整理,主要介绍了SSM环境搭建回顾相关的知识,希望对你有一定的参考价值。

编辑器:IDEA
系统:Win 10
包管理:maven
SSM:SpringMvc、Spring、MyBatis
一、搭建 maven的父子工程
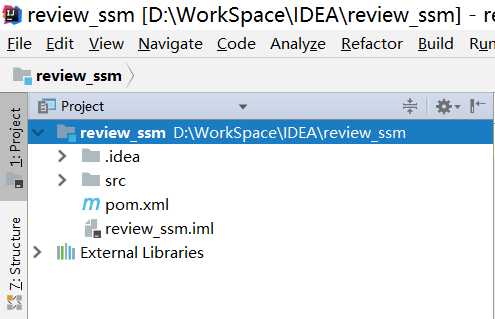
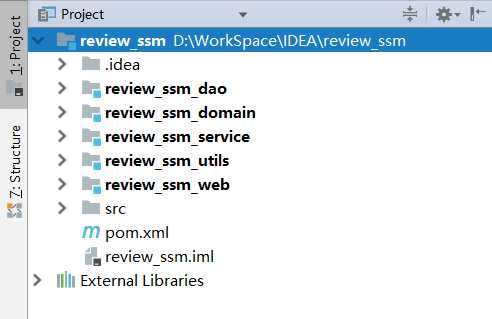
- 先建立 ssm 的父工程 review_ssm

- 再分别建立 domain、dao、service、utils子模块,以及最后创建使用maven的webapp骨架构建的 web模块

构建 web骨架的时候记得补全目录

二、导包
在父工程中导入相关的依赖。
    <properties>
        <spring.version>5.0.2.RELEASE</spring.version>
        <slf4j.version>1.6.6</slf4j.version>
        <log4j.version>1.2.12</log4j.version>
        <oracle.version>11.2.0.1.0</oracle.version>
        <mybatis.version>3.4.5</mybatis.version>
        <spring.security.version>5.0.1.RELEASE</spring.security.version>
    </properties>

    <dependencies>        <!-- spring -->
        <dependency>
            <groupId>org.aspectj</groupId>
            <artifactId>aspectjweaver</artifactId>
            <version>1.6.8</version>
        </dependency>
        <dependency>
            <groupId>org.springframework</groupId>
            <artifactId>spring-aop</artifactId>
            <version>${spring.version}</version>
        </dependency>
        <dependency>
            <groupId>org.springframework</groupId>
            <artifactId>spring-context</artifactId>
            <version>${spring.version}</version>
        </dependency>
        <dependency>
            <groupId>org.springframework</groupId>
            <artifactId>spring-context-support</artifactId>
            <version>${spring.version}</version>
        </dependency>
        <dependency>
            <groupId>org.springframework</groupId>
            <artifactId>spring-web</artifactId>
            <version>${spring.version}</version>
        </dependency>
        <dependency>
            <groupId>org.springframework</groupId>
            <artifactId>spring-orm</artifactId>
            <version>${spring.version}</version>
        </dependency>
        <dependency>
            <groupId>org.springframework</groupId>
            <artifactId>spring-beans</artifactId>
            <version>${spring.version}</version>
        </dependency>
        <dependency>
            <groupId>org.springframework</groupId>
            <artifactId>spring-core</artifactId>
            <version>${spring.version}</version>
        </dependency>
        <dependency>
            <groupId>org.springframework</groupId>
            <artifactId>spring-test</artifactId>
            <version>${spring.version}</version>
        </dependency>
        <dependency>
            <groupId>org.springframework</groupId>
            <artifactId>spring-webmvc</artifactId>
            <version>${spring.version}</version>

        </dependency>
        <dependency>
            <groupId>org.springframework</groupId>
            <artifactId>spring-tx</artifactId>
            <version>${spring.version}</version>
        </dependency>
        <dependency>
            <groupId>junit</groupId>
            <artifactId>junit</artifactId>
            <version>4.12</version>
            <scope>test</scope>
        </dependency>

        <dependency>
            <groupId>javax.servlet</groupId>
            <artifactId>javax.servlet-api</artifactId>
            <version>3.1.0</version>
            <scope>provided</scope>
        </dependency>
        <dependency>
            <groupId>javax.servlet.jsp</groupId>
            <artifactId>jsp-api</artifactId>
            <version>2.0</version>
            <scope>provided</scope>
        </dependency>
        <dependency>
            <groupId>jstl</groupId>
            <artifactId>jstl</artifactId>
            <version>1.2</version>
        </dependency>        <!-- log start -->
        <dependency>
            <groupId>log4j</groupId>
            <artifactId>log4j</artifactId>
            <version>${log4j.version}</version>
        </dependency>
        <dependency>
            <groupId>org.slf4j</groupId>
            <artifactId>slf4j-api</artifactId>
            <version>${slf4j.version}</version>
        </dependency>
        <dependency>
            <groupId>org.slf4j</groupId>
            <artifactId>slf4j-log4j12</artifactId>
            <version>${slf4j.version}</version>
        </dependency>        <!-- log end -->

        <dependency>
            <groupId>org.mybatis</groupId>
            <artifactId>mybatis</artifactId>
            <version>${mybatis.version}</version>
        </dependency>
        <dependency>
            <groupId>org.mybatis</groupId>
            <artifactId>mybatis-spring</artifactId>
            <version>1.3.0</version>
        </dependency>
        <dependency>
            <groupId>c3p0</groupId>
            <artifactId>c3p0</artifactId>
            <version>0.9.1.2</version>
            <type>jar</type>
            <scope>compile</scope>
        </dependency>
        <dependency>
            <groupId>com.github.pagehelper</groupId>
            <artifactId>pagehelper</artifactId>
            <version>5.1.2</version>
        </dependency>
        <dependency>
            <groupId>org.springframework.security</groupId>
            <artifactId>spring-security-web</artifactId>
            <version>${spring.security.version}</version>
        </dependency>
        <dependency>
            <groupId>org.springframework.security</groupId>
            <artifactId>spring-security-config</artifactId>
            <version>${spring.security.version}</version>
        </dependency>
        <dependency>
            <groupId>org.springframework.security</groupId>
            <artifactId>spring-security-core</artifactId>
            <version>${spring.security.version}</version>
        </dependency>
        <dependency>
            <groupId>org.springframework.security</groupId>
            <artifactId>spring-security-taglibs</artifactId>
            <version>${spring.security.version}</version>
        </dependency>

        <dependency>
            <groupId>com.oracle</groupId>
            <artifactId>ojdbc14</artifactId>
            <version>${oracle.version}</version>
        </dependency>

        <dependency>
            <groupId>javax.annotation</groupId>
            <artifactId>jsr250-api</artifactId>
            <version>1.0</version>
        </dependency>
    </dependencies>
    <build>
        <pluginManagement>
            <plugins>
                <plugin>
                    <groupId>org.apache.maven.plugins</groupId>
                    <artifactId>maven-compiler-plugin</artifactId>
                    <version>3.2</version>
                    <configuration>
                        <source>1.8</source>
                        <target>1.8</target>
                        <encoding>UTF-8</encoding>
                        <showWarnings>true</showWarnings>
                    </configuration>
                </plugin>
            </plugins>
        </pluginManagement>
    </build>
三、开始 ssm整合配置文件的编写

编写实体类(domain),编写业务接口(service),编写持久层接口(dao)
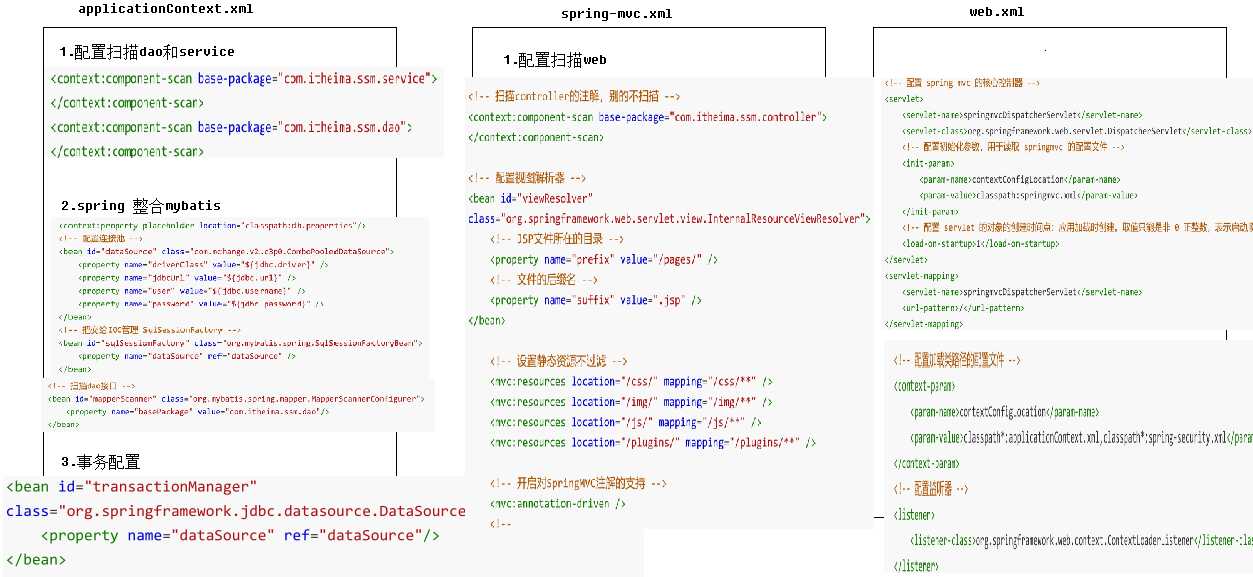
spring环境搭建(applicationContext) 编写业务层实现类(使用注解Service)
==========applicationContext============
<!-- 开启注解扫描,管理service和dao -->
<context:component-scan base-package="com.cnblogs.ssm.service">
</context:component-scan>
<context:component-scan base-package="com.cnblogs.ssm.dao">
</context:component-scan>
springmvc环境搭建以及,spring和mvc的整合
========web.xml========
<?xml version="1.0" encoding="UTF-8"?>
<web-app xmlns:xsi="http://www.w3.org/2001/XMLSchema-instance"
	xmlns="http://xmlns.jcp.org/xml/ns/javaee"
	xsi:schemaLocation="http://xmlns.jcp.org/xml/ns/javaee http://xmlns.jcp.org/xml/ns/javaee/web-app_3_1.xsd"
	version="3.1">

	<!-- 配置加载类路径的配置文件 -->
	<context-param>
		<param-name>contextConfigLocation</param-name>
		<param-value>classpath*:applicationContext.xml,classpath*:spring-security.xml</param-value>
	</context-param>

<!-- 配置监听器 -->
	<listener>
		<listener-class>org.springframework.web.context.ContextLoaderListener</listener-class>
	</listener>
	<!-- 配置监听器,监听request域对象的创建和销毁的 -->
	<listener>
		<listener-class>org.springframework.web.context.request.RequestContextListener</listener-class>
	</listener>


	<!-- 前端控制器(加载classpath:springmvc.xml 服务器启动创建servlet) -->
	<servlet>
		<servlet-name>dispatcherServlet</servlet-name>
		<servlet-class>org.springframework.web.servlet.DispatcherServlet</servlet-class>
		<!-- 配置初始化参数,创建完DispatcherServlet对象,加载springmvc.xml配置文件 -->
		<init-param>
			<param-name>contextConfigLocation</param-name>
			<param-value>classpath:springmvc.xml</param-value>
		</init-param>
		<!-- 服务器启动的时候,让DispatcherServlet对象创建 -->
		<load-on-startup>1</load-on-startup>
	</servlet>
	<servlet-mapping>
		<servlet-name>dispatcherServlet</servlet-name>
		<url-pattern>*.do</url-pattern>
	</servlet-mapping>

	<!-- 解决中文乱码过滤器 -->
	<filter>
		<filter-name>characterEncodingFilter</filter-name>
		<filter-class>org.springframework.web.filter.CharacterEncodingFilter</filter-class>
		<init-param>
			<param-name>encoding</param-name>
			<param-value>UTF-8</param-value>
		</init-param>
	</filter>
	<filter-mapping>
		<filter-name>characterEncodingFilter</filter-name>
		<url-pattern>/*</url-pattern>
	</filter-mapping>

	<!-- 委派过滤器 -->
	<filter>
		<filter-name>springSecurityFilterChain</filter-name>
		<filter-class>org.springframework.web.filter.DelegatingFilterProxy</filter-class>
	</filter>
	<filter-mapping>
		<filter-name>springSecurityFilterChain</filter-name>
		<url-pattern>/*</url-pattern>
	</filter-mapping>

	<welcome-file-list>
		<welcome-file>index.html</welcome-file>
		<welcome-file>index.htm</welcome-file>
		<welcome-file>index.jsp</welcome-file>
		<welcome-file>default.html</welcome-file>
		<welcome-file>default.htm</welcome-file>
		<welcome-file>default.jsp</welcome-file>
	</welcome-file-list>
</web-app>
=========spring-mvc.xml=========
<?xml version="1.0" encoding="UTF-8"?>
<beans xmlns="http://www.springframework.org/schema/beans"
	xmlns:mvc="http://www.springframework.org/schema/mvc"
	xmlns:context="http://www.springframework.org/schema/context"
	xmlns:xsi="http://www.w3.org/2001/XMLSchema-instance"
	xmlns:aop="http://www.springframework.org/schema/aop"
	xsi:schemaLocation="
           http://www.springframework.org/schema/beans
           http://www.springframework.org/schema/beans/spring-beans.xsd
           http://www.springframework.org/schema/mvc
           http://www.springframework.org/schema/mvc/spring-mvc.xsd
           http://www.springframework.org/schema/context
           http://www.springframework.org/schema/context/spring-context.xsd
           http://www.springframework.org/schema/aop
		http://www.springframework.org/schema/aop/spring-aop.xsd
           ">

	<!-- 扫描controller的注解,别的不扫描 -->
	<context:component-scan base-package="com.cnblog.ssm.controller">
	</context:component-scan>

	<!-- 配置视图解析器 -->
	<bean id="viewResolver" class="org.springframework.web.servlet.view.InternalResourceViewResolver">
		<!-- JSP文件所在的目录 -->
		<property name="prefix" value="/pages/" />
		<!-- 文件的后缀名 -->
		<property name="suffix" value=".jsp" />
	</bean>

	<!-- 设置静态资源不过滤 -->
	<mvc:resources location="/css/" mapping="/css/**" />
	<mvc:resources location="/img/" mapping="/img/**" />
	<mvc:resources location="/js/" mapping="/js/**" />
	<mvc:resources location="/plugins/" mapping="/plugins/**" />

	<!-- 开启对SpringMVC注解的支持 -->
	<mvc:annotation-driven />

	<!--
		支持AOP的注解支持,AOP底层使用代理技术
		JDK动态代理,要求必须有接口
		cglib代理,生成子类对象,proxy-target-class="true" 默认使用cglib的方式
	-->
	<aop:aspectj-autoproxy proxy-target-class="true"/>

</beans>
spring和 mybatis的整合(主要是配置数据源和sqlsessionFactory)
=========applicationContext=============
<context:property-placeholder location="classpath:db.properties"/>
	<!-- 配置连接池 -->
	<bean id="dataSource" class="com.mchange.v2.c3p0.ComboPooledDataSource">
   		<property name="driverClass" value="${jdbc.driver}" />
   		<property name="jdbcUrl" value="${jdbc.url}" />
   		<property name="user" value="${jdbc.username}" />
   		<property name="password" value="${jdbc.password}" />
   	</bean>
	<!-- 交给IOC管理 SqlSessionFactory -->
	<bean id="sqlSessionFactory" class="org.mybatis.spring.SqlSessionFactoryBean">
   		<property name="dataSource" ref="dataSource" />
   	</bean>

	<!-- 扫描dao接口 -->
	<bean id="mapperScanner" class="org.mybatis.spring.mapper.MapperScannerConfigurer">
   		<property name="basePackage" value="com.cnblog.ssm.dao"/>
   	</bean>

	<!-- 配置Spring的声明式事务管理 -->
	<!-- 配置事务管理器 -->
   	<bean id="transactionManager" class="org.springframework.jdbc.datasource.DataSourceTransactionManager">
   		<property name="dataSource" ref="dataSource"/>
   	</bean>

  <tx:annotation-driven transaction-manager="transactionManager"/>
以上是关于SSM环境搭建回顾的主要内容,如果未能解决你的问题,请参考以下文章