Appium+python移动自动化测试--Monitor/uiautomatorviewer工具及元素定位方法
Posted qianmaoliugou
tags:
篇首语:本文由小常识网(cha138.com)小编为大家整理,主要介绍了Appium+python移动自动化测试--Monitor/uiautomatorviewer工具及元素定位方法相关的知识,希望对你有一定的参考价值。
写在前面:
本文介绍识别元素的工具和元素的定位方法,识别元素的工具主要有uiautomator和monitor,以及Appium Inspector(Windows下小编在1.7.0之后版本可使用,1.4.16版本不行),本系列教程用的appium1.4.16本文,故暂不介绍Appium Inspector。
一、常用的识别元素的工具介绍
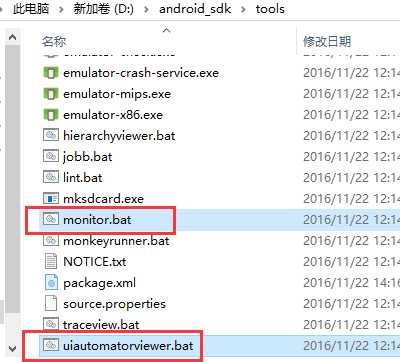
- 启动uiautomatorviewer.bat/monitor.bat。打开sdk/tools目录找到uiautomatorviewer.bat/monitor.bat.如图:
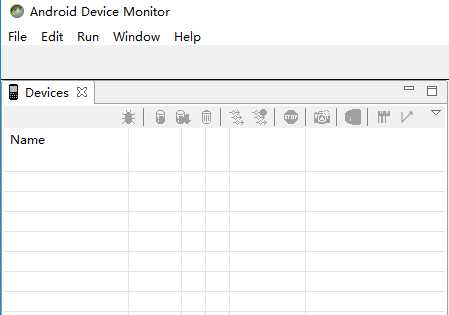
- 双击后启动,启动后如图
二、Monitor连接手机
- win+R快捷键输入cmd打开,输入adb devices,确认当前有设备接入。
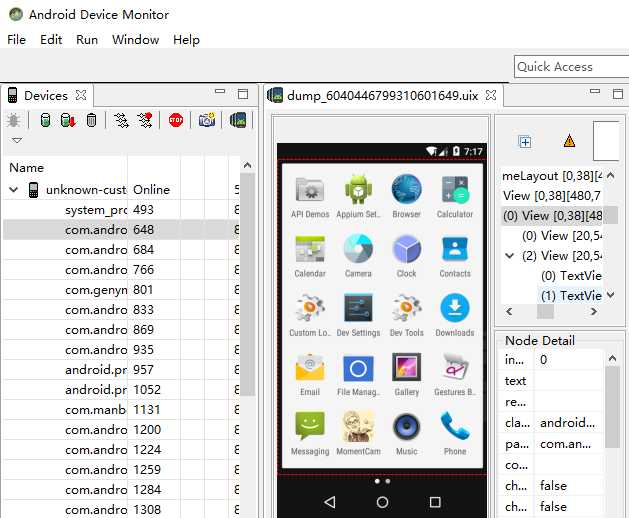
- 打开魔漫相机主界面,在Monitor界面点击手机机器人小图标
 ,此按钮每次都会刷新最新界面
三、定位元素
- 移动鼠标到需要定位的元素区域,并点击一下,使红色实线条框住。点击按钮进漫画
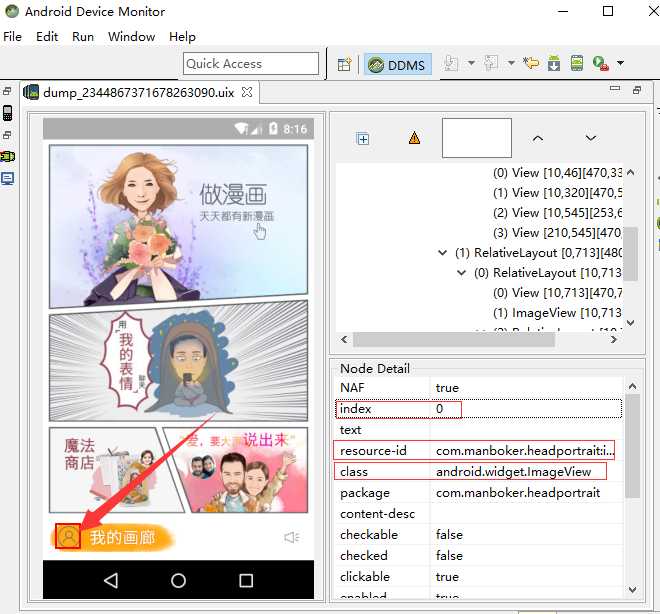
Node Detail里能看到元素对应的属性
resource-id:com.manboker.headportrait:id/entry_album_set
class:android.widget.ImageView
index 界面有多个相同属性时使用
四、点击我的按钮
通过resource-id定位并点击.最终代码如下:
#coding:utf-8
import time
from appium import webdriver

desired_caps = {}
desired_caps[‘deviceName‘] = ‘192.168.199.101:5555‘
desired_caps[‘platformName‘] = ‘Android‘
desired_caps[‘platformVersion‘] = ‘5.0‘
desired_caps[‘appPackage‘] = ‘com.manboker.headportrait‘
desired_caps[‘appActivity‘] = ‘com.manboker.headportrait.activities.FirstActivity‘
driver = webdriver.Remote(‘http://localhost:4723/wd/hub‘, desired_caps)
time.sleep(8)#休眠8秒
driver.find_element_by_id(‘com.manboker.headportrait:id/entry_album_set‘).click()#点击进入我的页面
driver.quit()
五、Appium工具简单使用介绍
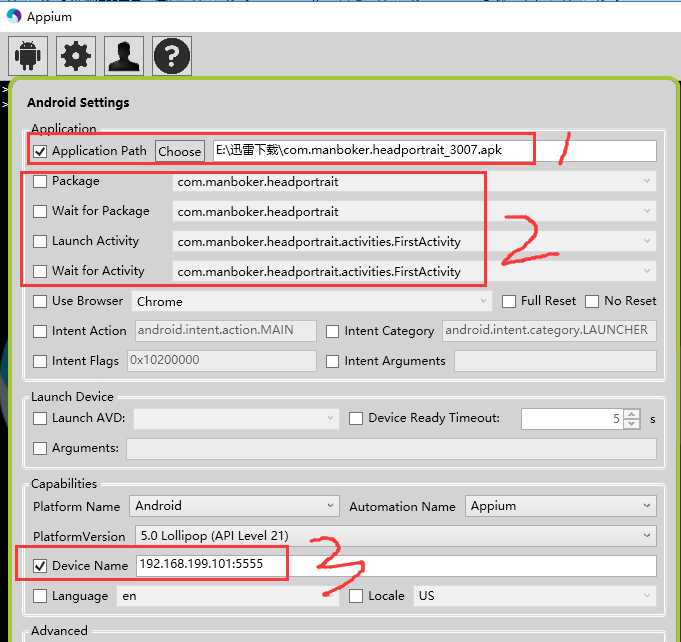
- 双击appium.exe打开,进setting界面。如下截图1是被测apk的路径,截图2查看app的包名及Launch Activity,截图3是被测app的设备名
- 开启appium
确认手机成功电脑,点击搜索按钮右侧的三角形图标启动appium服务,当界面出现如下现象则证明服务已启动。
- Remote远程控制(appium--General Setting界面)
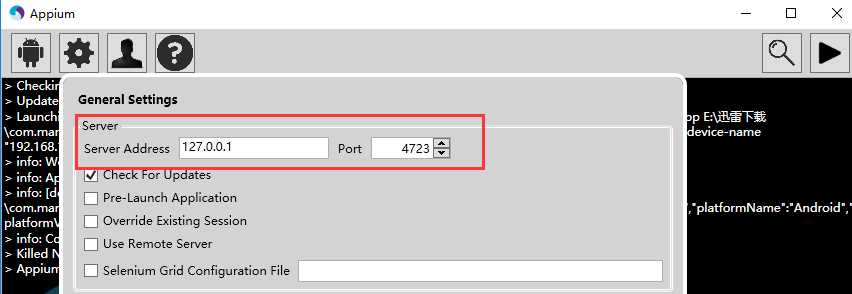
appium默认服务地址是127.0.0.1端口号4723,一般在本地机器上调试的话,无需修改。
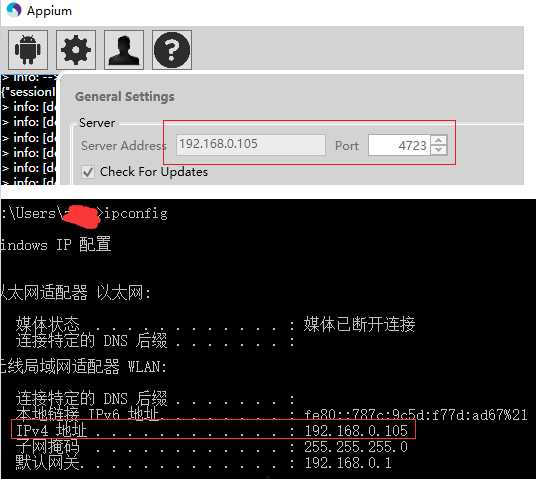
若是远程到某台自动化测试电脑运行则此ip就能派上用场了,通过修改如下代码即可
driver = webdriver.Remote(‘http://localhost:4723/wd/hub‘, desired_caps)改成:
driver = webdriver.Remote(‘http://192.168.0.105:4723/wd/hub‘, desired_caps)截图如下:ipconfig查看电脑ip
- 远程连接
浏览器输入:http://192.168.0.105:4723/wd/hub,看到如下界面,证明远程链接成功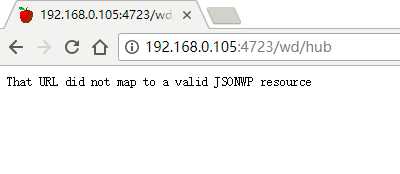
- 脚本里的代码修改后如下
#coding:utf-8
import time
from appium import webdriver
desired_caps = {}
desired_caps[‘deviceName‘] = ‘192.168.199.101:5555‘
desired_caps[‘platformName‘] = ‘Android‘
desired_caps[‘platformVersion‘] = ‘5.0‘
desired_caps[‘appPackage‘] = ‘com.manboker.headportrait‘
desired_caps[‘appActivity‘] = ‘com.manboker.headportrait.activities.FirstActivity‘
driver = webdriver.Remote(‘http://192.168.0.105:4723/wd/hub‘, desired_caps)
time.sleep(8)#休眠8秒
driver.find_element_by_id(‘com.manboker.headportrait:id/entry_album_set‘).click()
time.sleep(5)
driver.quit()
六、元素定位(常用方法)
- 通过id定位
取resource-id的值:driver.find_element_by_id(‘com.manboker.headportrait:id/entry_album_set‘) - 通过class_name定位
取class内容:driver.find_element_by_class_name("android.widget.ImageView") - 通过text定位
使用text的内容:driver.find_elements_by_android_uiautomator("new UiSelector().text(\\"登录\\")") - 通过name定位:driver.find_element_by_name()
- 通过xpath定位:driver.find_element_by_xpath("//android.widget.TextView[@resource-id=\\"com.manboker.headportrait:id/nologin_retry\\"]")
- 通过css_selector定位:driver.find_element_by_css_selector()
如上的方法pycharm输入driver.find_element_by会自动匹配出来。
OK,本文就介绍到这,下篇介绍Appium Python API。
以上是关于Appium+python移动自动化测试--Monitor/uiautomatorviewer工具及元素定位方法的主要内容,如果未能解决你的问题,请参考以下文章