003 ansible部署ceph集群
Posted zyxnhr
tags:
篇首语:本文由小常识网(cha138.com)小编为大家整理,主要介绍了003 ansible部署ceph集群相关的知识,希望对你有一定的参考价值。
介绍:在上一次的deploy部署ceph,虽然出了结果,最后的结果并没有满足最初的目的,现在尝试使用ansible部署一遍,看是否会有问题
一、环境准备
ceph1充当部署节点,ceph2,ceph3,ceph4充当ceph集群节点
| IP | 主机名 | 节点 | 系统 |
|---|---|---|---|
| 172.25.250.10 | ceph1 | ceph-ansible | Red Hat release 7.4 |
| 172.25.250.11 | ceph2 | mon、mgr、osd | Red Hat release 7.4 |
| 172.25.250.12 | ceph3 | mon、mgr、osd | Red Hat release 7.4 |
| 172.25.250.10 | ceph4 | mon、mgr、osd | Red Hat release 7.4 |
1.1 ceph1配置hosts
172.25.250.10  ceph1
172.25.250.11  ceph2
172.25.250.12  ceph3
172.25.250.13  ceph4
1.2 配置免密登录
[[email protected] ~]# ssh-keygen
[[email protected] ~]# ssh-copy-id -i .ssh/id_rsa.pub ceph1
[[email protected] ~]# ssh-copy-id -i .ssh/id_rsa.pub ceph2
[[email protected] ~]# ssh-copy-id -i .ssh/id_rsa.pub ceph3
[[email protected] ~]# ssh-copy-id -i .ssh/id_rsa.pub ceph4
二,部署ceph集群
2.1部署节点安装ansible
注:再部署之前,一般需要配置yum源和时间服务器ntp配置
[[email protected] ~]# yum -y install ansible
[[email protected] ~]# cd /etc/ansible/
[[email protected] ansible]# ll

2.2 定义hosts
[[email protected] ansible]# vim hosts
[mons]
ceph2
ceph3
ceph4
[mgrs]
ceph2
ceph3
ceph4
[osds]
ceph2
ceph3
ceph4
[clients]
ceph1
2.3 安装ceph-ansible
[[email protected] ansible]# yum -y install ceph-ansible
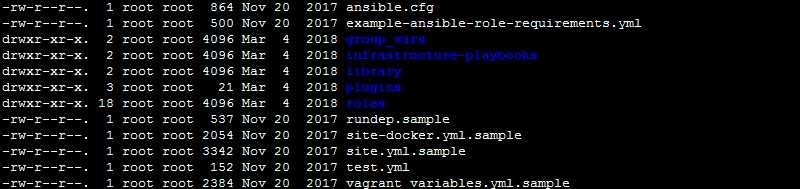
[[email protected] ansible]# cd /usr/share/ceph-ansible/
[[email protected] ceph-ansible]# ls
[[email protected] ceph-ansible]# ansible all -m ping

[[email protected] ceph-ansible]# cd /usr/share/ceph-ansible/group_vars/

[[email protected] group_vars]# cp mons.yml.sample mons.yml
[[email protected] group_vars]# cp mgrs.yml.sample mgrs.yml
[[email protected] group_vars]# cp osds.yml.sample osds.yml
[[email protected] group_vars]# cp clients.yml.sample clients.yml
[[email protected] group_vars]# cp all.yml.sample all.yml
[[email protected] group_vars]# vim all.yml
fetch_directory: ~/ceph-ansible-keys
ceph_repository_type: "cdn"
ceph_origin: repository
ceph_repository: rhcs
ceph_rhcs_version: 3
monitor_interface: eth0
journal_size: 5120
public_network: 172.25.250.0/24
cluster_network: "{{ public_network }}"
2.4 定义OSD
[[email protected] group_vars]# vim osds.yml
devices:
   - /dev/vdb
   - /dev/vdc
   - /dev/vdd
osd_scenario: collocated
[[email protected] group_vars]# grep -Ev "^$|^s*#" *.yml

2.5 定义ansible的入口文件
[r[email protected] group_vars]# cd ..
[[email protected] ceph-ansible]# cp site.yml.sample site.yml
[[email protected] ceph-ansible]# vim site.yml
- hosts:
  - mons
#  - agents
  - osds
#  - mdss
#  - rgws
#  - nfss
#  - restapis
#  - rbdmirrors
  - clients
  - mgrs
#  - iscsi-gws
2.6 安装
[[email protected] ceph-ansible]# ansible-playbook site.yml
安装如果有问题,会有报错,根据报错信息去修改yml文件,然后重新执行,出现下面的结果表示已经安装完成
PLAY RECAP ****************************************************************
ceph1                      : ok=42   changed=4    unreachable=0    failed=0
ceph2                      : ok=213  changed=9    unreachable=0    failed=0
ceph3                      : ok=196  changed=3    unreachable=0    failed=0
ceph4                      : ok=190  changed=28   unreachable=0    failed=0
2.7 检测验证
[[email protected] ~]# ceph -s

[[email protected] ~]# ceph osd tree

所有的文件都存放在/etc/ceph下
[[email protected] ~]# cd /etc/ceph/
[[email protected] ceph]# ll

ceph.conf是配置文件的名字,是因为没有指定集群的名字默认为ceph,配置文件的名字应为:cluster_name.conf
[[email protected] ceph]# cat ceph.conf
[global]
fsid = 35a91e48-8244-4e96-a7ee-980ab989d20d
mon initial members = ceph2,ceph3,ceph4
mon host = 172.25.250.11,172.25.250.12,172.25.250.13
public network = 172.25.250.0/24
cluster network = 172.25.250.0/24
[osd]
osd mkfs type = xfs
osd mkfs options xfs = -f -i size=2048
osd mount options xfs = noatime,largeio,inode64,swalloc
osd journal size = 5120
查看磁盘,有一个日志分区和数据分区
[[email protected] ceph]# fdisk -l

查看ceph进程
[[email protected] ceph]# ps aux|grep ceph

2.8 节点扩充
如果需要扩充节点,可以直接在部署节点的hosts文件,添加上主机名,执行部署,就会自己在原来的基础上继续扩充
如,把ceph1的三个磁盘扩充到osd,则配置如下:
[[email protected] ansible]# vim hosts
[mons]
ceph2
ceph3
ceph4

[mgrs]
ceph2
ceph3
ceph4

[osds]
ceph2
ceph3
ceph4
ceph1

[clients]
ceph1
再执行部署
[[email protected] ceph-ansible]# ansible-playbook site.yml
如果部署错误,删除需要下面这个yml文件
[[email protected] ceph-ansible]# vim infrastructure-playbooks/purge-cluster.yml
部分注释内容:
# This playbook purges Ceph
# It removes: packages, configuration files and ALL THE DATA
#
# Use it like this:
# ansible-playbook purge-cluster.yml
#     Prompts for confirmation to purge, defaults to no and
#     doesn‘t purge the cluster. yes purges the cluster.
#
# ansible-playbook -e ireallymeanit=yes|no purge-cluster.yml
#     Overrides the prompt using -e option. Can be used in
#     automation scripts to avoid interactive prompt.
执行删除:
[[email protected] ceph-ansible]# ansible-playbook infrastructure-playbooks/purge-cluster.yml
另一个环境安装
一、环境准备,
每个虚拟机只有一块多余的磁盘做osd
| IP | 主机名 | 节点 | 系统 |
|---|---|---|---|
|
172.25.254.130 |
ceph1 | ceph-ansible | centos 7.5-1810 |
|
172.25.254.131 |
ceph2 | mon、mgr、osd | centos 7.5-1810 |
|
172.25.254.132 |
ceph3 | mon、mgr、osd | centos 7.5-1810 |
| 172.25.254.133 | ceph4 | mon、mgr、osd | centos 7.5-1810 |
1.1 配置hosts
172.25.254.130  ceph1
172.25.254.131  ceph2
172.25.254.132  ceph3
172.25.254.133  ceph4
1.2 配置免密登录
[email protected] ~]# ssh-keygen
[[email protected] ~]# ssh-copy-id -i .ssh/id_rsa.pub ceph1
[[email protected] ~]# ssh-copy-id -i .ssh/id_rsa.pub ceph2
[[email protected] ~]# ssh-copy-id -i .ssh/id_rsa.pub ceph3
[[email protected] ~]# ssh-copy-id -i .ssh/id_rsa.pub ceph4
时间同步:
/usr/sbin/ntpdate asia.pool.ntp.org && hwclock -w
二、部署
2.1 安装notario
[[email protected] ~]# yum install -y python-pip
[[email protected] ~]# pip install notario

2.1 下载ceph-ansible的代码到本地
[email protected] ~]# yum -y git
[[email protected] ~]# git clone https://github.com/ceph/ceph-ansible.git
2.3 修改inventory,添加主机信息
[[email protected] ~]# cd ceph-ansible/
[[email protected] ceph-ansible]# vim hosts
[mons]
ceph2
ceph3
ceph4

[mgrs]
ceph2
ceph3
ceph4

[osds]
ceph2
ceph3
ceph4

[clients]
ceph1
2.4 修改all.yml写入如下内容
[[email protected] ceph-ansible]# vim group_vars/all.yml
cluster: ceph                                #集群名
ceph_origin: distro                          #使用distro,则不会使用公网源
ceph_repository: local                       #被操作节点使用本地的repo文件
ceph_stable_release: luminous                #安装版本
public_network: "172.25.254.0/24"
cluster_network: "172.25.254.0/24"
mon_host: ceph2,ceph3,ceph4
monitor_interface: ens33
devices:                                     #OSD磁盘,有几块写几块
  - ‘/dev/sdb‘
osd_scenario: collocated
[[email protected] ceph-ansible]# mv site.yml.sample site.yml
[[email protected] ceph-ansible]# vim site.yml
# Defines deployment design and assigns role to server groups
- hosts:
  - mons
#  - agents
  - osds
#  - mdss
#  - rgws
#  - nfss
#  - rbdmirrors
  - clients
  - mgrs
2.5 执行部署
在执行部署动作之前,执行时间同步
/usr/sbin/ntpdate asia.pool.ntp.org && hwclock -w
[[email protected] ceph-ansible]# ansible-playbook site.yml -i hosts
-bash: ansible-playbook: command not found
[[email protected] ceph-ansible]# yum install ansible -y
[[email protected] ceph-ansible]# ansible-playbook site.yml -i hosts
报错:

需要安装python-netaddr:
[[email protected] ceph-ansible]# pip install netaddr
[[email protected] ceph-ansible]# ansible-playbook site.yml -i hosts
成功安装
参考链接:https://yq.aliyun.com/articles/624202
以上是关于003 ansible部署ceph集群的主要内容,如果未能解决你的问题,请参考以下文章