Swoft 图片上传与处理
Posted xiaoliwang
tags:
篇首语:本文由小常识网(cha138.com)小编为大家整理,主要介绍了Swoft 图片上传与处理相关的知识,希望对你有一定的参考价值。
上传
在Swoft下通过
SwoftHttpMessageServerRequest -> getUploadedFiles()[‘image‘]
方法可以获取到一个 SwoftHttpMessageUploadUploadedFile 对象或者对象数组(取决于上传时字段是image还是image[])
打印改对象输出:
object(SwoftHttpMessageUploadUploadedFile)#1813 (6) {
  ["clientFilename":"SwoftHttpMessageUploadUploadedFile":private]=>
  string(25) "蒙太奇配置接口.txt"
  ["clientMediaType":"SwoftHttpMessageUploadUploadedFile":private]=>
  string(10) "text/plain"
  ["error":"SwoftHttpMessageUploadUploadedFile":private]=>
  int(0)
  ["tmpFile":"SwoftHttpMessageUploadUploadedFile":private]=>
  string(55) "/var/www/swoft/runtime/uploadfiles/swoole.upfile.xZyq0d"
  ["moved":"SwoftHttpMessageUploadUploadedFile":private]=>
  bool(false)
  ["size":"SwoftHttpMessageUploadUploadedFile":private]=>
  int(710)
}
都是私用属性,无法访问,但是可以通过对应方法访问到
getClientFilename()      //得到文件原名称
getClientMediaType()     //得到文件类型
getSize()        //获取到文件大小
通过方法
moveTo() //将文件从临时位置转移到目录
上面方法返回为NULL,在移动文件到指定位置时最好判断一下文件夹是否存在,不存在创建
图片处理
借助 ImageMagick 工具完成
ubuntu下一键安装
I. 安装ImageMagick
sudo apt-get install imagemagick

II. 安装imagemagick 的lib 供php调用
sudo apt-get install libmagick++-dev

III. 调用当前的pecl安装imagick
pecl install imagick

IV. 修改php.ini.重启nginx服务器
在php.ini中添加: extension = imagick.so
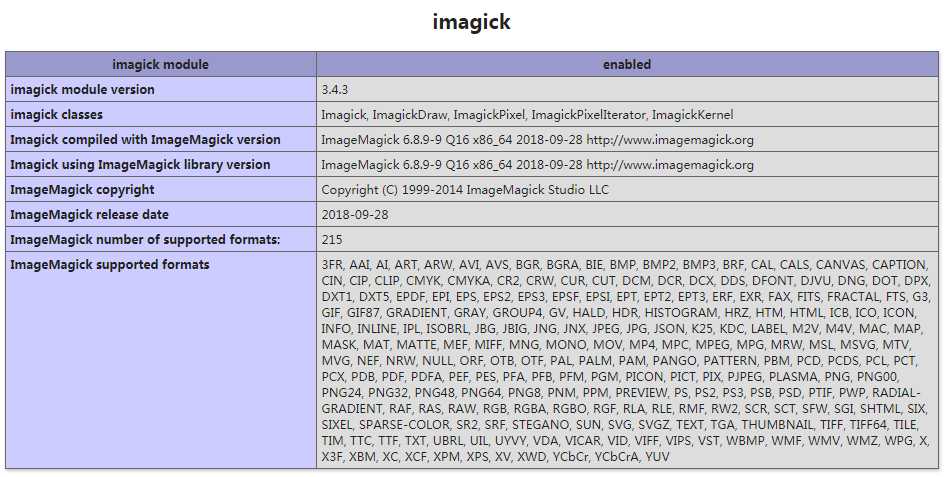
在安装完成后修改完 /etc/php/7.0/cli/php.ini 后发现 phpinfo 页面打印出来没有出现下面信息,于是又修改了/etc/php/7.0/fpm/php.ini 才出现下面信息

安装 Intervention Image
composer require intervention/image
安装完成后可以直接在页面use
use InterventionImageImageManager;

$manager = new ImageManager(array(‘driver‘ => ‘imagick‘));
//宽缩小到300px,高自适应
$thumb = $manager->make($path)->resize(300, null, function ($constraint) {
                $constraint->aspectRatio();
});
$thumb->save($path);
完整代码
namespace AppControllersApi;

use InterventionImageImageManager;
use SwoftHttpMessageServerRequest;
use SwoftHttpMessageUploadUploadedFile;
use SwoftHttpServerExceptionNotAcceptableException;
use SwoftHttpServerBeanAnnotationController;
use SwoftHttpServerBeanAnnotationRequestMapping;
use SwoftHttpServerBeanAnnotationRequestMethod;


class FileController
{
    //图片可接受的mime类型
    private static $img_mime = [‘image/jpeg‘,‘image/jpg‘,‘image/png‘,‘image/gif‘];

    /**
     * 文件上传
     * @RequestMapping(route="image",method=RequestMethod::POST)
     */
    public static function imgUpload(Request $request){
        $files = $request->getUploadedFiles()[‘image‘];
        if(!$files){
           throw new NotAcceptableException(‘image字段为空‘);
        }

        if(is_array($files)){
            $result = array();
            foreach ($files as $file){
                self::checkImgFile($file);
                $result[] = self::saveImg($file);
            }
        }else{
            self::checkImgFile($files);
            return self::saveImg($files);
        }

    }

    /**
     * 保存图片
     * @param UploadedFile $file
     */
    protected static function saveImg(UploadedFile $file){
        $dir = alias(‘@upload‘) . ‘/‘ . date(‘Ymd‘);
        if(!is_dir($dir)){
            @mkdir($dir,0777,true);
        }
        $ext_name = substr($file->getClientFilename(), strrpos($file->getClientFilename(),‘.‘));
        $file_name = time().rand(1,999999);
        $path = $dir . ‘/‘ . $file_name . $ext_name;
        $file->moveTo($path);
        //修改移动后文件访问权限,文件默认没有访问权限
        @chmod($path,0775);
        //生成缩略图
        $manager = new ImageManager(array(‘driver‘ => ‘imagick‘));
        $thumb = $manager->make($path)->resize(300, null, function ($constraint) {
            $constraint->aspectRatio();
        });
        $thumb_path = $dir. ‘/‘ . $file_name . ‘_thumb‘ .$ext_name;
        $thumb->save($dir. ‘/‘ . $file_name . ‘_thumb‘ .$ext_name);
        @chmod($thumb_path,0775);
        return [
            ‘url‘ => explode(alias(‘@public‘),$path)[1],
            ‘thumb_url‘ => explode(alias(‘@public‘),$thumb_path)[1]
        ];
    }

    /**
     * 图片文件校验
     * @param UploadedFile $file
     * @return bool
     */
    protected static function checkImgFile(UploadedFile $file){
        if($file->getSize() > 1024*1000*2){
            throw new NotAcceptableException($file->getClientFilename().‘文件大小超过2M‘);
        }
        if(!in_array($file->getClientMediaType(), self::$img_mime)){
            throw new NotAcceptableException($file->getClientFilename().‘类型不符‘);
        }
        return true;
    }

}
使用
FileController::imgUpload($request);
说明
当前保存文件路径为 alias("@upload"),需要在 /config/define.php 手动填上该路径
$aliases = [
    ‘@root‘       => BASE_PATH,
    ‘@env‘        => ‘@root‘,
    ‘@app‘        => ‘@root/app‘,
    ‘@res‘        => ‘@root/resources‘,
    ‘@runtime‘    => ‘@root/runtime‘,
    ‘@configs‘    => ‘@root/config‘,
    ‘@resources‘  => ‘@root/resources‘,
    ‘@beans‘      => ‘@configs/beans‘,
    ‘@properties‘ => ‘@configs/properties‘,
    ‘@console‘    => ‘@beans/console.php‘,
    ‘@commands‘   => ‘@app/command‘,
    ‘@vendor‘     => ‘@root/vendor‘,
    ‘@public‘     => ‘@root/public‘,     //public目录,也是nginx设置站点根目录
    ‘@upload‘     => ‘@public/upload‘    //上传目录
];
Swoft 不提供静态资源访问,可以使用nginx托管
配置nginx
vim /etc/nginx/sites-avaiable/default
server {
        listen 80 default_server;
        listen [::]:80 default_server;

        # 域名设置
        server_name eko.xiao.com;
        #设置nginx根目录
        root /var/www/html/swoft/public;

        # 将所有非静态请求转发给 Swoft 处理
        location / {
            proxy_set_header X-Real-IP $remote_addr;
            proxy_set_header Host $host;
            proxy_set_header X-Forwarded-For $proxy_add_x_forwarded_for;
            proxy_set_header Connection "keep-alive";
            proxy_pass http://127.0.0.1:9501;
        }

        location ~ .php$ {
                proxy_pass http://127.0.0.1:9501;
        }
        # 静态资源使用nginx托管
        location ~* .(js|map|css|png|jpg|jpeg|gif|ico|ttf|woff2|woff)$ {
            expires max;
        }
}
以上是关于Swoft 图片上传与处理的主要内容,如果未能解决你的问题,请参考以下文章