Python爬虫从入门到放弃(十三)之 Scrapy框架的命令行详解
Posted 111testing
tags:
篇首语:本文由小常识网(cha138.com)小编为大家整理,主要介绍了Python爬虫从入门到放弃(十三)之 Scrapy框架的命令行详解相关的知识,希望对你有一定的参考价值。
原文地址https://www.cnblogs.com/zhaof/p/7183220.html
这篇文章主要是对的scrapy命令行使用的一个介绍
创建爬虫项目
scrapy startproject 项目名
例子如下:
localhost:spider zhaofan$ scrapy startproject test1
New Scrapy project ‘test1‘, using template directory ‘/Library/Frameworks/Python.framework/Versions/3.5/lib/python3.5/site-packages/scrapy/templates/project‘, created in:
    /Users/zhaofan/Documents/python_project/spider/test1

You can start your first spider with:
    cd test1
    scrapy genspider example example.com
localhost:spider zhaofan$
这个时候爬虫的目录结构就已经创建完成了,目录结构如下:
|____scrapy.cfg
|____test1
| |______init__.py
| |____items.py
| |____middlewares.py
| |____pipelines.py
| |____settings.py
| |____spiders
| | |______init__.py
接着我们按照提示可以生成一个spider,这里以百度作为例子,生成spider的命令格式为;
scrapy genspider 爬虫名字 爬虫的网址
localhost:test1 zhaofan$ scrapy genspider baiduSpider baidu.com
Created spider ‘baiduSpider‘ using template ‘basic‘ in module:
  test1.spiders.baiduSpider
localhost:test1 zhaofan$
关于命令详细使用
命令的使用范围
这里的命令分为全局的命令和项目的命令,全局的命令表示可以在任何地方使用,而项目的命令只能在项目目录下使用
全局的命令有:
startproject
genspider
settings
runspider
shell
fetch
view
version
项目命令有:
crawl
check
list
edit
parse
bench
startproject
这个命令没什么过多的用法,就是在创建爬虫项目的时候用
genspider
用于生成爬虫,这里scrapy提供给我们不同的几种模板生成spider,默认用的是basic,我们可以通过命令查看所有的模板
localhost:test1 zhaofan$ scrapy genspider -l
Available templates:
  basic
  crawl
  csvfeed
  xmlfeed
localhost:test1 zhaofan$
当我们创建的时候可以指定模板,不指定默认用的basic,如果想要指定模板则通过
scrapy genspider -t 模板名字
localhost:test1 zhaofan$ scrapy genspider -t crawl zhihuspider zhihu.com
Created spider ‘zhihuspider‘ using template ‘crawl‘ in module:
  test1.spiders.zhihuspider
localhost:test1 zhaofan$
crawl
这个是用去启动spider爬虫格式为:
scrapy crawl 爬虫名字
这里需要注意这里的爬虫名字和通过scrapy genspider 生成爬虫的名字是一致的
check
用于检查代码是否有错误,scrapy check
list
scrapy list列出所有可用的爬虫
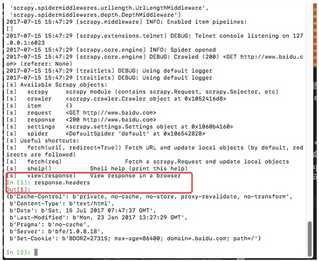
fetch
scrapy fetch url地址
该命令会通过scrapy downloader 讲网页的源代码下载下来并显示出来
这里有一些参数:
--nolog 不打印日志
--headers 打印响应头信息
--no-redirect 不做跳转
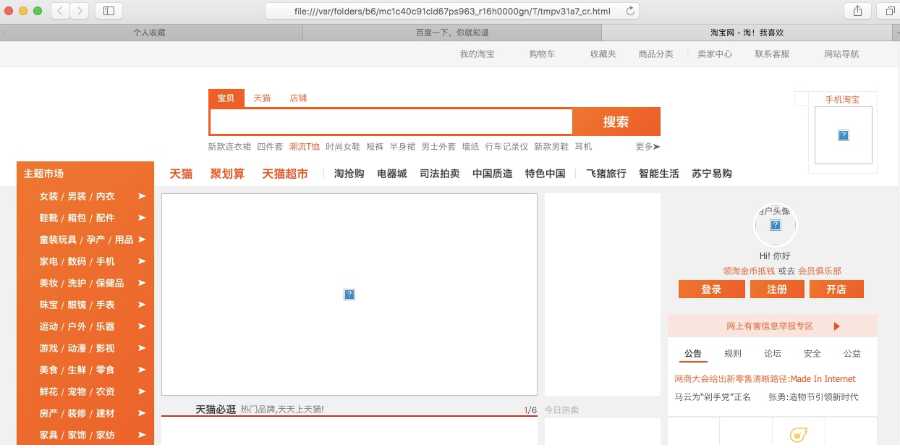
view
scrapy view url地址
该命令会讲网页document内容下载下来,并且在浏览器显示出来

因为现在很多网站的数据都是通过ajax请求来加载的,这个时候直接通过requests请求是无法获取我们想要的数据,所以这个view命令可以帮助我们很好的判断
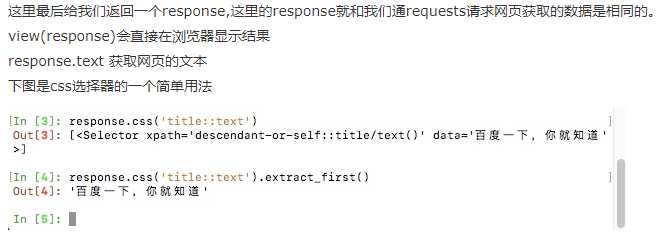
shell
这是一个命令行交互模式
通过scrapy shell url地址进入交互模式
这里我么可以通过css选择器以及xpath选择器获取我们想要的内容(xpath以及css选择的用法会在下个文章中详细说明),例如我们通过scrapy shell http://www.baidu.com


settings
获取当前的配置信息
通过scrapy settings -h可以获取这个命令的所有帮助信息
localhost:jobboleSpider zhaofan$ scrapy settings -h
Usage
=====
  scrapy settings [options]

Get settings values

Options
=======
--help, -h              show this help message and exit
--get=SETTING           print raw setting value
--getbool=SETTING       print setting value, interpreted as a boolean
--getint=SETTING        print setting value, interpreted as an integer
--getfloat=SETTING      print setting value, interpreted as a float
--getlist=SETTING       print setting value, interpreted as a list

Global Options
--------------
--logfile=FILE          log file. if omitted stderr will be used
--loglevel=LEVEL, -L LEVEL
                        log level (default: DEBUG)
--nolog                 disable logging completely
--profile=FILE          write python cProfile stats to FILE
--pidfile=FILE          write process ID to FILE
--set=NAME=VALUE, -s NAME=VALUE
                        set/override setting (may be repeated)
--pdb                   enable pdb on failure
拿一个例子进行简单的演示:(这里是我的这个项目的settings配置文件中配置了数据库的相关信息,可以通过这种方式获取,如果没有获取的则为None)
localhost:jobboleSpider zhaofan$ scrapy settings --get=mysql_HOST
192.168.1.18
localhost:jobboleSpider zhaofan$
runspider
这个和通过crawl启动爬虫不同,这里是scrapy runspider 爬虫文件名称
所有的爬虫文件都是在项目目录下的spiders文件夹中
version
查看版本信息,并查看依赖库的信息
localhost:~ zhaofan$ scrapy version
Scrapy 1.3.2
localhost:~ zhaofan$ scrapy version -v
Scrapy    : 1.3.2
lxml      : 3.7.3.0
libxml2   : 2.9.4
cssselect : 1.0.1
parsel    : 1.1.0
w3lib     : 1.17.0
Twisted   : 17.1.0
Python    : 3.5.2 (v3.5.2:4def2a2901a5, Jun 26 2016, 10:47:25) - [GCC 4.2.1 (Apple Inc. build 5666) (dot 3)]
pyOpenSSL : 16.2.0 (OpenSSL 1.0.2k  26 Jan 2017)
Platform  : Darwin-16.6.0-x86_64-i386-64bit
以上是关于Python爬虫从入门到放弃(十三)之 Scrapy框架的命令行详解的主要内容,如果未能解决你的问题,请参考以下文章
