Ray Tracing The Next Week 超详解 光线追踪2-3
Posted lv-anchoret
tags:
篇首语:本文由小常识网(cha138.com)小编为大家整理,主要介绍了Ray Tracing The Next Week 超详解 光线追踪2-3相关的知识,希望对你有一定的参考价值。
Preface
终于到了激动人心的纹理章节了
然鹅,看了下,并不激动
因为我们之前就接触过
当初有一个 attenuation 吗?
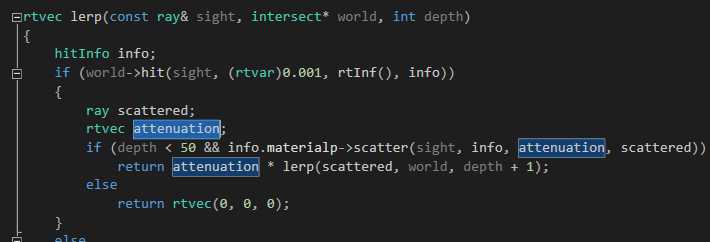
对了,这就是我们的rgb分量过滤器,我们画出的红色、蓝色、绿色等等,都是通过它来控制的
专业点的词语叫做rgb衰减比例,比如rtvec(1.,0.,0.),最后呈现出来的是红色,因为r保留了100%
它是怎么控制的呢,我们来回顾一下这个过程
首先,我们创建一个材质球

后面那个rtvec(0.4,0.2,0.1)就是衰减比例(衰减到原来的百分之。。)
之后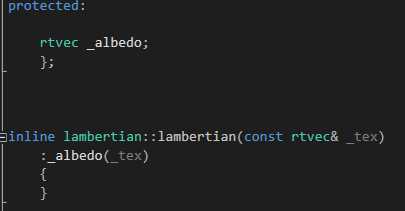
进入数据成员中,之后主函数调用lerp的时候
info.materialp->scatter(sight, info, attenuation, scattered))
球体的材质调用scatter函数
即:
没有丝毫改动地有数据成员传递到了attenuation 中
然后用attenuation 做乘法进行rgb衰减,递归就不用说了吧,最后递归到深处为黑色,不然为背景色
为什么要在前言将这个东东,因为
attenuation 所控制形成的物体表面颜色就是最简单的纹理
说白了这章比较简单,因为下一章是这本书的另外一个高难度章节(分别分布于第二章和第四章)
所以,中间第三章来点简单好玩的,过渡一下
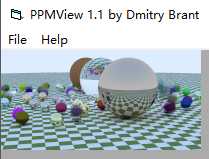
先看效果
Chapter 3:Solid Textures
废话不多说,先写一个纹理类
/// texture.hpp

// -----------------------------------------------------
// [author]        lv
// [begin ]        2019.1
// [brief ]        the texture-class for the ray-tracing project
//                from the 《ray tracing the next week》

#pragma once

namespace rt
{

class texture
    {
public:

    virtual rtvec value(rtvar u, rtvar v, const rtvec& p)const = 0;

    };

}
u 和 v后面用到再讲,p就是衰减向量
然后写一个常量纹理(基础纹理)
/// constant_tex.hpp

// -----------------------------------------------------
// [author]        lv
// [begin ]        2019.1
// [brief ]        the constant_texture-class for the ray-tracing project
//                from the 《ray tracing the next week》
// -----------------------------------------------------

#pragma once


namespace rt
{

class constant_texture :public texture
    {
    public:

        constant_texture() {  }

        constant_texture(const rtvec& color);

        virtual rtvec value(rtvar u, rtvar v, const rtvec& p)const override;

    public:

        inline const rtvec& color()const { return _color; }

    private:

        rtvec _color;

    };


inline constant_texture::constant_texture(const rtvec& color)
    :_color(color)
    {
    }

rtvec constant_texture::value(rtvar u, rtvar v, const rtvec& p)const
    {
    return _color;
    }

}
之后,我们把材质中的rtvec向量改为纹理指针
/// diffuse.hpp
// https://www.cnblogs.com/lv-anchoret/p/10198423.html

// -----------------------------------------------------
// [author]        lv
// [begin ]        2018.12
// [brief ]        one of the materials
// -----------------------------------------------------

#pragma once


namespace rt
{

class texture;

//diffuse material
class lambertian : public material
    {
public:
    lambertian(texture* _tex);

    virtual bool scatter(const ray& rIn, const hitInfo& info, rtvec& attenuation, ray& scattered)const override;

protected:

    texture* _albedo;
    };


inline lambertian::lambertian(texture* _tex)
    :_albedo(_tex)
    {
    }

bool lambertian::scatter(const ray& rIn, const hitInfo& info, rtvec& attenuation, ray& scattered)const
    {
    rtvec target = info._p + info._n + lvgm::random_unit_sphere();
    scattered = ray{ info._p, target - info._p };
    attenuation = _albedo->value(0.,0.,info._p);
    return true;
    }

}
之前我们创建的材质球代码就要改一种风格了

把其他的材质类也做相应的改动
我们今天最重要的是弄棋盘(checkerboard)纹理
棋盘纹理就是交错的双色格子,呈现一定的规律性
所以我们想象一下利用某些映射函数来实现这种类似二值性,且呈现周期性
我们比较容易想到利用正余弦函数,呈现周期性,且值域为【-1,1】是个有界函数
如何体现二值呢,正负嘛,正余弦函数一定关于x轴对称
如何将物体表面和正余弦函数联系在一起形成双色交错的格子呢
表面法向量!!
综上,如果我们在所有三个维度中相乘某个正余弦函数,那么该公式的符号形成一个棋盘形式
即:rtvar sines = sin(10 * p.x()) * sin(10 * p.y()) * sin(10 * p.z());
当然,你也可以试一下sgnx函数,设置一个相关的判别式
/// checker_tex.hpp

// -----------------------------------------------------
// [author]        lv
// [begin ]        2019.1
// [brief ]        the checker_texture-class for the ray-tracing project
//                from the 《ray tracing the next week》
// -----------------------------------------------------


#pragma once


namespace rt
{

class checker_texture :public texture
    {
    public:
        checker_texture() {  }

        checker_texture(texture* t1, texture* t2);

        virtual rtvec value(rtvar u, rtvar v, const rtvec& p)const override;

    private:

        texture* _even;

        texture* _odd;

    };


inline checker_texture::checker_texture(texture * t1, texture * t2)
        :_even(t1)
        , _odd(t2)
    {
    }

rtvec checker_texture::value(rtvar u, rtvar v, const rtvec& p)const
    {
    rtvar sines = sin(30 * p.x()) * sin(30 * p.y()) * sin(30 * p.z());
    if (sines < 0)
        return _odd->value(u, v, p);
    else
        return _even->value(u, v, p);
    }

}
我们把大球设置为棋盘纹理

就是开篇图
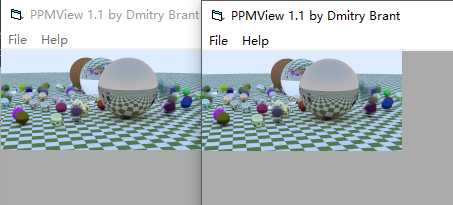
然后,我把判别式中的10改成了30依旧是原图
10(左)30(右)
y = sin(wx + φ)
你可以尝试改动一下φ参数试一下
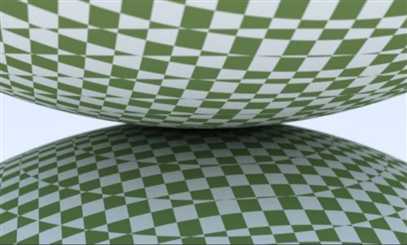
下面是另外一个图:
随机球体生成函数改成

相机参数依旧是之前的

会得到这样一个图
感谢您的阅读,生活愉快~
以上是关于Ray Tracing The Next Week 超详解 光线追踪2-3的主要内容,如果未能解决你的问题,请参考以下文章