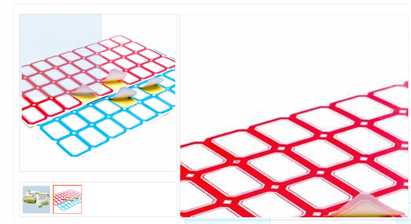
图片放大镜功能
Posted lxy1023-
tags:
篇首语:本文由小常识网(cha138.com)小编为大家整理,主要介绍了图片放大镜功能相关的知识,希望对你有一定的参考价值。
html:
<div class="pr_hLeft">
    <div class="imgLeft">
        <!--中号图-->
        <div class="Medium">
            <!-- 放大镜 -->
            <div class="magnifier" id="magnifier">
                <img src="http://product.dangdang.com/images/zoom_pup.png" width="166" height="166">
            </div>
            <!--图片-->
            <div class="pr_img" id="pr_img">
                <img src="<{$shopimg[0][‘url‘]}>" alt="<{$goods.ty_name}>" width="308" height="308">
            </div>
            <div id="zhezhao"></div>
        </div>
        <div class="divimg">
            <ul class="proul" id="img_x">
                <{volist name="shopimg" id="sp"}>
                <li class="proul_li"><img src="<{$sp.url}>" ></li>
                <{/volist}>
            </ul>
        </div>
    </div>
    <div class="imgRight">
        <!-- 大图 -->
        <div class="img_u" id="img_u">
            <img src="<{$shopimg[0][‘url‘]}>" width="200%" height="200%">
        </div>
    </div>
</div>
CSS:
.pr_hLeft{
    height: 100%;
    width: 320px;
    float: left;
    margin-left: 10px;
}
.divimg{
    margin-top: 20px;
    width: 316px;
    height: 70px;
    border: 1px solid #E3E3E3;
}
.pr_img{
    width: 316px;
    height: 316px;
    border: 1px double #DFDFDF;
    padding: 4px;
    margin-top: 20px;
}
.proul li{
    width: 58px;
    height: 58px;
    margin-left: 4px;
    margin-top: 5px;
    border: 1px solid #E3E3E3;
    float: left;
    cursor: pointer;
}
.proul_li{
    float: left;
}
.proul li img{
    width: 55px;
    height: 55px;
}
.imgLeft{
    float: left;
}
.imgRight{
    float: left;
}
.Medium{
    position: relative;
}
.imgLeft .magnifier {
    position: absolute;
    display: none;
    width: 166px;
    height: 166px;
}
#zhezhao {
    width: 316px;
    height: 316px;
    background: transparent;
    position: absolute;
    top: 0;
    border: 1px solid transparent;
}
#zhezhao:hover {
    cursor: move;
}
.img_u {
    position: absolute;
    width: 458px;
    height: 408px;
    border: 1px solid #eee;
    overflow: hidden;
    display: none;
    background-color: #eee;
    margin-top: 20px;
    margin-left: 5px;
}
.img_u img{
    background-size:100% 100%;
}
JS:
$(‘#img_x li‘).eq(0).css(‘border‘, ‘2px solid coral‘);
$(‘#zhezhao‘).mousemove(function(e){
    $(‘#img_u‘).show();
    $(‘#magnifier‘).show();
    var left = e.offsetX - parseInt($(‘#magnifier‘).width()) / 2;
    var top = e.offsetY - parseInt($(‘#magnifier‘).height()) / 2;
    left = left < 0 ? 0 : left;
    left = left > (parseInt($(‘#zhezhao‘).outerWidth()) - parseInt($(‘#magnifier‘).outerWidth())) ? (parseInt($(‘#zhezhao‘).outerWidth()) - parseInt($(‘#magnifier‘).outerWidth())) : left;
    top = top < 0 ? 0 : top;
    top = top > (parseInt($(‘#zhezhao‘).outerHeight()) - parseInt($(‘#magnifier‘).outerHeight())) ? (parseInt($(‘#zhezhao‘).outerHeight()) - parseInt($(‘#magnifier‘).outerHeight())) : top;

    $(‘#magnifier‘).css(‘left‘, left + ‘px‘);
    $(‘#magnifier‘).css(‘top‘,  top + ‘px‘);

    var leftRate = left / parseInt($(‘#zhezhao‘).outerWidth());
    var bigLeft = leftRate * parseInt($(‘#img_u img‘).outerWidth());
    $(‘#img_u img‘).css(‘margin-left‘, -bigLeft + ‘px‘);

    var topRate = top / parseInt($(‘#zhezhao‘).outerHeight());
    var bigTop =  topRate * parseInt($(‘#img_u img‘).outerHeight());
    $(‘#img_u img‘).css(‘margin-top‘, -bigTop + ‘px‘);
});
$(‘#zhezhao‘).mouseleave(function(){
    $(‘#img_u‘).hide();
    $(‘#magnifier‘).hide();
});

切换图片:
$(‘#img_x li‘).mouseover(function(){
    $(this).css(‘border‘, ‘2px solid coral‘).siblings().css(‘border‘, ‘2px solid transparent‘);
    var lisrc = $(this).children().attr(‘src‘);
    $(‘#pr_img img‘).attr("src",lisrc);
    $(‘#img_u img‘).attr("src",lisrc);
});
效果:

以上是关于图片放大镜功能的主要内容,如果未能解决你的问题,请参考以下文章