发布CRM你将使用以下软件
- nginx
- uWSGI
- CentOS7
- CRM项目文件
- virtualenv
- supervisor
WSGI、uWSGI
python web服务器开发使用WSGI协议(Web Server Gateway Interface)
python web项目默认会生成一个wsgi.py文件,确定好应用模块。
生产环境中使用的是uWSGI,实现了WSGI所有接口,C语言编写,效率很高的web服务器。
uWSGI是一个全功能的HTTP服务器,实现了WSGI协议、uwsgi协议、http协议等。它要做的就是把HTTP协议转化成语言支持的网络协议。比如把HTTP协议转化成WSGI协议,让Python可以直接使用。
Nginx
使用nginx是为了它的反向代理功能,项目会通过Django+uWSGI+Nginx进行服务器线上部署。
CentOS
1.打包项目CRM文件夹,压缩文件
2.通过xftp、scp、lrzsz等上传文件至Centos服务器
Linux使用技巧
1.通过xshell或者iTerm等软件,多终端操作你的linxu,这样对uwsgi、nginx、项目代码调试的时候,避免来回切换目录,提供工作效率。
2.注意修改了linux软件的配置文件,都要重启服务才能生效。
Virtualenv
构建一个干净,隔离的python解释器环境,防止软件依赖,冲突等问题,建议使用。
Supervisor
Supervisor(http://supervisord.org/)是用Python开发的一个client/server服务,是Linux/Unix系统下的一个进程管理工具,不支持Windows系统。它可以很方便的监听、启动、停止、重启一个或多个进程。用Supervisor管理的进程,当一个进程意外被杀死,supervisort监听到进程死后,会自动将它重新拉起,很方便的做到进程自动恢复的功能,不再需要自己写shell脚本来控制。
项目部署
激活虚拟python环境
#创建基于python3的虚拟解释器环境venv
virtualenv --no-site-packages --python=python3 venv
#激活python3虚拟环境
[[email protected] /data 11:11:30]#source venv/bin/activate
(venv) [[email protected] /data 11:11:35]#
安装uwsgi
(venv) [[email protected] /data 11:13:23]#pip3 install uwsgi
配置启动uwsgi.ini,启动uwsgi时候,用这个配置文件启动
(venv) [[email protected] /data 11:14:25]#cat uwsgi.ini
[uwsgi]
#使用nginx连接时使用
socket=0.0.0.0:8000
#不用nginx直接当做web服务器使用
#http=0.0.0.0:9000
#项目目录绝对路径
chdir=/data/Ace_crm
#wsgi文件路径,在项目底下
wsgi-file=Ace_crm/wsgi.py
#指定解释器目录
home=/data/venv
processes=4
threads=2
master=True
pidfile=uwsgi.pid
daemonize=uwsgi.log
配置nginx
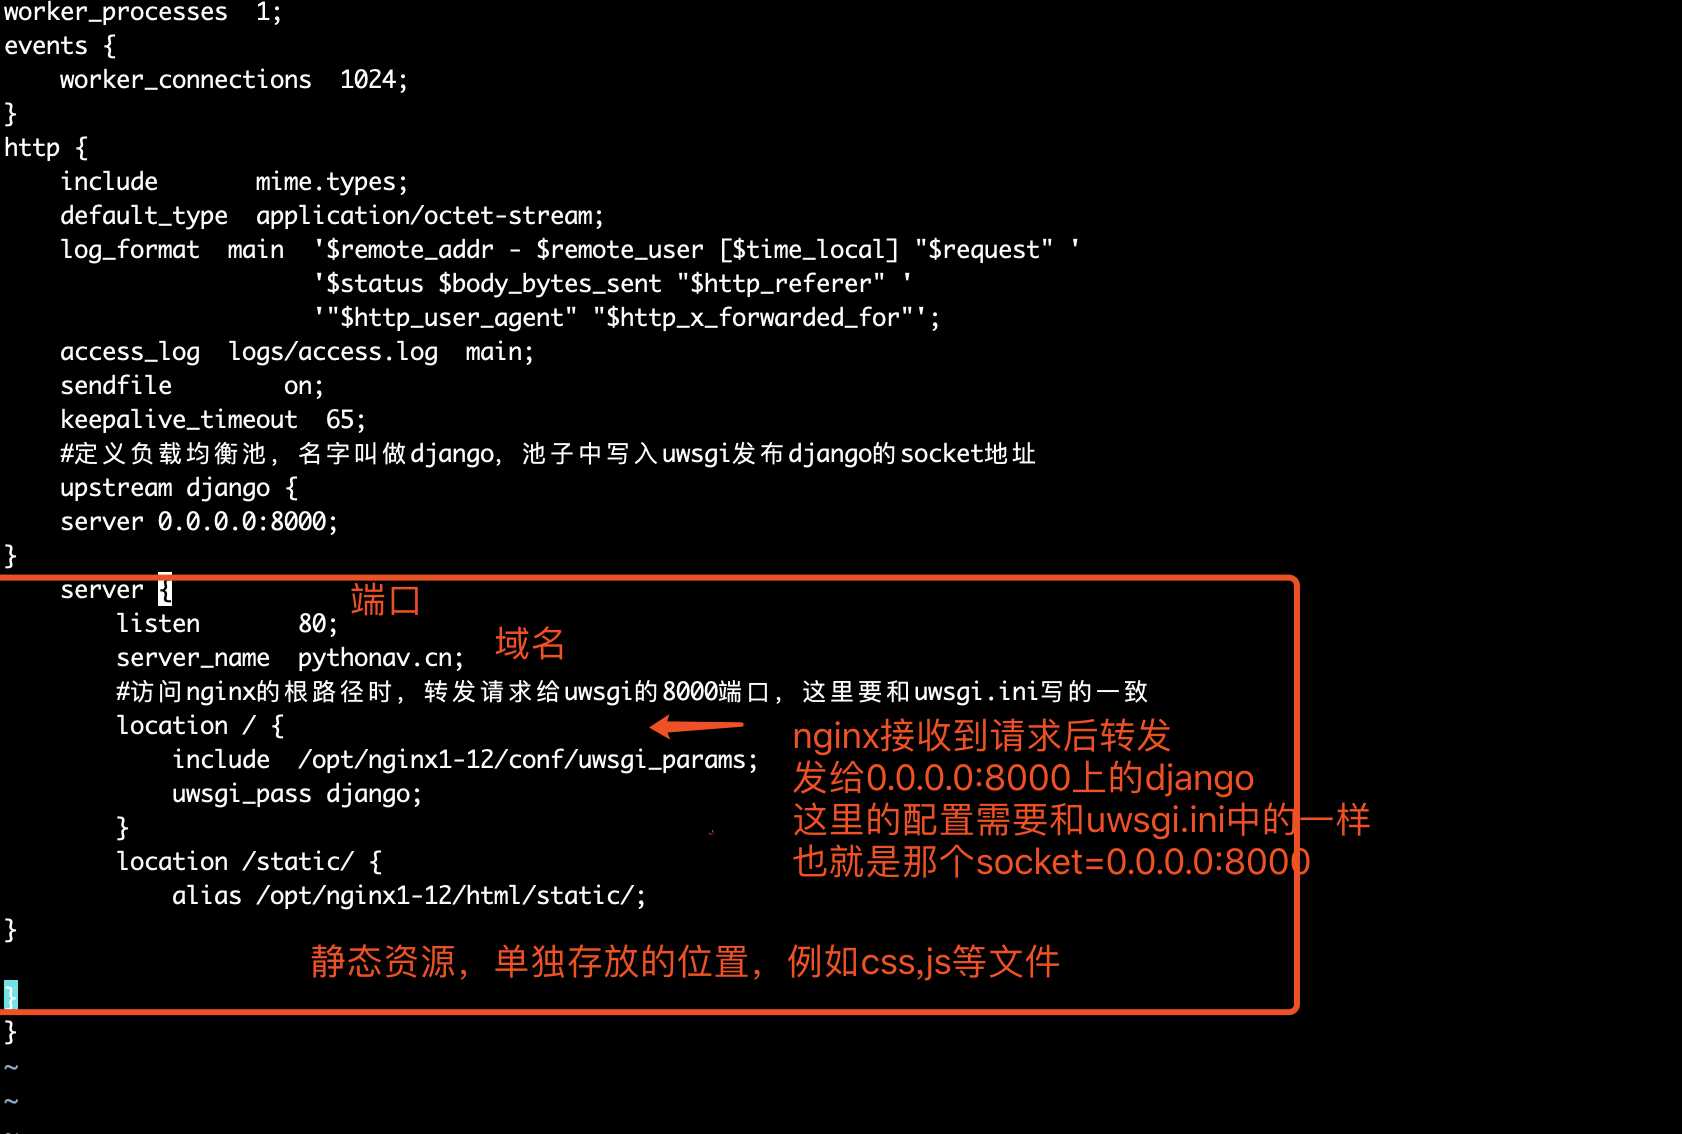
配置nginx.conf,通过nginx反向代理将请求丢给django处理
(venv) [[email protected] /data 11:20:32]#cat /opt/nginx1-12/conf/nginx.conf
worker_processes  1;
events {
    worker_connections  1024;
}
http {
    include       mime.types;
    default_type  application/octet-stream;
    log_format  main  ‘$remote_addr - $remote_user [$time_local] "$request" ‘
                      ‘$status $body_bytes_sent "$http_referer" ‘
                      ‘"$http_user_agent" "$http_x_forwarded_for"‘;
    access_log  logs/access.log  main;
    sendfile        on;
    keepalive_timeout  65;
    #定义负载均衡池,名字叫做django,池子中写入uwsgi发布django的socket地址
    upstream django {
    server 0.0.0.0:8000;
}
    server {
        listen       80;
        server_name  pythonav.cn;
        #访问nginx的根路径时,转发请求给uwsgi的8000端口,这里要和uwsgi.ini写的一致
        location / {
        include  /opt/nginx1-12/conf/uwsgi_params;
     #请求转发给upstream地址池里的uwsgi程序
        uwsgi_pass django;
        }
        location /static/ {
            alias /opt/nginx1-12/html/static/;
}

}
}
热加载nginx服务,读取nginx.conf内容
(venv) [[email protected] /data 11:24:24]#/opt/nginx1-12/sbin/nginx -t
nginx: the configuration file /opt/nginx1-12/conf/nginx.conf syntax is ok
nginx: configuration file /opt/nginx1-12/conf/nginx.conf test is successful
(venv) [[email protected] /data 11:26:07]#/opt/nginx1-12/sbin/nginx -s reload
启动uwsgi,启动django
(venv) [[email protected] /data 11:26:54]#uwsgi --ini uwsgi.ini
[uWSGI] getting INI configuration from uwsgi.ini
(venv) [[email protected] /data 11:27:10]#ps -ef|grep uwsgi
root     15540     1  0 11:27 ?        00:00:00 uwsgi uwsgi.ini
root     15543 15540  0 11:27 ?        00:00:00 uwsgi uwsgi.ini
root     15544 15540  0 11:27 ?        00:00:00 uwsgi uwsgi.ini
root     15545 15540  0 11:27 ?        00:00:00 uwsgi uwsgi.ini
root     15546 15540  0 11:27 ?        00:00:00 uwsgi uwsgi.ini
root     15590 11958  0 11:27 pts/0    00:00:00 grep --color=auto uwsgi

#如果需要停止uwsgi可以使用ps -ef|grep uwsgi,找到pid杀掉
#更好的一个杀掉uwsgi的方式
killall -9 uwsgi
访问nginx的80端口,查看是否请求转发给django
http://pythonav.cn/login/
或者10.0.0.10/login
配置nginx的静态资源

为什么要配置静态资源?
配置静态资源目录是因为让静态资源通过nginx可以直接返回,不需要通过uwsgi,也就是让uwsgi只处理后端逻辑,不处理静态资源,优化性能
配置静态资源,django和nginx
#创建静态资源存放目录
[[email protected] /opt/nginx1-12/html 11:39:51]#mkdir -vp /opt/nginx1-12/html/static
mkdir: created directory ‘/opt/nginx1-12/html/static’
#给目录添加权限
[[email protected] /opt/nginx1-12/html 11:40:57]#chmod  755 /opt/nginx1-12/html/static/
配置django的settings.py
DEBUG = False
ALLOWED_HOSTS = [‘*‘]


# Static files (CSS, javascript, Images)
# https://docs.djangoproject.com/en/1.11/howto/static-files/

STATIC_URL = ‘/static/‘
STATIC_ROOT= ‘/opt/nginx1-12/html/static/‘
STATICFILES_DIRS = [
    os.path.join(BASE_DIR, ‘static‘)
]

分割线--

收集django静态文件
python3 manage.py collectstatic

这一句话就会把以前放在app下static中的静态文件全部拷贝到 settings.py 中设置的 STATIC_ROOT 文件夹中

然后请求静态资源就会去nginx配置的 location /static {alias /opt/nginx1-12/html/static/ } 寻找
以上步骤完成后,访问服务器主机地址和端口,如果nginx.conf中配置的为80端口,则地址栏不需要输入端口,因为浏览器请求端口也是默认为80端口,非80端口的需要自己在ip后面添加
