angular 生命周期
link函数可接受三个或四个参数,分别为:scope;ele;ettrs
scope:该指令的作用域
ele :指令元素
attrs指令上的属性
Link:function(scope,ele,attrs){
ele.children().css("background","red"); //修改样式
ele on("click",function(e){ //加入点击方法
console.log(e.target)
});
scope.name="三"; // scope 表示作用域
}
link函数中的require指令
require相当于连接桥的作用
<first-directive>
<second-directive></second-directive>
</first-directive>
app.directive("firstdirective",function($scope){ //自定义指令
return{
controller:["$scope",function($scope){
$scope.firstname="first";
this.info={
name:$scope.firstname
age:30
}
}]
}
})
app.directive("seconddirective",function(){ //自定义指令
return{
template:<div><h1>第二个指令</h1></div>
link:function(scope,ele,attrs){
})
}
})
因为第一个指令没有写template模板,所以页面显示 “第二个指令”,若第一个谢了template,则页面不在显示第二条指令,而被第一条指令中的内容代替。
@ 注意一个定义:controller:["$scope" function($scope){
this.name="thirdDirective"}] //内联式注入
$http服务
$http服务对浏览器原生的XmlHttpRequest对象进行封装
调用的$http方法后,返回一个promise对象,进行下一步操作
status(状态码):200 代表成功
app.controller(‘mycontroller‘,["$scope","$http",function($scope,$http){
$http({
method:"GET"
url:"./data.json"
params:{
name:"$http服务";
}
}).then(function(res){
console.log(res.data);
})
}])
$watch:监听 每当有一个模型与视图进行绑定时,angular便会创建一个监听放到监听列表中去。
-----依赖注入 PS:重点,也是开发中的重要部分
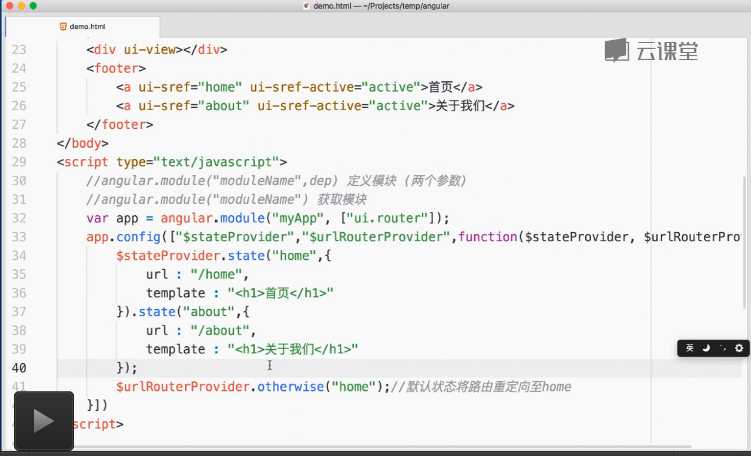
先看一段标准的路由代码:
<div ui-view></div> //将匹配到的ui路由规则时,将其渲染到ui-view 中去,

此处不再详解,具体看视频教程 见下方。
依赖注入定义:源出现于Java, c#等语言,是一种控制反转的软件设计模式,
注入:将被被依赖的对象实例,,传递给依赖对象的行为,而不需要依赖自己创建或查找他们所需对象
// 手动创建所需对象的实例
var person=function(){}
var person=new person();
依赖注入有三个角色:调用者(client) 服务(service) 注入者(injector)
简单示意:调用者(client)只需知道(service)服务的具体接口。而具体服务(service)的查找和创建由注入者(injector)负责处理,并提供给调用者client.
第一个依赖注入的实例
var myAPP=angular.module("myapp" []);
myapp.controller("mycontroller" ,["$scope",function($scope){
//此可填写一些内容,
}])
angular依赖注入的实现步骤分三步:
1)得到模块的依赖项,通过参数列表也就是$scope
2) 查找该依赖项所对应的对象
3)执行时注入对象
-------------------------------------
angular 一般按照参数查找依赖,而混淆方式将参数变为无意义的代码,因此会影响推断注入。