Muse UI 路由
Posted dudu123
tags:
篇首语:本文由小常识网(cha138.com)小编为大家整理,主要介绍了Muse UI 路由相关的知识,希望对你有一定的参考价值。
index.html中
    <meta name="viewport" content="maximum-scale=1.0,minimum-scale=1.0,user-scalable=0,width=device-width,initial-scale=1.0"/>
    <title>mt_museui</title>
    <!-- 下面四句目的相同,为了引入icon样式,前面两个是外链接-->
    <!--<link rel="stylesheet" href="https://fonts.googleapis.com/css?family=Roboto:300,400,500,700,400italic">
        <link rel="stylesheet" href="https://fonts.googleapis.com/icon?family=Material+Icons">-->
    <link rel="stylesheet" type="text/css" href="src/css/iconfonts_family=Material+Icons.css"/>
    <link rel="stylesheet" type="text/css" href="src/css/iconfonts_family=Roboto.css"/>

    <link rel="stylesheet" type="text/css" href="http://cdn.bootcss.com/material-design-icons/3.0.1/iconfont/material-icons.css"/>
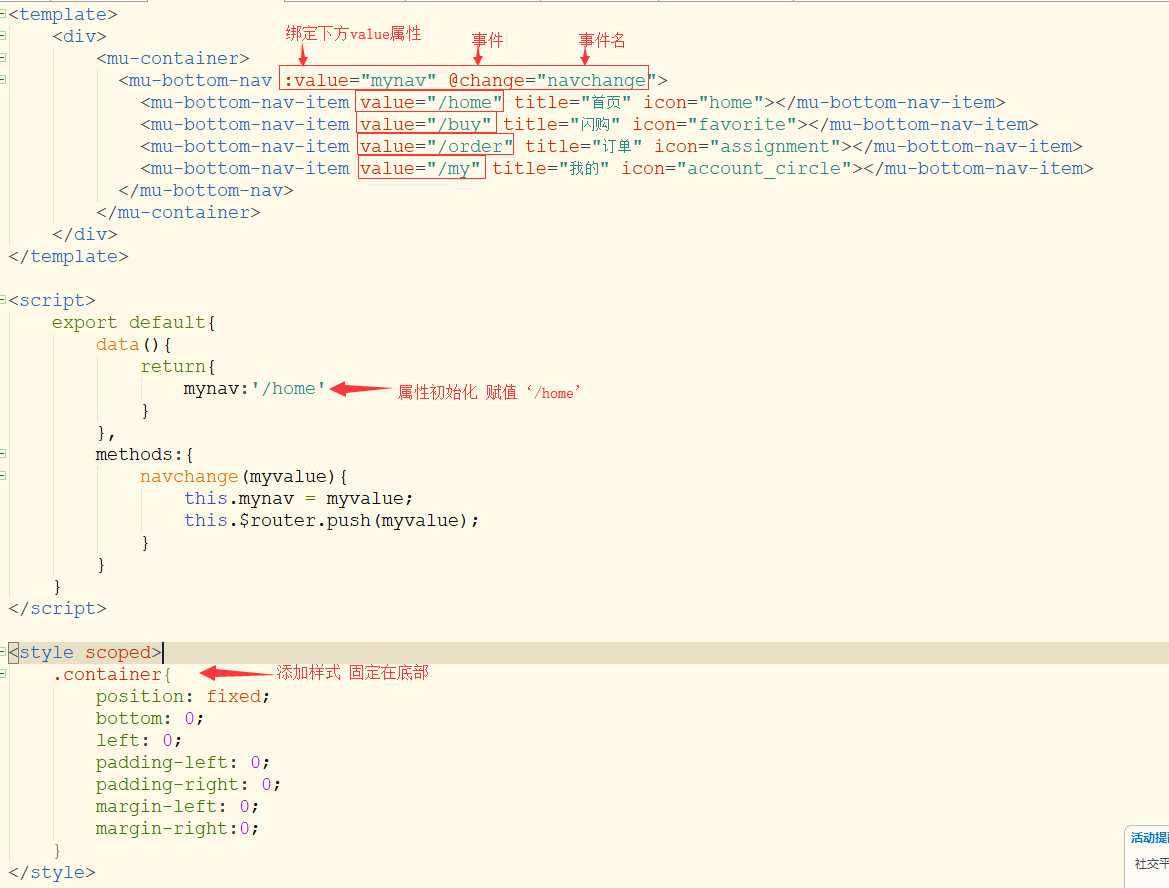
建立组件FooterView.vue
<template>
    <div>
        <mu-container>
          <mu-bottom-nav :value="mynav" @change="navchange">
            <mu-bottom-nav-item value="/home" title="首页" icon="home"></mu-bottom-nav-item>
            <mu-bottom-nav-item value="/buy" title="闪购" icon="favorite"></mu-bottom-nav-item>
            <mu-bottom-nav-item value="/order" title="订单" icon="assignment"></mu-bottom-nav-item>
            <mu-bottom-nav-item value="/my" title="我的" icon="account_circle"></mu-bottom-nav-item>
          </mu-bottom-nav>
        </mu-container>
    </div>
</template>

<script>
    export default{
        data(){
            return{
                mynav:‘/home‘
            }
        },
        methods:{
            navchange(myvalue){
                this.mynav = myvalue;
                this.$router.push(myvalue);
            }
        }
    }
</script>

<style scoped>
    .container{
        position: fixed;
        bottom: 0;
        left: 0;
        padding-left: 0;
        padding-right: 0;
        margin-left: 0;
        margin-right:0;
    }
</style>

$router:是路由对象信息,包含有很多属性,push为其中一个属性,表示路由要到哪里去,参数是等同于to的值:‘/home’

FooterView.vue底部组件引入默认主组件App.vue
<template>
    <div>
        <router-view></router-view>
        <FooterView></FooterView>
    </div>
</template>

<script>
    import FooterView from ‘./components/FooterView.vue‘
    export default{
        components:{
            FooterView
        }
    }
</script>
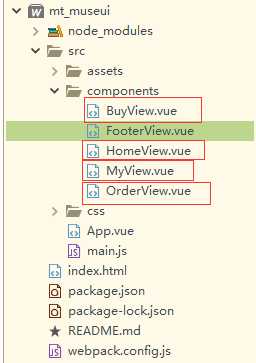
建立每个路由对应的组件

暂且在每个组件内写上内容
<template>
    <div>
        我是首页
    </div>
</template>

<script>

</script>

<style scoped>
</style>
在main.js中配置路由
import Vue from ‘vue‘
import App from ‘./App.vue‘

//安装路由:npm install vue-router
//引入路由
import VueRouter from ‘vue-router‘
Vue.use(VueRouter)

//安装MuseUI:npm install muse-ui -S
//引入并Use
import MuseUI from ‘muse-ui‘
import ‘muse-ui/dist/muse-ui.css‘
Vue.use(MuseUI)

import Toast from ‘muse-ui-toast‘;
Vue.use(Toast);

import ‘muse-ui-message/dist/muse-ui-message.css‘;
import Message from ‘muse-ui-message‘;
Vue.use(Message);

//引入组件
import HomeView from ‘./components/HomeView.vue‘
import BuyView from ‘./components/BuyView.vue‘
import OrderView from ‘./components/OrderView.vue‘
import MyView from ‘./components/MyView.vue‘

//声明路由
var routes =[
    {
        "path":‘/home‘,
        name:‘home‘,
        component:HomeView
    },
    {
        "path":‘/buy‘,
        name:‘buy‘,
        component:BuyView
    },
    {
        "path":‘/order‘,
        name:‘order‘,
        component:OrderView
    },
    {
        "path":‘/my‘,
        name:‘my‘,
        component:MyView
    }
]

//路由实例化
var router = new VueRouter({
    routes
})

//路由挂载
new Vue({
    router,
  el: ‘#app‘,
  render: h => h(App)
})
以上是关于Muse UI 路由的主要内容,如果未能解决你的问题,请参考以下文章