iOS 类似微信,QQ聊天界面的气泡聊天简单实现Demo
Posted Deft_MKJing宓珂璟
tags:
篇首语:本文由小常识网(cha138.com)小编为大家整理,主要介绍了iOS 类似微信,QQ聊天界面的气泡聊天简单实现Demo相关的知识,希望对你有一定的参考价值。
以下是YYKit组件的源码分析,高级性能优化相关都在里面可以找到
YYwebImage超细源码分析
YYImage超细源码分析
YYModel源码分析
YYText源码分析
12.27日更新:分析了一个很牛B的聊天UI框架

帅气的我又来了,是不是帅气逼人。。。。。。


来说说又是早些前,去面试了一些公司,有些喜欢打电话让你说说runtime,runloop什么的,这还好,关键遇到一个吊炸天的公司,我和一个哥们两个人去面试,到那里没都人理你啊,面试题也没有,坐在那发呆,接待我们的人很久才来,正好他们要写什么聊天功能还是干嘛,突然让我们两个快速撸一个聊天功能的界面,我没听错吧???!!!
当时 ,深井冰啊,尼玛深井冰啊,谁有空帮你们写demo啊,那么问题来了,尼玛就
一台电脑,我看了那个哥们,我果断告诉他我接个电话, ,等我回来的时候,哥们已经在写tableView了,这代码风格,一看就不是本地人,赶紧坐在那膜拜。。。。。。这哥们写了很久,反正没写出来,然后那人一来问了他几句,
 ,然后就没有然后了。
鸡汁的我一想,这个界面几秒钟不搞定了么


哎呦喂,看官别走啊,咱说点正事,他一看时间已经五点了,就说先这样吧。
喂喂喂!!! 110么,这里有人装逼,我还没操作呢,什么鬼啊???!!!
这什么面试啊,看别人写Demo啊,辣么奇葩的面试官
 还告诉我等电话通知哦,亲。。。。。。
 。
。
有完没完啊你,哎,sb博主,你弱智么,还写不写啊。。。。。。
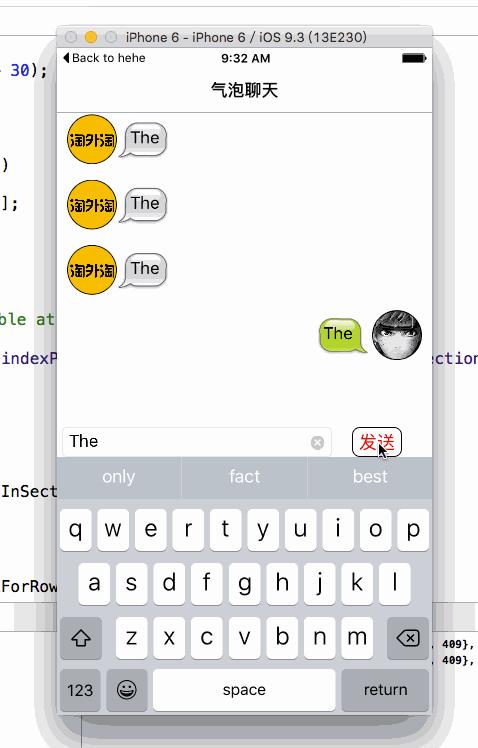
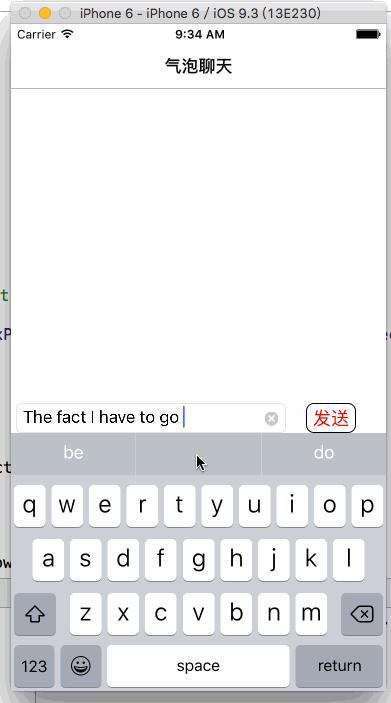
上图


NOTE:
A: 需要注意键盘的监听高度问题
B:
 ,气泡就这么小的,我们需要根据文本拉伸
stretchableImageWithLeftCapWidth:topCapHeight: --->拉伸气泡用它计算文本(boundingRectWithSize:)具体参数看文档吧
C:每次发文字的时候让ScrollView滚动到最后一个cell,用户可见
1.首先Demo这次没用AutoLayout布局了,来看下关键的cell部分以及键盘部分
@property (nonatomic,strong) UIImageView *headImageView; // 用户头像
@property (nonatomic,strong) UIImageView *backView; // 气泡
@property (nonatomic,strong) UILabel *contentLabel; // 气泡内文本

- (void)refreshCell:(MKJChatModel *)model; // 安装我们的cell
- (void)refreshCell:(MKJChatModel *)model
// 首先计算文本宽度和高度
CGRect rec = [model.msg boundingRectWithSize:CGSizeMake(200, CGFLOAT_MAX) options:NSStringDrawingUsesLineFragmentOrigin attributes:@NSFontAttributeName : [UIFont systemFontOfSize:17] context:nil];
// 气泡
UIImage *image = nil;
// 头像
UIImage *headImage = nil;
// 模拟左边
if (!model.isRight)
// 当输入只有一个行的时候高度就是20多一点
self.headImageView.frame = CGRectMake(10, rec.size.height - 18, 50, 50);
self.backView.frame = CGRectMake(60, 10, rec.size.width + 20, rec.size.height + 20);
image = [UIImage imageNamed:@"bubbleSomeone"];
headImage = [UIImage imageNamed:@"head.JPG"];
else // 模拟右边
self.headImageView.frame = CGRectMake(375 - 60, rec.size.height - 18, 50, 50);
self.backView.frame = CGRectMake(375 - 60 - rec.size.width - 20, 10, rec.size.width + 20, rec.size.height + 20);
image = [UIImage imageNamed:@"bubbleMine"];
headImage = [UIImage imageNamed:@"naruto@3x"];
// image.leftCapWidth
// 拉伸图片 参数1 代表从左侧到指定像素禁止拉伸,该像素之后拉伸,参数2 代表从上面到指定像素禁止拉伸,该像素以下就拉伸
image = [image stretchableImageWithLeftCapWidth:image.size.width/2 topCapHeight:image.size.height/2];
self.backView.image = image;
self.headImageView.image = headImage;
// 文本内容的frame
self.contentLabel.frame = CGRectMake(model.isRight ? 5 : 13, 5, rec.size.width, rec.size.height);
self.contentLabel.text = model.msg;
2.控制器注册两个监听
// 注册键盘的通知hide or show
    [[NSNotificationCenter defaultCenter] addObserver:self selector:@selector(keyBoardShow:) name:UIKeyboardWillShowNotification object:nil];
    [[NSNotificationCenter defaultCenter] addObserver:self selector:@selector(keyboardHide:) name:UIKeyboardWillHideNotification object:nil];
// 监听键盘弹出
- (void)keyBoardShow:(NSNotification *)noti
// 获取到的Noti信息是这样的
// NSConcreteNotification 0x7fde0a598bd0 name = UIKeyboardWillShowNotification; userInfo =
// UIKeyboardAnimationCurveUserInfoKey = 7;
// UIKeyboardAnimationDurationUserInfoKey = "0.25";
// UIKeyboardBoundsUserInfoKey = "NSRect: 0, 0, 375, 258";
// UIKeyboardCenterBeginUserInfoKey = "NSPoint: 187.5, 796";
// UIKeyboardCenterEndUserInfoKey = "NSPoint: 187.5, 538";
// UIKeyboardFrameBeginUserInfoKey = "NSRect: 0, 667, 375, 258";
// UIKeyboardFrameEndUserInfoKey = "NSRect: 0, 409, 375, 258"; 就是他
// UIKeyboardIsLocalUserInfoKey = 1;
//
// 咱们取自己需要的就好了
CGRect rec = [noti.userInfo[UIKeyboardFrameEndUserInfoKey] CGRectValue];
NSLog(@"%@",NSStringFromCGRect(rec));
// 小于,说明覆盖了输入框
if ([UIScreen mainScreen].bounds.size.height - rec.size.height < self.inputView.frame.origin.y + self.inputView.frame.size.height)
// 把我们整体的View往上移动
CGRect tempRec = self.view.frame;
tempRec.origin.y = - (rec.size.height);
self.view.frame = tempRec;
// 由于可见的界面缩小了,TableView也要跟着变化Frame
self.tableView.frame = CGRectMake(0, rec.size.height+64, 375, 667 - 64 - rec.size.height - 30);
if (self.dataSouce.count != 0)
[self.tableView scrollToRowAtIndexPath:[NSIndexPath indexPathForRow:self.dataSouce.count - 1 inSection:0] atScrollPosition:UITableViewScrollPositionBottom animated:YES];
// 监听键盘隐藏
- (void)keyboardHide:(NSNotification *)noti

    self.view.frame = CGRectMake(0, 0, 375, 667);
    self.tableView.frame = CGRectMake(0, 64, 375, 667 - 64 - 30);
3.这里的数据是模拟的,大致如下
- (void)clickSengMsg:(UIButton *)btn

    if (![self.inputView.textField.text isEqualToString:@""])

        MKJChatModel *chatModel = [[MKJChatModel alloc] init];
        chatModel.msg = self.inputView.textField.text;
        chatModel.isRight = arc4random() % 2; // 0 or 1
        [self.dataSouce addObject:chatModel];

    [self.tableView reloadData];
    // 滚到底部  scroll so row of interest is completely visible at top/center/bottom of view
    if (self.dataSouce.count != 0)
        [self.tableView scrollToRowAtIndexPath:[NSIndexPath indexPathForRow:self.dataSouce.count - 1 inSection:0] atScrollPosition:UITableViewScrollPositionBottom animated:YES];
关键的就这么多,一个简单的Demo就完成了,抛砖引玉,各位需要完善的自己再完 善,需要跑起来试试的,记得用iphone6的屏幕跑哦,没做适配。。。。。。
Demo请戳:https://github.com/DeftMKJ/Chat
TableViewCell入门版高度自适应传送门:http://blog.csdn.net/deft_mkjing/article/details/51569605
微信朋友圈纯Autolayout高度自适应:点击打开链接

以上是关于iOS 类似微信,QQ聊天界面的气泡聊天简单实现Demo的主要内容,如果未能解决你的问题,请参考以下文章
模仿QQ聊天界面的横向图片选择器HorizontalPicturePicker