QML-Canva画板画图功能-跟随鼠标位置进行随笔画
Posted surimn
tags:
篇首语:本文由小常识网(cha138.com)小编为大家整理,主要介绍了QML-Canva画板画图功能-跟随鼠标位置进行随笔画相关的知识,希望对你有一定的参考价值。
参考博主文章进行整理了代码,实现功能https://blog.csdn.net/UbuntuTouch/article/details/46375697
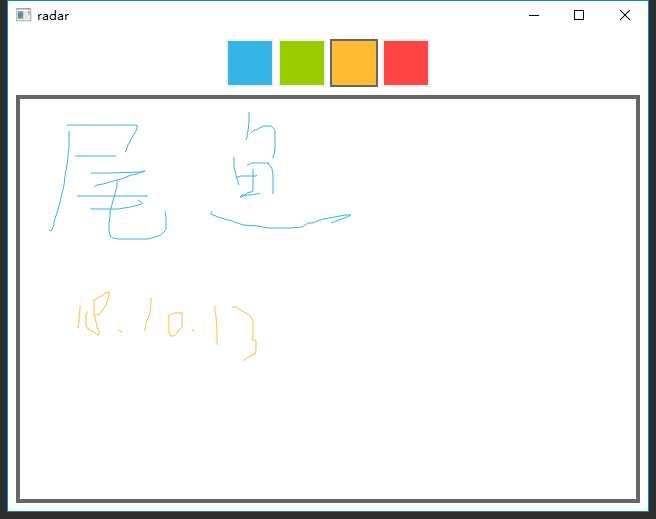
功能实现如下图:

1.组件ColorSquare.qml
该组件主要是颜色提取块,完整代码如下:
import QtQuick 2.0

Rectangle {
    id: colorSquare;
    width: 48; height: 48
    color: "green"
    signal clicked
    property bool active: false
    border.color: active? "#666666" : "#f0f0f0"
    border.width: 2

    MouseArea {
        id: area
        anchors.fill :parent
        onClicked: {
            colorSquare.clicked()
        }

    }
}
设置了该组件激活状态为false,边框颜色在点击激活状态下颜色为“#666”,就是该颜色提取块被选中时边框颜色改变
2.main.qml
主文件是执行画笔功能和颜色选取,我给添加了注释,原博主的引入文件我不知道如何在cpp中注册的,所以进行了整改,完整代码如下:
import QtQuick 2.7
import QtQuick.Window 2.2
import QtQuick.Controls 1.4
Window{
    id: root
    width: 640
    height: 480
    visible: true

    Row{
        id:colorTools//颜色提取工具
        anchors{
            horizontalCenter: parent.horizontalCenter
            top: parent.top
            topMargin: 8

        }
        property color paintColor: "#33b5e5"//设置初始画笔颜色
        spacing: 4;
        Repeater{//四个colorSquare
            model: ["#33B5E5", "#99CC00", "#FFBB33", "#FF4444"]//modelData 颜色数据
            ColorSquare{
                id:red;
                color: modelData;
                active: parent.paintColor == color//当选中一个colorSquare时,当前画笔颜色为选中的颜色
                onClicked: {
                    parent.paintColor = color
                }

            }
        }
    }
    Rectangle{
        anchors.fill: canvas
        border.color: "#666"
        border.width: 4;
    }
    Canvas{
        id:canvas;
        anchors{
            left: parent.left;
            right:parent.right;
            top:colorTools.bottom;
            bottom: parent.bottom;
            margins: 8
        }
      //鼠标点击坐标位置
        property real lastX
        property real lastY
        property color color: colorTools.paintColor

        onPaint: {
            var ctx = getContext("2d")
            ctx.lineWidtn = 5
            ctx.strokeStyle = canvas.color;
            ctx.beginPath()
            ctx.moveTo(lastX,lastY)
            lastX = area.mouseX;
            lastY = area.mouseY;
            ctx.lineTo(lastX,lastY)
            ctx.stroke()
        }
        MouseArea{
            id:area;
            anchors.fill: parent;
            onPressed: {
                canvas.lastX = mouseX;
                canvas.lastY = mouseY;
            }
            onPositionChanged: {
                canvas.requestPaint()//当鼠标press位置改变  完成当前绘制
            }
        }
    }
}//Window
以上是关于QML-Canva画板画图功能-跟随鼠标位置进行随笔画的主要内容,如果未能解决你的问题,请参考以下文章