openstack内外网ip实现
Posted chengjian-physique
tags:
篇首语:本文由小常识网(cha138.com)小编为大家整理,主要介绍了openstack内外网ip实现相关的知识,希望对你有一定的参考价值。
类似于阿里云ECS主机的内外网(双网卡不通网段)的结构,最终实现内外网区分隔离。
16.1各个虚拟机添加并配置IP
如果已经是双网卡不需要重新添加,网段配置文192.168.10.20
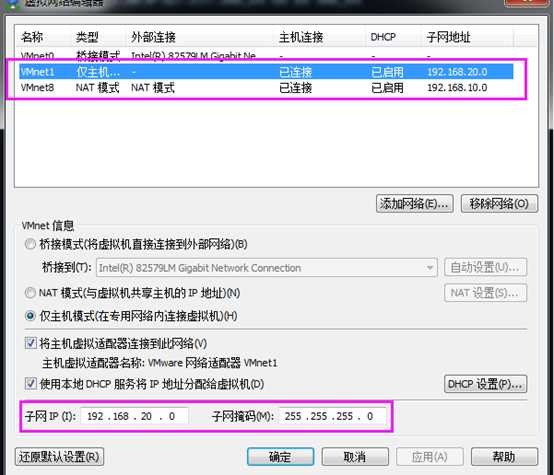
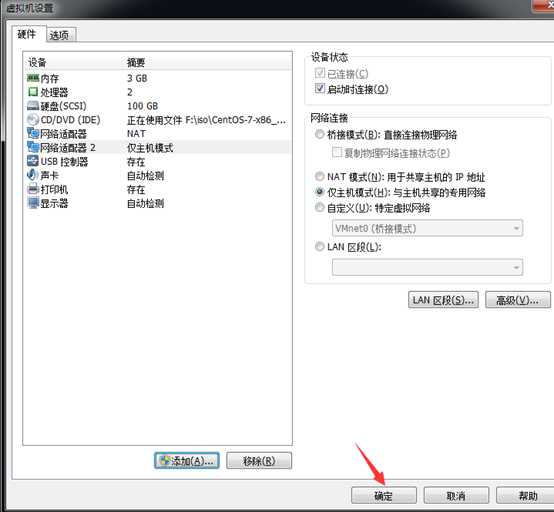
16.1.1在各虚拟机设置界面点击添加
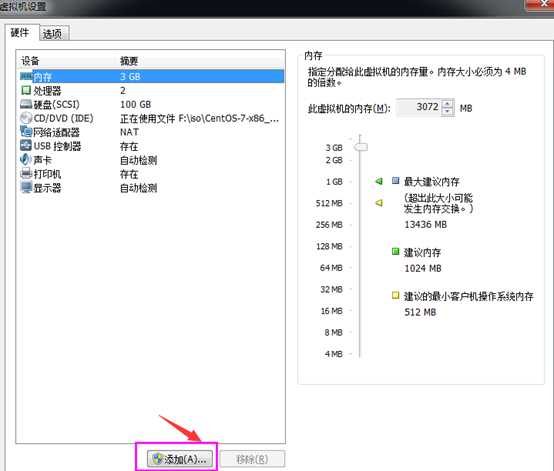
16.1.2添加网卡
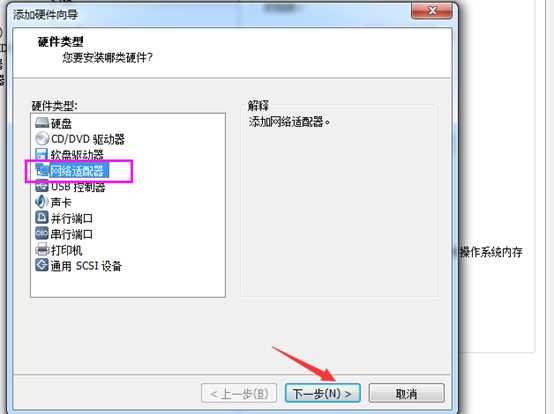
选择网络适配器然后点下一步:
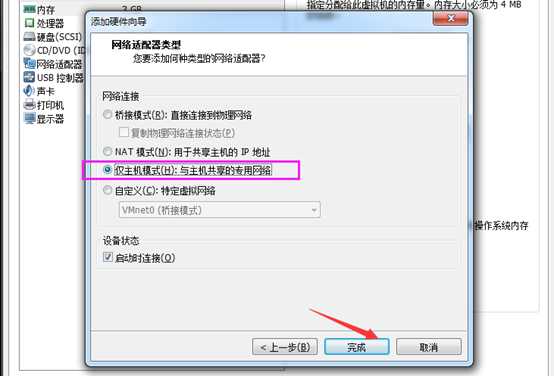
16.1.3确认添加
选仅主机模式然后点完成
16.1.4最终确认
确认添加正确然后点确定
16.1.5各虚拟机确认网卡添加成功
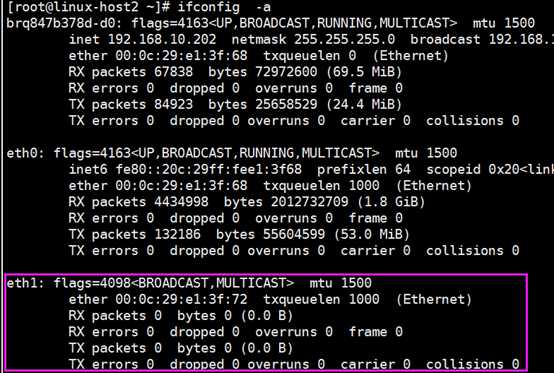
16.1.6各个虚拟机配置IP
# cd /etc/sysconfig/network-scripts/
# vim ifcfg-eth1
TYPE=Ethernet
BOOTPROTO=static
ONBOOT=yes
DEVICE=eth1
NAME=eth1
IPADDR=192.168.20.202 #与192.168.10.x网段最后一位IP相同
NETMASK=255.255.252.0
16.1.7其他服务器配置与验证
按照以上过程添加其他服务器,然验证各服务器第二块网卡之间是否网络互通:
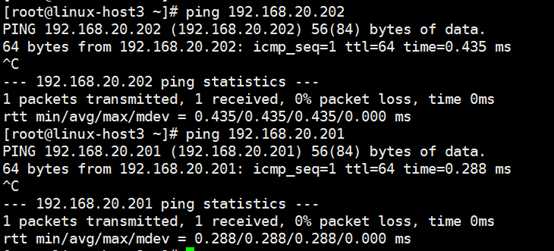
16.2控制节点配置
16.2.1编辑配置文件linuxbridge_agent.ini
# vim /etc/neutron/plugins/ml2/linuxbridge_agent.ini
155 physical_interface_mappings = internal:eth0, external:eth1
16.2.2编辑配置文件如下ml2_conf.ini
# vim /etc/neutron/plugins/ml2/ml2_conf.ini
172 flat_networks = internal, external
16.2.3控制节点当前全部配置
# grep "^[a-Z]" /etc/neutron/plugins/ml2/linuxbridge_agent.ini
physical_interface_mappings = internal:eth0, external:eth1
firewall_driver = neutron.agent.linux.iptables_firewall.IptablesFirewallDriver
enable_security_group = true
enable_vxlan = false
# grep "^[a-Z]" /etc/neutron/plugins/ml2/ml2_conf.ini
type_drivers = flat,vlan
tenant_network_types =
mechanism_drivers = linuxbridge
extension_drivers = port_security
flat_networks = internal, external
enable_ipset = true
16.2.4重启neutron服务
# systemctl restart neutron-linuxbridge-agent
# systemctl restart neutron-server
16.3计算节点配置
16.3.1编辑配置文件
# vim /etc/neutron/plugins/ml2/linuxbridge_agent.ini
155 physical_interface_mappings = internal:eth0, external:eth1
# vim /etc/neutron/plugins/ml2/linuxbridge_agent.ini
physical_interface_mappings = internal:eth0,external:eth1
16.3.2当前全部配置
# grep "^[a-Z]" /etc/neutron/plugins/ml2/linuxbridge_agent.ini
physical_interface_mappings = internal:eth0, external:eth1
firewall_driver = neutron.agent.linux.iptables_firewall.IptablesFirewallDriver
enable_security_group = true
enable_vxlan = false
# grep "^[a-Z]" /etc/neutron/plugins/ml2/linuxbridge_agent.ini
physical_interface_mappings = internal:eth0,external:eth1
firewall_driver = neutron.agent.linux.iptables_firewall.IptablesFirewallDriver
enable_security_group = true
enable_vxlan = false
16.3.3重启neutron服务
# systemctl restart neutron-linuxbridge-agent
# systemctl restart neutron-linuxbridge-agent
16.4创建网络并验证
16.4.1控制端创建网络
# neutron net-create --shared --provider:physical_network external --provider:network_type flat external-net
neutron CLI is deprecated and will be removed in the future. Use openstack CLI instead.
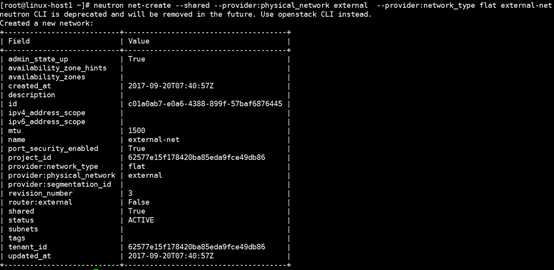
16.4.2创建子网
# neutron subnet-create --name external-subnet --allocation-pool start=192.168.20.100,end=192.168.20.200 --dns-nameserver 223.5.5.5 external-net 192.
168.20.0/24
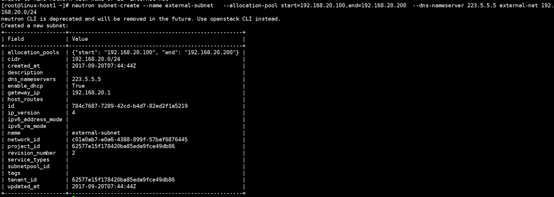
16.4.3验证子网创建
# neutron net-list

16.5创建虚拟机
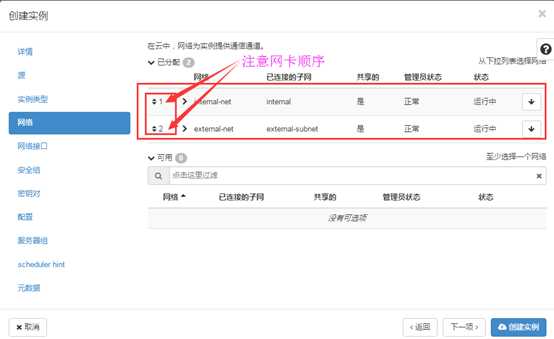
16.5.1在网卡界面添加两个网卡
其他保持不变
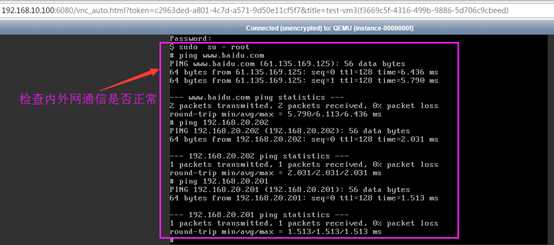
16.5.2验证内外网访问
#如果是在虚拟机启动的实例,则实例启动过程会稍微有点慢,下面是计算节点192.168.10.202上面的实例:
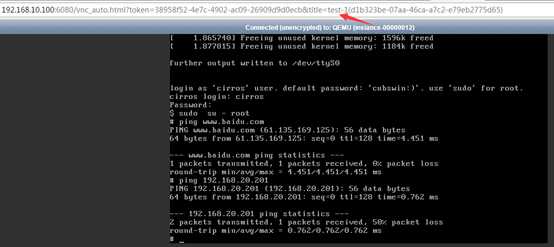
# 下面是计算节点192.168.10.203上面的实例:
以上是关于openstack内外网ip实现的主要内容,如果未能解决你的问题,请参考以下文章