VS2013 FFmpeg开发环境配置
Posted jiulonghudefeizhai
tags:
篇首语:本文由小常识网(cha138.com)小编为大家整理,主要介绍了VS2013 FFmpeg开发环境配置相关的知识,希望对你有一定的参考价值。
1、下载ffmpeg包(dll、include、lib) https://ffmpeg.zeranoe.com/builds/
有3个版本:Static、Shared和Dev
- Static --- 包含3个应用程序:ffmpeg.exe , ffplay.exe , ffprobe.exe,相关的DLL已经被编译到exe里了。
- Shared---包含3个应用程序之外还包含一些DLL,exe体积很小,在运行时到相应的DLL中调用功能。
- Dev ---开发者(developer)版本,包含了库文件XXX.lib和头文件XXX.h,不包含exe.
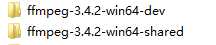
开发者下载Shared(include、lib)和Dev(dll),依据自己电脑选择相应的平台下载,本文下载的是:
2、环境配置
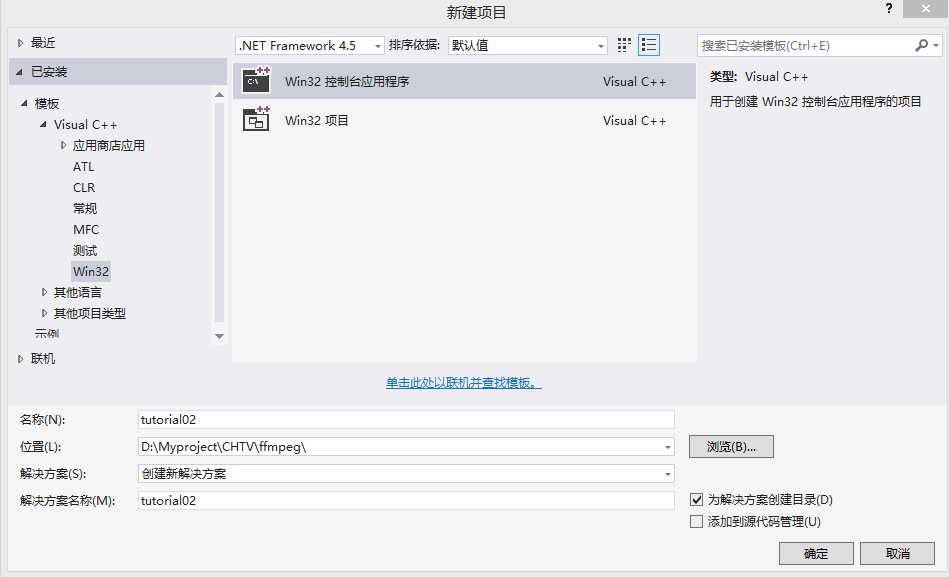
2.1 新建工程
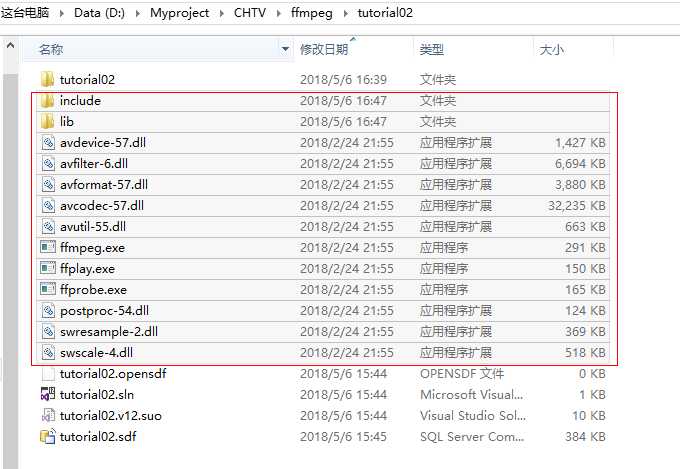
2.2 将1中准备的dll、include、lib拷贝到2.1建立的tutorial02工程目录下
2.3 右击工程“属性”
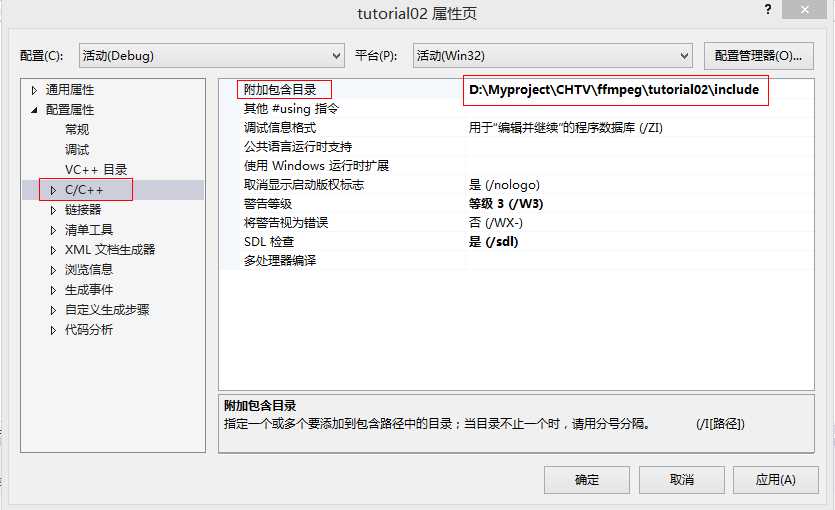
2.4 “c/c++”---->"附加包含目录"---->添加2.2中拷贝到tutorial02工程目录下的“include”路径
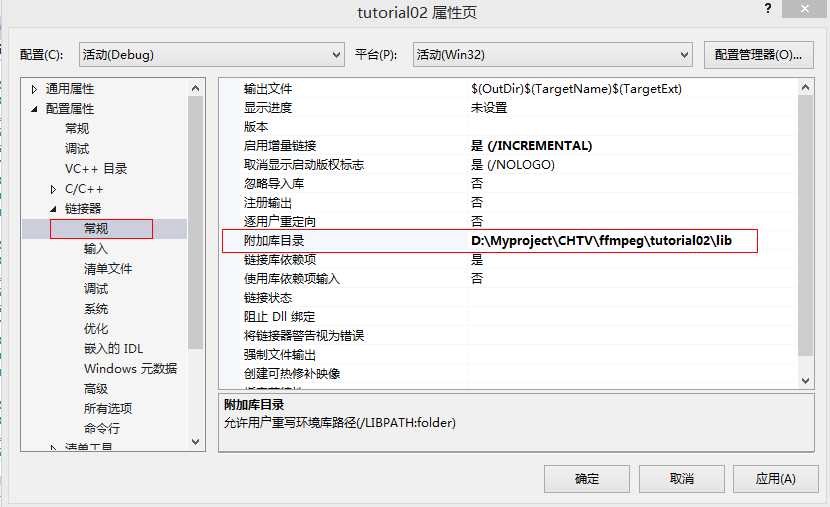
2.5 “连接器”---->"常规"---->“附加库目录”---->添加2.2中拷贝到tutorial02工程目录下的“lib”路径
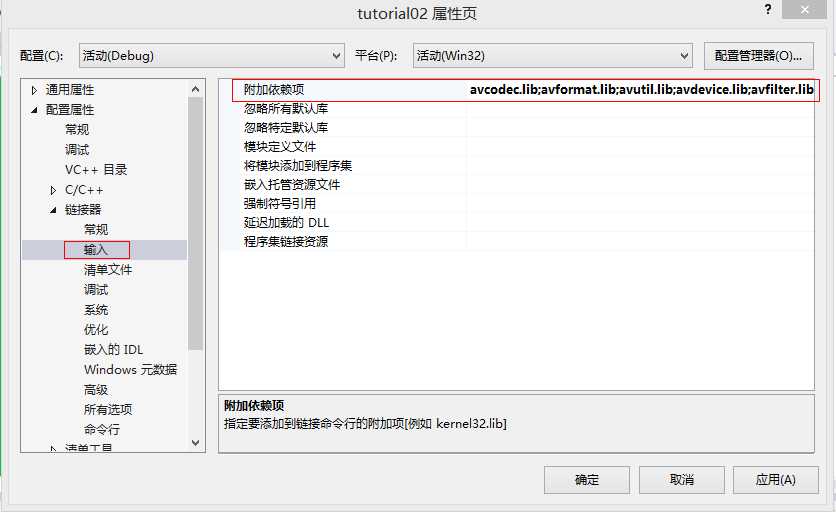
2.6 “连接器”---->"输入"---->“附加依赖项“---->添加“avcodec.lib;avformat.lib;avutil.lib;avdevice.lib;avfilter.lib;postproc.lib;swresample.lib;swscale.lib;”
3、测试
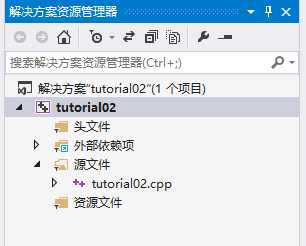
在ffmpeg-3.4.2-win64-devexamples目录下复制metagata.c源码到新建的tutorial02.cpp文件中,这是一个独立的demo,作用是打印音视频媒体文件基本信息。
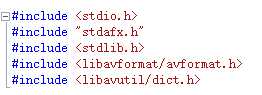
注意!!!有些人下载的metadata.c里面的头文件如下左图所示,需要修改为右图所示
(why? C++工程直接调用ffmpeg的c函数库会导致c函数无法解析,用extern "C"进行声明即可)
 ------------>
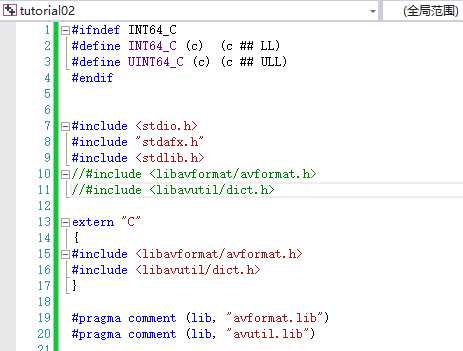
测试代码(metadata.c):
#ifndef INT64_C
#define INT64_C (c) (c ## LL)
#define UINT64_C (c) (c ## ULL)
#endif
#include <stdio.h>
#include "stdafx.h"
#include <stdlib.h>
//#include <libavformat/avformat.h>
//#include <libavutil/dict.h>
extern "C"
{
#include <libavformat/avformat.h>
#include <libavutil/dict.h>
}
#pragma comment (lib, "avformat.lib")
#pragma comment (lib, "avutil.lib")
int main(int argc, char ** argv)
{
AVFormatContext *fmt_ctx = NULL ;
AVDictionaryEntry *tag = NULL ;
int ret;
if (argc != 2) {
printf( "usage: %s <input_file>
"
"example program to demonstrate the use of the libavformat metadata API.
"
"
", argv [0]);
return 1;
}
av_register_all();
if ((ret = avformat_open_input(&fmt_ctx, argv[1], NULL, NULL )))
return ret;
while ((tag = av_dict_get(fmt_ctx->metadata, "", tag, AV_DICT_IGNORE_SUFFIX)))
printf( "%s=%s
", tag->key, tag->value);
avformat_close_input(&fmt_ctx);
return 0;
}
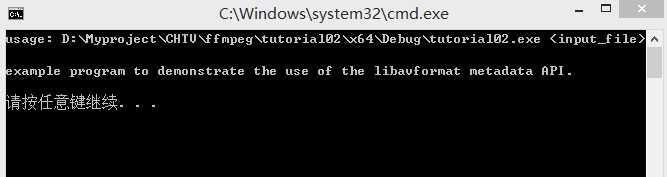
运行结果:
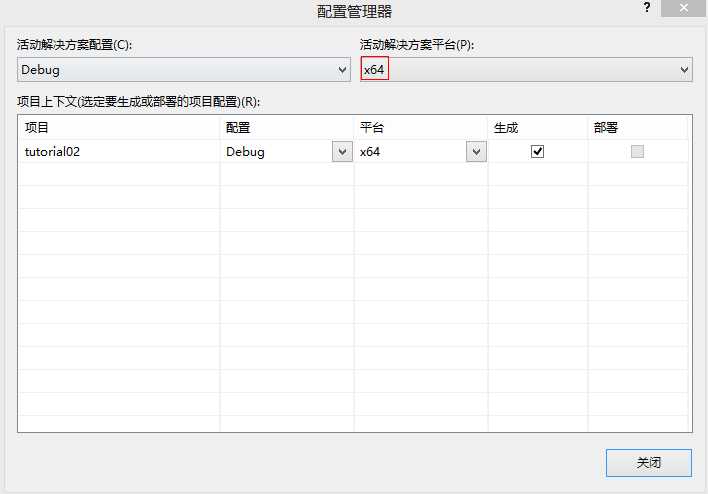
4、出现的错误
4.1 编译出现---error LNK2019: 无法解析的外部符号 
解决方法:
1) ffmpeg的环境已经配置好(第2部分)
2)配置管理器--平台由Win32修改为x64(原因未知)参考 https://blog.csdn.net/ljh0302/article/details/50011587
4.2 运行程序,弹如下错误
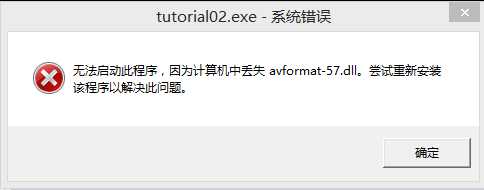
解决方法:将文件夹内的dll文件拷贝到工程——工程文件夹内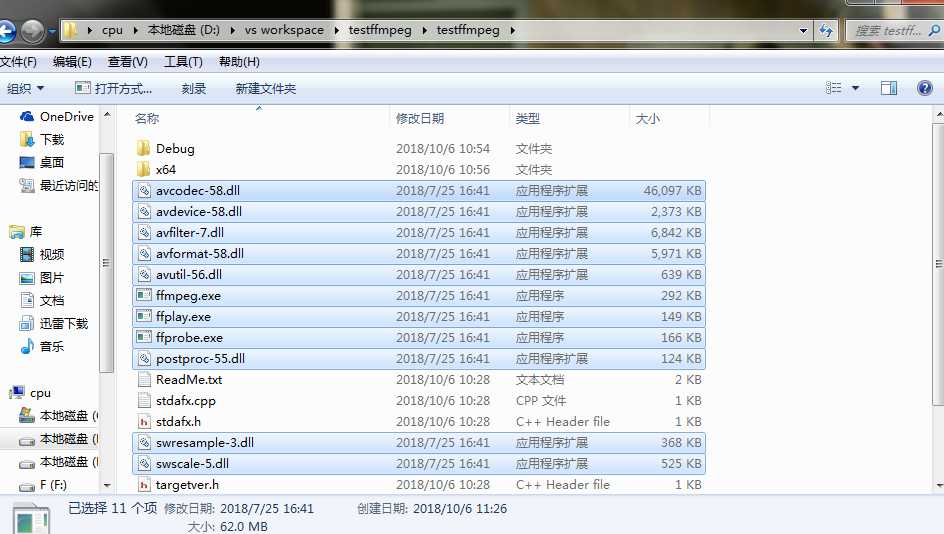
4.3
错误 4 error C4996: ‘av_register_all‘: 被声明为已否决

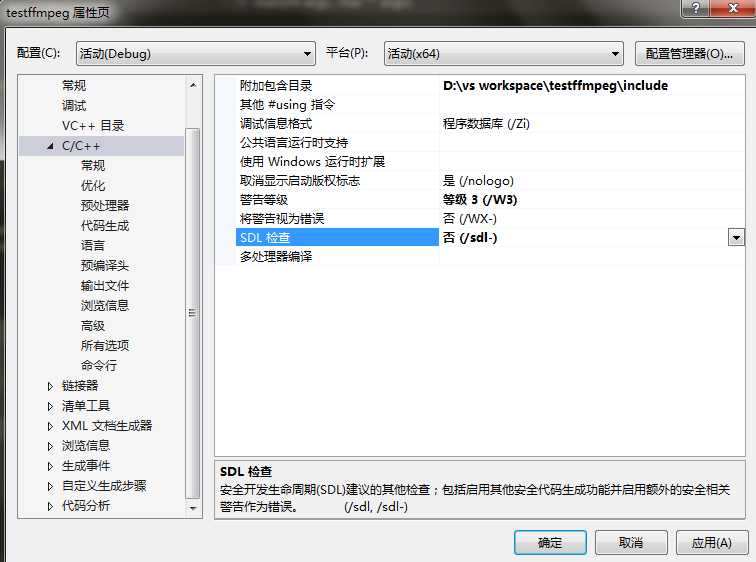
解决办法:禁用SDL 右击工程-属性-c/c++-SDL检查
以上是关于VS2013 FFmpeg开发环境配置的主要内容,如果未能解决你的问题,请参考以下文章