Swagger2接口开发
Posted lrj1009iret
tags:
篇首语:本文由小常识网(cha138.com)小编为大家整理,主要介绍了Swagger2接口开发相关的知识,希望对你有一定的参考价值。
Swagger2接口开发
1、先在pom.xml添加
          <!-- https://mvnrepository.com/artifact/io.springfox/springfox-swagger2 -->
		<dependency>
			<groupId>io.springfox</groupId>
			<artifactId>springfox-swagger2</artifactId>
			<version>2.5.0</version>
		</dependency>
		<!-- https://mvnrepository.com/artifact/io.springfox/springfox-swagger-ui -->
		<dependency>
			<groupId>io.springfox</groupId>
			<artifactId>springfox-swagger-ui</artifactId>
			<version>2.5.0</version>
		</dependency>
2、配置config
@EnableSwagger2
@Configuration
public class SwggerConfig {

    @Bean
    public Docket createMobileAppApi() {
        return new Docket(DocumentationType.SWAGGER_2)
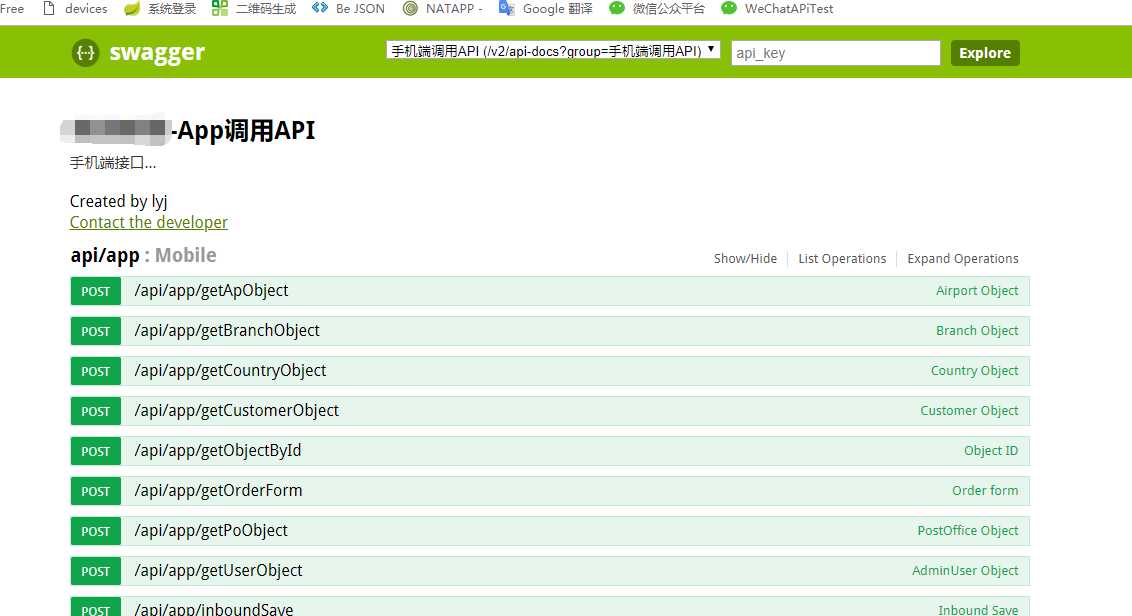
                .groupName("手机端调用API")
                // .pathMapping("/api")
                .select()
                // 为当前包路径
                .apis(RequestHandlerSelectors
                        .basePackage("com.djb.swagger.control"))
                .paths(PathSelectors.regex("/api/app/.*")).build()
                .apiInfo(appInfo());
    }

    // 构建 api文档的详细信息函数
    private ApiInfo appInfo() {
        return new ApiInfoBuilder()
        // 页面标题
                .title("XX系统-App调用API")
                // 创建人
                .contact(new Contact("lyj", "", "[email protected]"))
                // 版本号
                .version("1.0")
                // 描述
                .description("手机端接口...").build();
    }
3、controller层
private static final Log log = LogFactory.getLog(AppController.class);

    @ApiOperation(value = "Login")
    @RequestMapping(value = "login", method = RequestMethod.POST, produces = "application/json; charset=utf-8")
    @ResponseBody
    public RecvAppResponse recvLoginInfo(
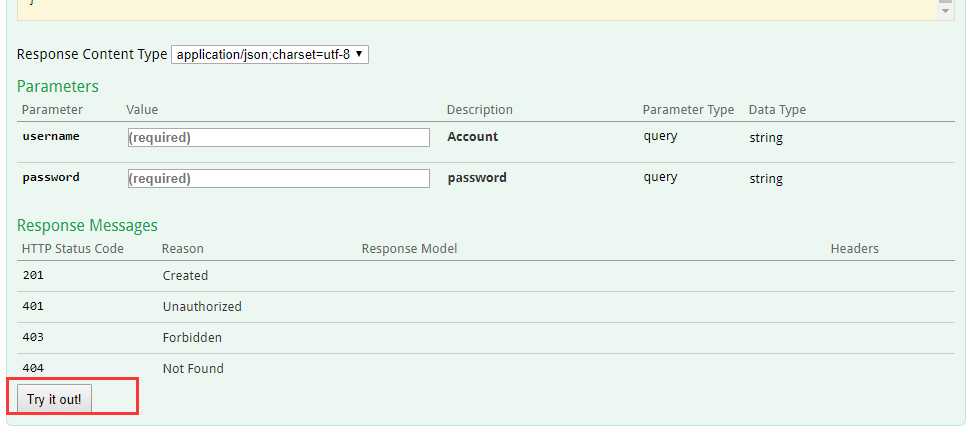
            @ApiParam(name = "username", value = "Account", required = true) @RequestParam String username,
            @ApiParam(name = "password", value = "password", required = true) @RequestParam String password) {
        RecvAppResponse recvAppResponse = new RecvAppResponse();
        ErrorObject error = new ErrorObject();
        error = appService.checkLogin(username, password);
        if (!error.isSuccess()) {
            recvAppResponse.setError(error);
            recvAppResponse.setSuccess(false);
            return recvAppResponse;
        }
        recvAppResponse.setUserToken(error.getMsg());
        error.setMsg("success!");
        recvAppResponse.setError(error);
        recvAppResponse.setSuccess(true);
        return recvAppResponse;
    }
4、登录 http://localhost:9090/api

5、测试
swagger方便直接测试

以上是关于Swagger2接口开发的主要内容,如果未能解决你的问题,请参考以下文章