实现百度第三方登陆详细解答
Posted lyxcode
tags:
篇首语:本文由小常识网(cha138.com)小编为大家整理,主要介绍了实现百度第三方登陆详细解答相关的知识,希望对你有一定的参考价值。
第一步:前提条件是需要在阿里云买个域名,并且买一个服务器。然后将域名解析,和服务器的ip地址绑定。然后需要将服务器备案,别人才能访问你的网页。
接下来就是重点看怎么实现第三方登陆了。。。。。
第二步:登陆百度云https://developer.baidu.com/如果有账号就直接登陆,可以手机验证码登陆,忘记密码也不怕。
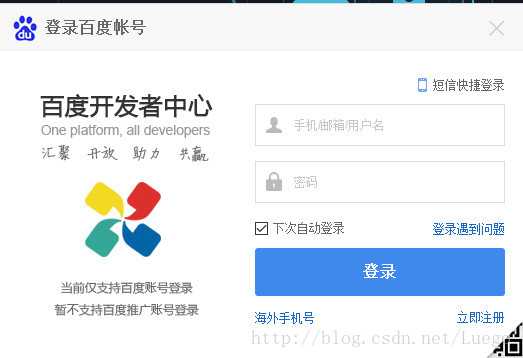
如果没有账号,就注册一个就行了。
第二步:把鼠标滑动到账户名上,会看到应用管理,点击应用管理。
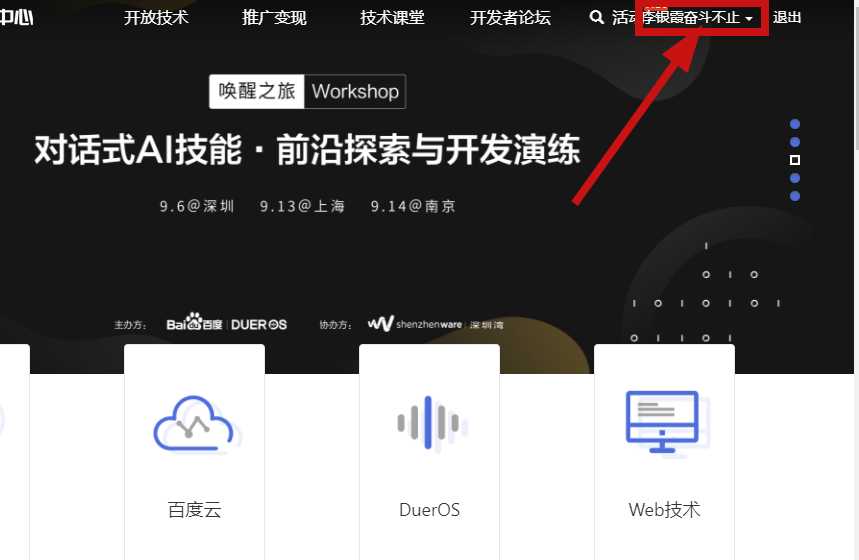
点击应用管理后的页面如下:
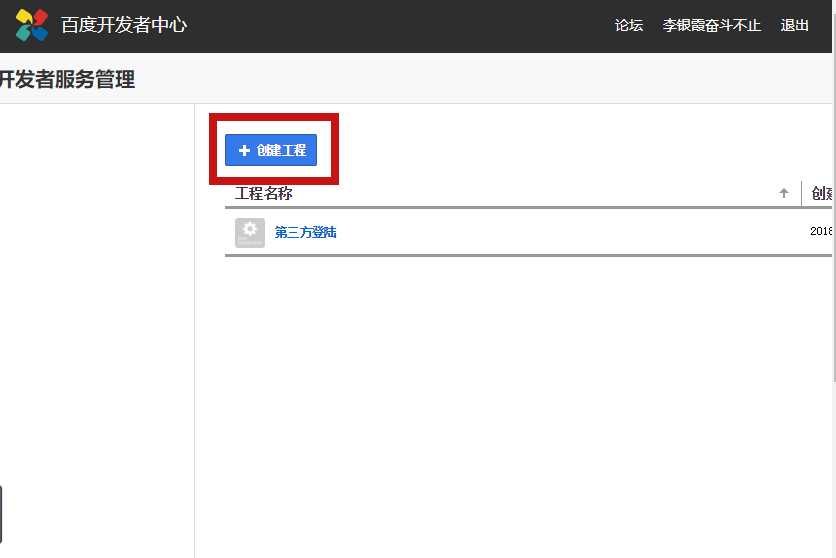
然后,点击创建工程,下面那个是我之前创建过得工程,
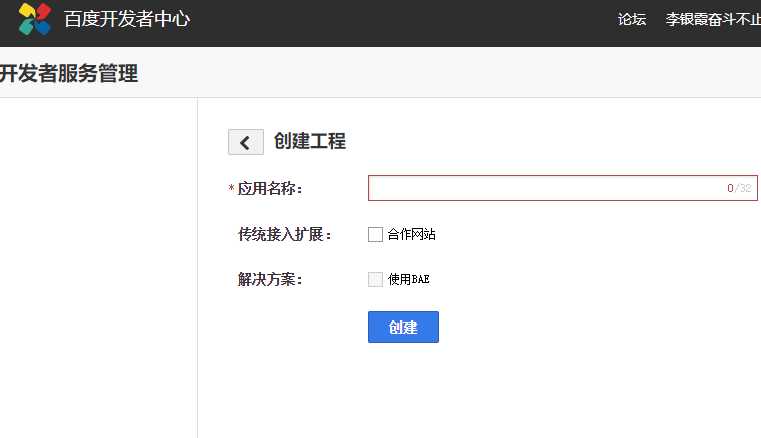
在应用名称里起一个名字,我就叫“第三方登陆研究”,下面的两个框框不用管,点击创建后如图:
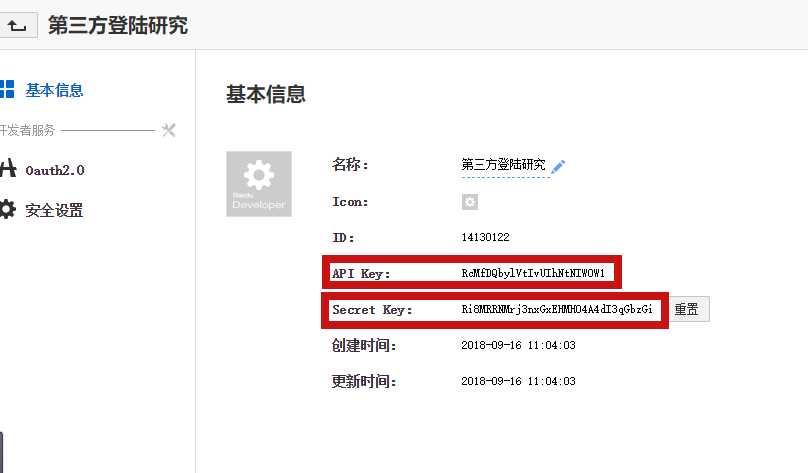
红色框框圈起来的就是我们后面需要的id和secret值,在JSP和Servlet里需要使用
然后单击“安全设置”,会出现下面的页面,
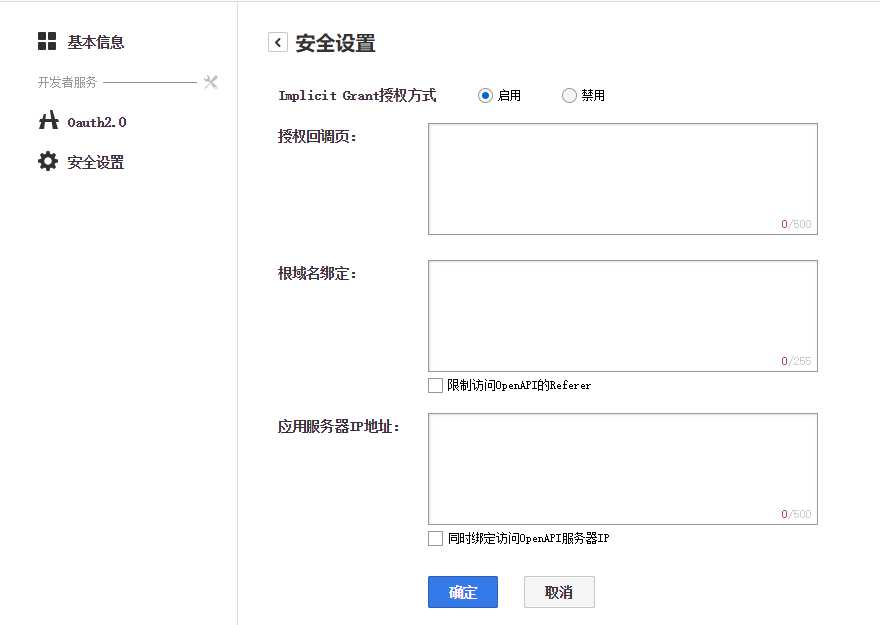
授权回调页就是你第三方访问成功后,进入的页面,例如我的:http://www.lyxwz.top/venu/BaiDuServlet
根域名绑定:就是你购买的域名
应用服务器ip地址:就是你购买的服务器的ip地址
确认无误后,点击确定;
这个时候,需要写一个项目venu,这个项目的登陆界面需要来一个第三方登陆,
在venu里的login.jsp 中的代码中的client_id和redirect_uri改成自己的,client_id 就是我们的API key ,redirect_uri就是我们之前填的授权回调页。
<%@ page language="java" contentType="text/html; charset=UTF-8"
    pageEncoding="UTF-8"%>
<!DOCTYPE html PUBLIC "-//W3C//DTD HTML 4.01 Transitional//EN" "http://www.w3.org/TR/html4/loose.dtd">
<html>
<head>
<meta http-equiv="Content-Type" content="text/html; charset=UTF-8">
<title>Insert title here</title>
</head>
<script type="text/javascript">
        function bdlogin(){
            location.href="https://openapi.baidu.com/oauth/2.0/authorize?response_type=code&client_id=RcMfDQbylVtIvUIhNtNIW0W1&redirect_uri=http://www.lyxwz.top/venu/BaiDuServlet&display=popup";
        }
</script>
<body>
<input type="button" value="百度登录" onclick="bdlogin()">
</body>
</html>
首先是我们的自己电脑的浏览器向购买服务器发送请求,然后购买的服务器给我们送来了一个登陆界面的信息,
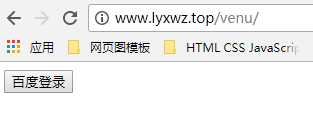
然后我们点击百度登陆,进入 百度服务器的登陆界面
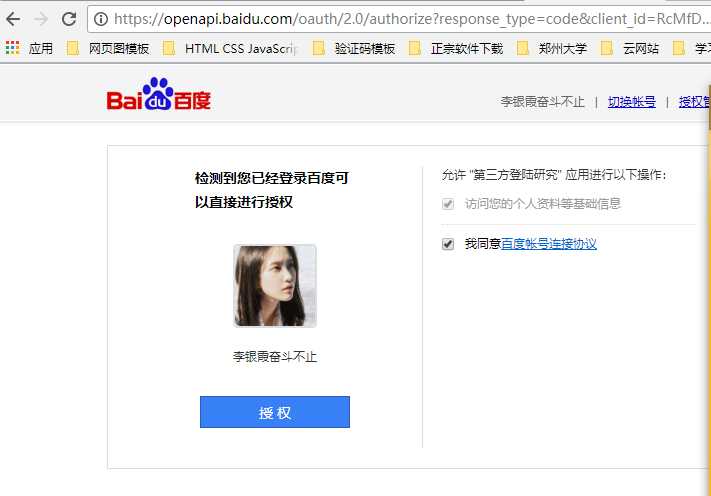
当我们点击授权,百度服务器就会核实我们的信息和百度里面的信息是否相符,如果相符,就会进入我们之前填写的授权回调页
我的授权会掉页里面的代码如下:重点:其中下面代码红色部分需要根据我们的百度密钥进行改正,
import java.io.IOException;
import java.util.Map;

import javax.servlet.ServletException;
import javax.servlet.http.HttpServlet;
import javax.servlet.http.HttpServletRequest;
import javax.servlet.http.HttpServletResponse;

import org.apache.http.HttpEntity;
import org.apache.http.HttpResponse;
import org.apache.http.client.methods.HttpGet;
import org.apache.http.impl.client.CloseableHttpClient;
import org.apache.http.impl.client.HttpClients;
import org.apache.http.util.EntityUtils;

import com.alibaba.fastjson.JSON;
import com.alibaba.fastjson.TypeReference;

public class BaiDuServlet extends HttpServlet {

    private static final long serialVersionUID = 1L;

    protected void doGet(HttpServletRequest request, HttpServletResponse response)
            throws ServletException, IOException {
        doPost(request, response);
    }

    protected void doPost(HttpServletRequest request, HttpServletResponse response)
            throws ServletException, IOException {
        String code = request.getParameter("code");
        String redirect_uri = "http://www.lyxwz.top/venu/BaiDuServlet";
        String client_secret = "Ri8MRRNMrj3nxGxEHMH04A4dI3qGbzGi";
        String client_id = "RcMfDQbylVtIvUIhNtNIW0W1";
        String url1 = "https://openapi.baidu.com/oauth/2.0/token?grant_type=authorization_code&code=" + code
                + "&client_id=" + client_id + "&client_secret=" + client_secret + "&redirect_uri=" + redirect_uri + "";

        String content1 = "";

        try {
            // 鍒涘缓涓?涓狧ttpClient瀵硅薄
            CloseableHttpClient httpClient = HttpClients.createDefault();
            // 鍒涘缓涓?涓狦et璇锋眰
            HttpGet getReq = new HttpGet(url1);

            getReq.addHeader("Accept",
                    "text/html,application/xhtml+xml,application/xml;q=0.9,image/webp,*/*;q=0.8    ");
            getReq.addHeader("Accept-Encoding", "gzip, deflate, sdch, br");
            getReq.addHeader("Accept-Language", "zh-CN,zh;q=0.8");
            getReq.addHeader("Cache-Control", "max-age=0");
            getReq.addHeader("Connection", "keep-alive");
            getReq.addHeader("Host", "openapi.baidu.com");
            getReq.addHeader("User-Agent",
                    "Mozilla/5.0 (Windows NT 6.3; WOW64) AppleWebKit/537.36 (KHTML, like Gecko) Chrome/52.0.2743.116 Safari/537.36");

            HttpResponse res = httpClient.execute(getReq);

            HttpEntity entity = res.getEntity();
            content1 = EntityUtils.toString(entity, "UTF-8");

        } catch (Exception e) {
            e.printStackTrace();
        }

        Map<String, Object> map = JSON.parseObject(content1, new TypeReference<Map<String, Object>>() {
        });
        String access_token = (String) map.get("access_token");

        print(access_token, request, response);
    }

    public void print(String access_token,HttpServletRequest request, HttpServletResponse response) throws ServletException, IOException {
        String content = "";
        String url = "https://openapi.baidu.com/rest/2.0/passport/users/getInfo?access_token=" + access_token + "";
        try {
            // 鍒涘缓涓?涓狧ttpClient瀵硅薄
            CloseableHttpClient httpClient = HttpClients.createDefault();
            // 鍒涘缓涓?涓狦et璇锋眰
            HttpGet getReq = new HttpGet(url);

            getReq.addHeader("Accept", "text/html,application/xhtml+xml,application/xml;q=0.9,image/webp,*/*;q=0.8    ");
            getReq.addHeader("Accept-Encoding", "gzip, deflate, sdch, br");
            getReq.addHeader("Accept-Language", "zh-CN,zh;q=0.8");
            getReq.addHeader("Cache-Control", "max-age=0");
            getReq.addHeader("Connection", "keep-alive");
            getReq.addHeader("Host", "openapi.baidu.com");
            getReq.addHeader("User-Agent", "Mozilla/5.0 (Windows NT 6.3; WOW64) AppleWebKit/537.36 (KHTML, like Gecko) Chrome/52.0.2743.116 Safari/537.36");

            HttpEntity entity = httpClient.execute(getReq).getEntity();
            content = EntityUtils.toString(entity, "UTF-8");
            System.out.println(content);
        } catch (Exception e) {
            e.printStackTrace();
        }

        Map<String, Object> map = JSON.parseObject(content, new TypeReference<Map<String, Object>>() {});
        System.out.println(map);

        String baiduid = (String) map.get("userid");
        System.out.println(baiduid);
        //List list = JdbcUtils.getList(User.class, "select * from user where baiduid=" + baiduid);

//        if (list.size() == 0) {
        request.setAttribute("message", map);
        request.getRequestDispatcher("/result.jsp").forward(request, response);
//        } else {
//            User user = (User) list.get(0);
//            req.getSession().setAttribute("UserInfo", user);
//            req.getRequestDispatcher("/success.jsp").forward(req, res);
//        }
    }

}
然后将这个项目压缩成war包,复制到购买的服务器上的tommcat里面的webapps中,点击lib里面的startup.bat就发布了 war包也自动解压了
我们就可以在任何一台电脑上像登陆百度一样登陆我们的项目了。
至此,百度第三方登陆完成!!!
以上是关于实现百度第三方登陆详细解答的主要内容,如果未能解决你的问题,请参考以下文章