OpenGL学习之旅01—Xcode+OpenGL环境配置
Posted leojason
tags:
篇首语:本文由小常识网(cha138.com)小编为大家整理,主要介绍了OpenGL学习之旅01—Xcode+OpenGL环境配置相关的知识,希望对你有一定的参考价值。
1、下载和安装HomeBrew
打开terminal,输入下面的命令:
/usr/bin/ruby -e "$(curl -fsSL https://raw.githubusercontent.com/Homebrew/install/master/install)"x
1
/usr/bin/ruby -e "$(curl -fsSL https://raw.githubusercontent.com/Homebrew/install/master/install)"
可能在下载的过程中遇到如下问题,不要慌,可能是网络问题导致的,重新执行一遍安装命令即可

然后就是一路enter即可,最后看到successful就搞定了
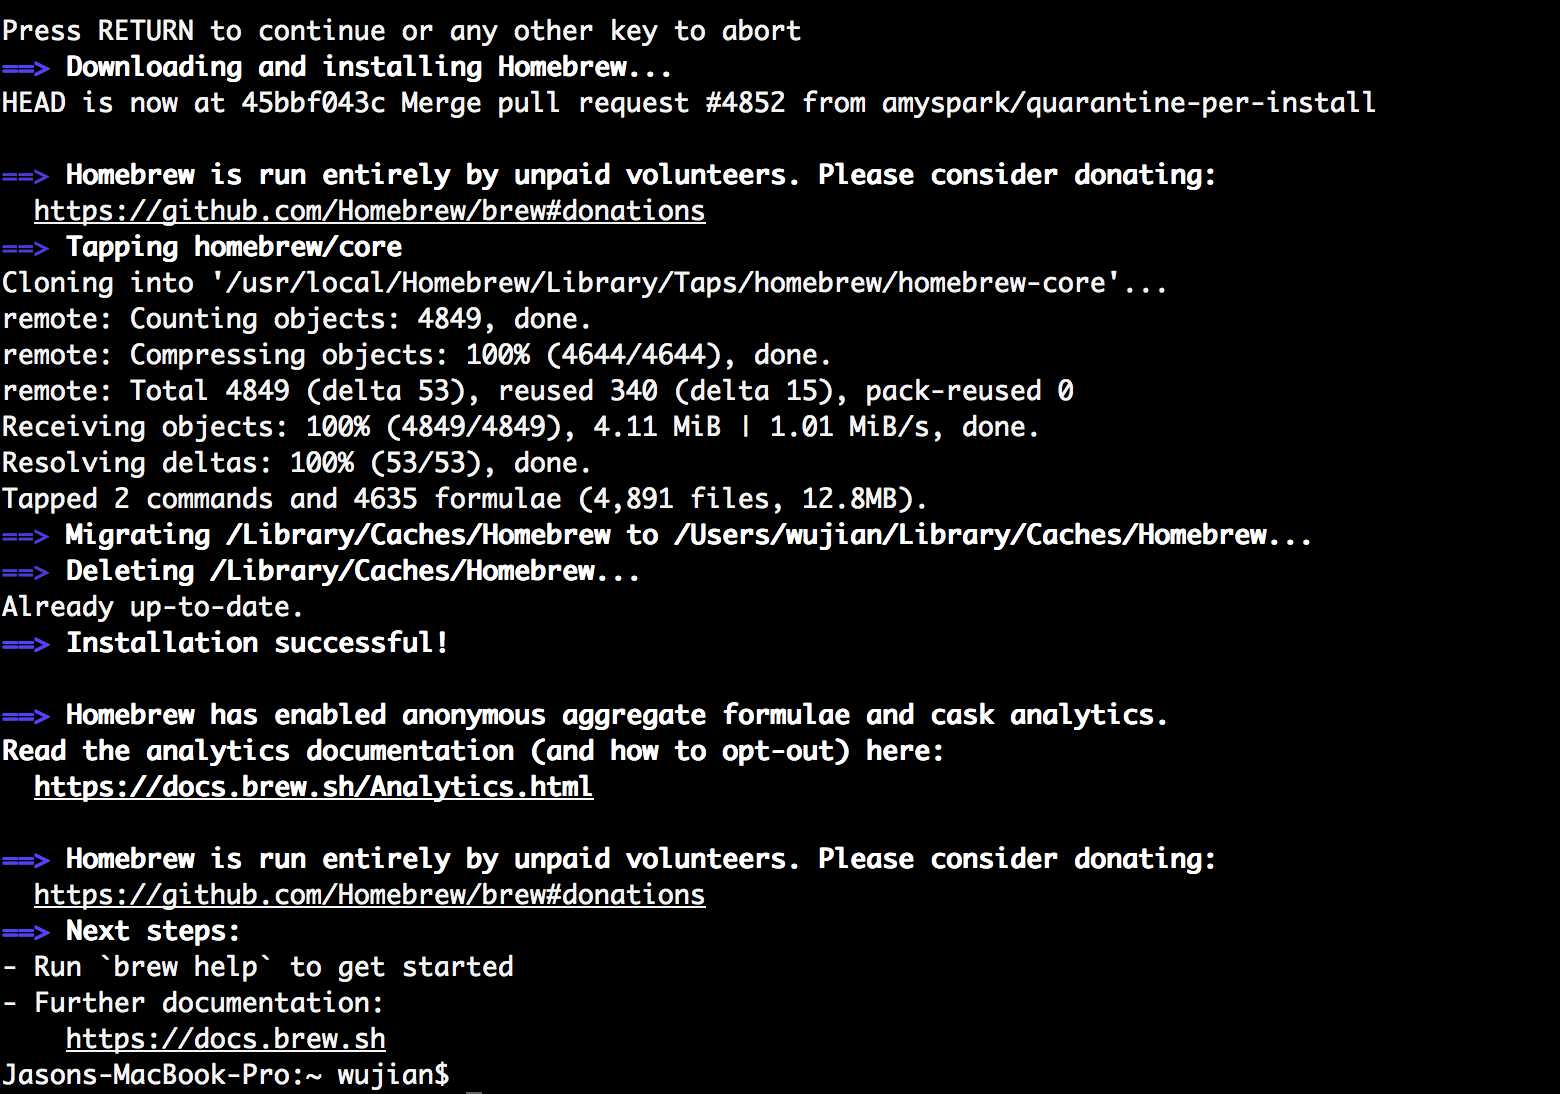
这里解释下为何要安装HomeBrew,我们都知道macOS是基于unix的,但是这套从unix衍生出来的计算机系统很多unix底层的工具都是缺失的,所以这就有了homebrew,官方解释可以以最简单,最灵活的方式来安装macOS中不包含的UNIX工具,安装和卸载的方式也很简单,只需要在terminal中输入下面的两条代码即可:
/usr/bin/ruby -e "$(curl -fsSL https://raw.githubusercontent.com/Homebrew/install/master/install)"
/usr/bin/ruby -e "$(curl -fsSL https://raw.githubusercontent.com/Homebrew/install/master/uninstall)"

//常用命令:
//安装软件,如:brew install oclint
//卸载软件,如:brew uninstall oclint
//搜索软件,如:brew search oclint
//更新软件,如:brew upgrade oclint
//查看安装列表, 如:brew list
//更新Homebrew,如:brew update
10
1
/usr/bin/ruby -e "$(curl -fsSL https://raw.githubusercontent.com/Homebrew/install/master/install)"
2
/usr/bin/ruby -e "$(curl -fsSL https://raw.githubusercontent.com/Homebrew/install/master/uninstall)"
3
4
//常用命令:
5
//安装软件,如:brew install oclint
6
//卸载软件,如:brew uninstall oclint
7
//搜索软件,如:brew search oclint
8
//更新软件,如:brew upgrade oclint
9
//查看安装列表, 如:brew list
10
//更新Homebrew,如:brew update
2、安装GLEW和GLFW
很过教程都是基于GLUT的,但Xcode上会显示deprecate的warning,主要因为GLUT从1998年不再更新了,使用也有一定隐患。现在使用的一般为GLEW,GLFW,FreeGLUT(兼容GLUT),在terminal中输入
brew install glew
brew install glfw
brew install freeglut
3
1
brew install glew
2
brew install glfw
3
brew install freeglut

笔者在安装最后一个的时候遇到了一个小问题
freeglut: XQuartz 2.7.11 (or newer) is required to install this formula. X11Requirement unsatisfied!
You can install with Homebrew-Cask:
 brew cask install xquartz
You can download from:
 https://xquartz.macosforge.org
Error: An unsatisfied requirement failed this build.
6
1
freeglut: XQuartz 2.7.11 (or newer) is required to install this formula. X11Requirement unsatisfied!
2
You can install with Homebrew-Cask:
3
brew cask install xquartz
4
You can download from:
5
https://xquartz.macosforge.org
6
Error: An unsatisfied requirement failed this build.
提示需要安装XQuartz,这个很简单,直接去XQuartz的官网下载安装一下就好了,安装完XQuartz后继续执行最后freeglut安装完毕
3、Xcode配置
新建一个command line tool工程
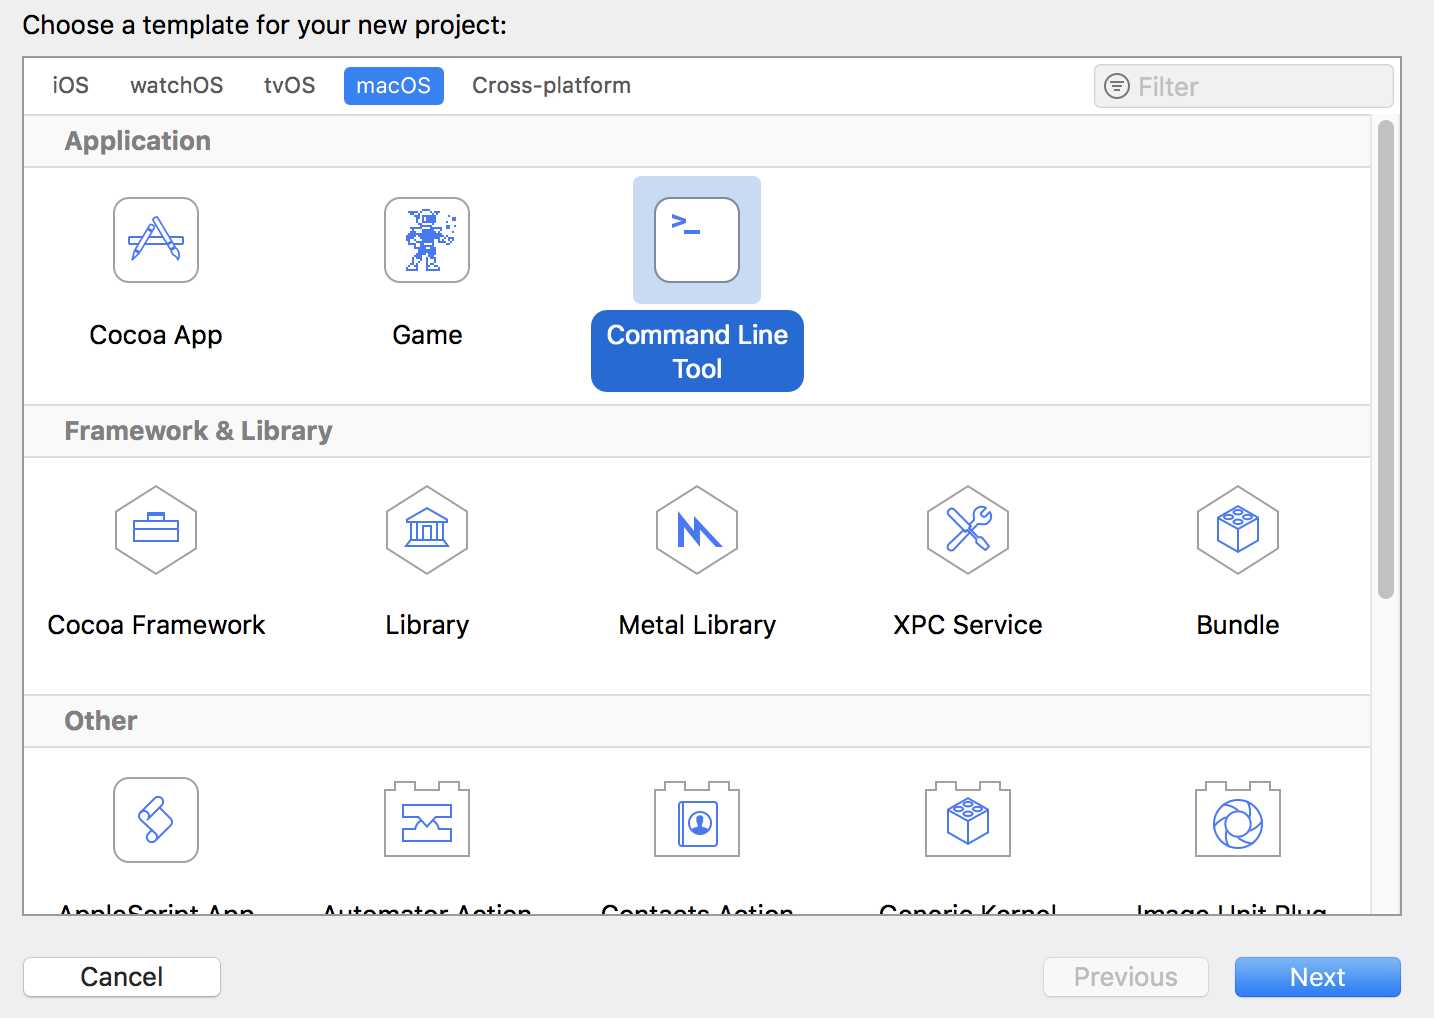
在Build Setting中设置好Header Search Paths和Library Search Paths如下:

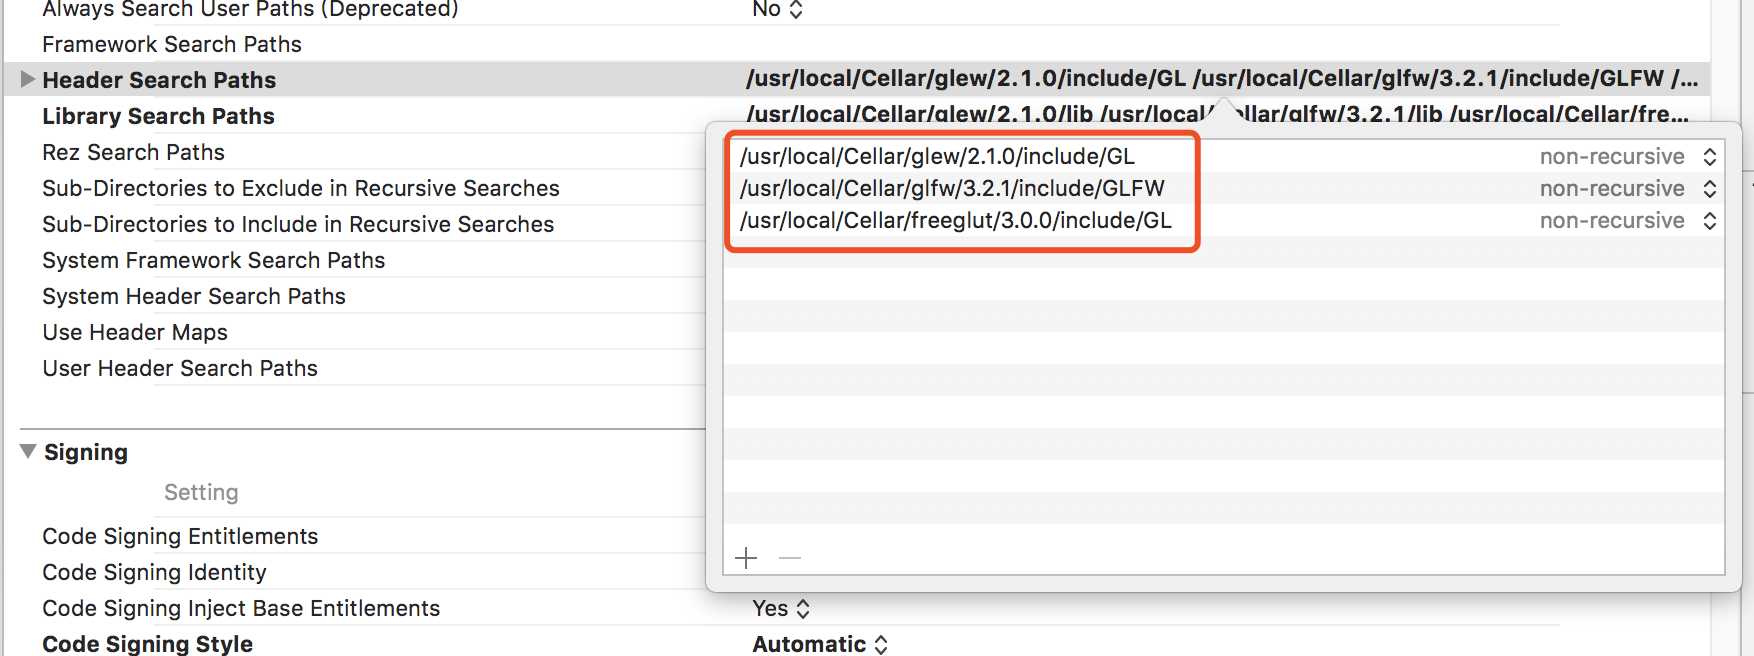
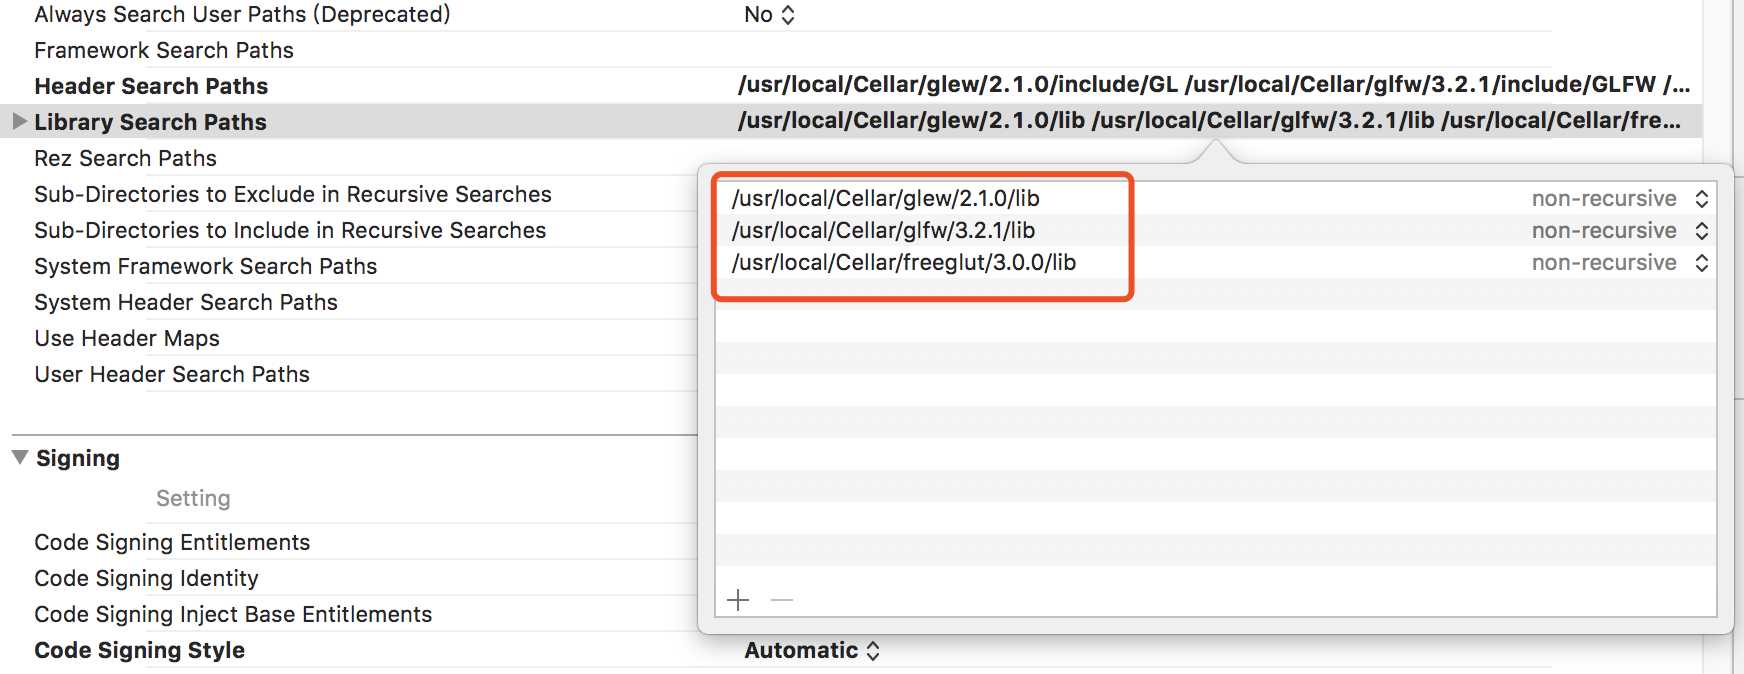
然后在Build Phases里面添加库文件
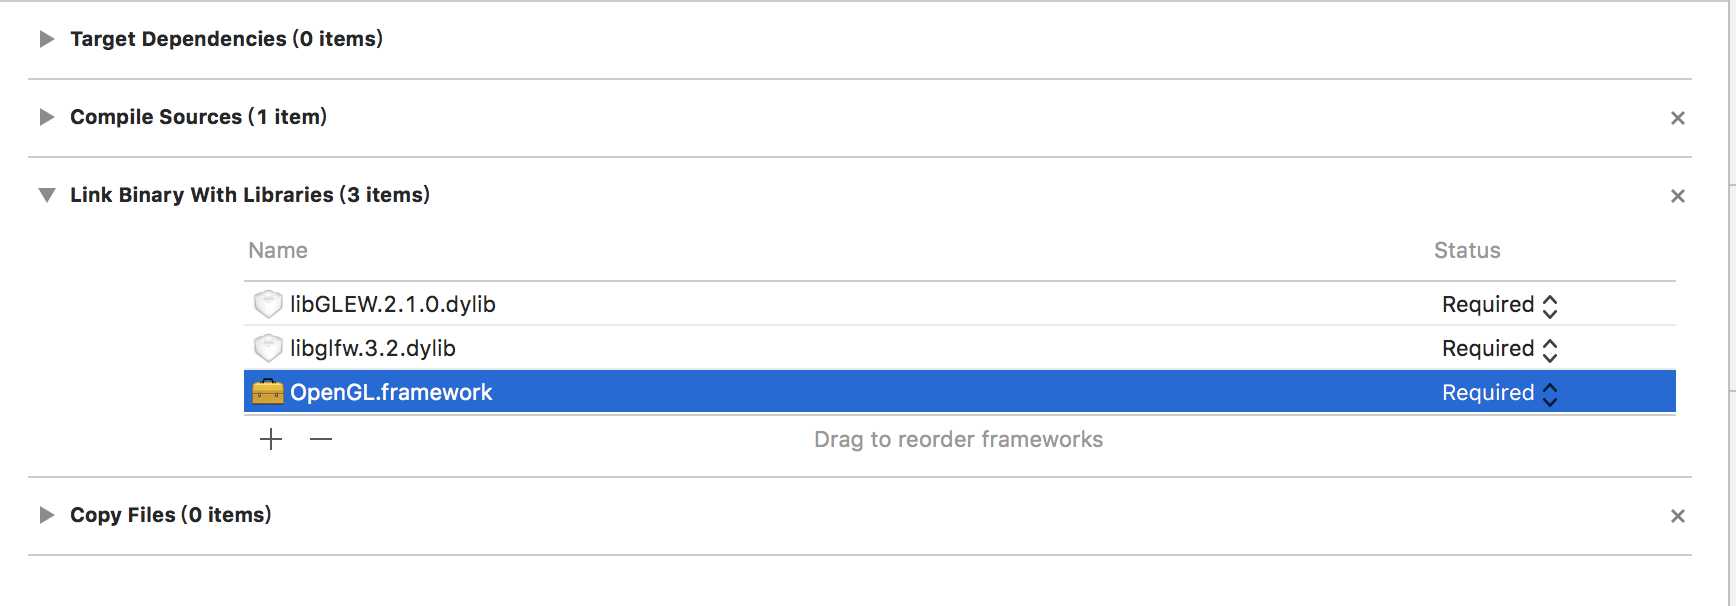
4、编写代码测试
从glfw的官网找了一个基本的代码框架,然后添加了一段渲染三角形的代码,主要功能就是创建一个glwindow,然后在里面绘制一个三角形,代码如下:
#include <stdio.h>
#include <GL/glew.h>
#include <GLFW/glfw3.h>

int main(int argc, const char * argv[]) {
    GLFWwindow *window;
    /* Initialize the library */
    if (!glfwInit())
        return -1;
    /* Create a windowed mode window and its OpenGL context */
    window = glfwCreateWindow(640, 480, "Hello OpenGL", NULL, NULL);
    if (!window) {
        glfwTerminate();
        return -1;
    }
    /* Make the window‘s context current */
    glfwMakeContextCurrent(window);
    /* Loop until the user closes the window */
    while (!glfwWindowShouldClose(window)) {
        /* Render here */
        glBegin(GL_TRIANGLES);

        glColor3f(1.0, 0.0, 0.0);    // Red
        glVertex3f(0.0, 1.0, 0.0);

        glColor3f(0.0, 1.0, 0.0);    // Green
        glVertex3f(-1.0, -1.0, 0.0);

        glColor3f(0.0, 0.0, 1.0);    // Blue
        glVertex3f(1.0, -1.0, 0.0);

        glEnd();
        /* Swap front and back buffers */
        glfwSwapBuffers(window);
        /* Poll for and process events */
        glfwPollEvents();
    }
    glfwTerminate();

    return 0;
}
x
1
2
3
4
5
int main(int argc, const char * argv[]) {
6
GLFWwindow *window;
7
/* Initialize the library */
8
if (!glfwInit())
9
return -1;
10
/* Create a windowed mode window and its OpenGL context */
11
window = glfwCreateWindow(640, 480, "Hello OpenGL", NULL, NULL);
12
if (!window) {
13
glfwTerminate();
14
return -1;
15
}
16
/* Make the window‘s context current */
17
glfwMakeContextCurrent(window);
18
/* Loop until the user closes the window */
19
while (!glfwWindowShouldClose(window)) {
20
/* Render here */
21
glBegin(GL_TRIANGLES);
22
23
glColor3f(1.0, 0.0, 0.0); // Red
24
glVertex3f(0.0, 1.0, 0.0);
25
26
glColor3f(0.0, 1.0, 0.0); // Green
27
glVertex3f(-1.0, -1.0, 0.0);
28
29
glColor3f(0.0, 0.0, 1.0); // Blue
30
glVertex3f(1.0, -1.0, 0.0);
31
32
glEnd();
33
/* Swap front and back buffers */
34
glfwSwapBuffers(window);
35
/* Poll for and process events */
36
glfwPollEvents();
37
}
38
glfwTerminate();
39
40
return 0;
41
}
42
然后build,然后就傻眼了有20个编译错误,仔细看error貌似是库的链接问题,提示找不到定义
/usr/local/Cellar/glew/2.1.0/include/GL/glew.h:19860:17: Missing ‘#include "/Applications/Xcode.app/Contents/Developer/Platforms/MacOSX.platform/Developer/SDKs/MacOSX10.13.sdk/System/Library/Frameworks/OpenGL.framework/Headers/gl3.h"‘; declaration of ‘PFNGLCOPYTEXSUBIMAGE3DPROC‘ must be imported from module ‘OpenGL.GL3‘ before it is required
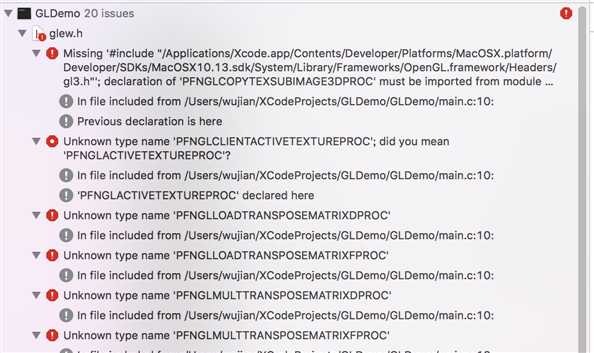
然后就百度找相关的资料,果然找到了类似的问题,解决办法就是需要将Build Settings里的Enable Modules(C and Objective-C)设为No即可,具体原因不详,笔者猜测可能与OpenGL对C的支持有关系,尝试设置后,果然可以编译通过了
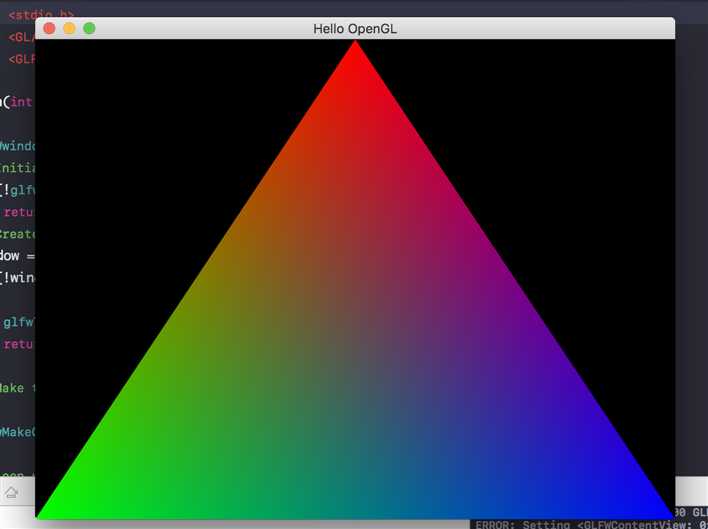
至此,在Xcode下的OpenGL开发环境就配置好了,接下来就可以愉快的学习OpenGL了
<wiz_tmp_tag id="wiz-table-range-border" contenteditable="false" style="display: none;">
以上是关于OpenGL学习之旅01—Xcode+OpenGL环境配置的主要内容,如果未能解决你的问题,请参考以下文章