Selenium Grid分布式测试入门详解
Posted
tags:
篇首语:本文由小常识网(cha138.com)小编为大家整理,主要介绍了Selenium Grid分布式测试入门详解相关的知识,希望对你有一定的参考价值。
本文对Selenium Grid进行了完整的介绍,从环境准备到使用Selenium Grid进行一次完整的多节点分布式测试。
运行环境为Windows 10,Selenium版本为 3.5.0,Chrome版本为62,Firefox版本为56,IE版本为11。
1. Selenium Grid简介
Selenium Grid允许你在多台机器的多个浏览器上并行的进行测试,即分布式测试。
通常,以下两种情况会需要使用Selenium Grid:
1) 通常多个浏览器的兼容性测试,即在不同浏览器或不同操作系统的浏览器中进行测试
2) 测试用例较多时,可以通过分布式测试减少测试执行时间
2. Selenium Grid结构
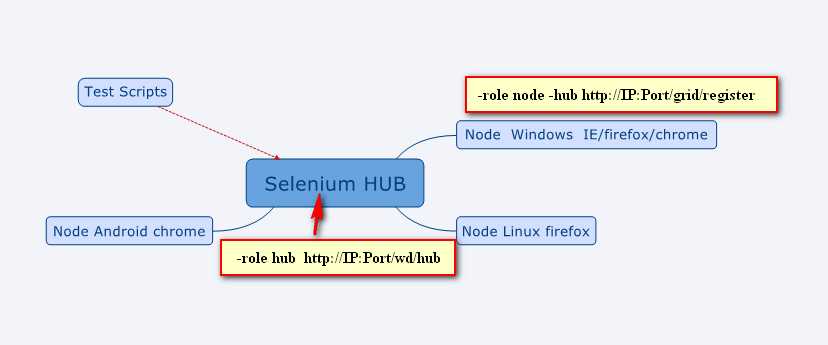
Selenium Grid由一个中心hub及多个节点node组成(类似于其他分布式系统的matser-slave),其中hub用来管理各个node的注册和状态信息,并且接受远程客户端代码的请求调用,然后把请求再转发给node来执行。
3. 环境准备
由于Selenium Grid的hub及node启动时需要java环境,所以首先需要安装JDK。
3.1 JDK环境
2. 选择Java SE 8u151/ 8u152,点击JDK下载
3. 安装下载的JDK
4. 配置系统环境变量
3.2 selenium-server-standalone下载
1. selenium-release官网地址:http://selenium-release.storage.googleapis.com/index.html
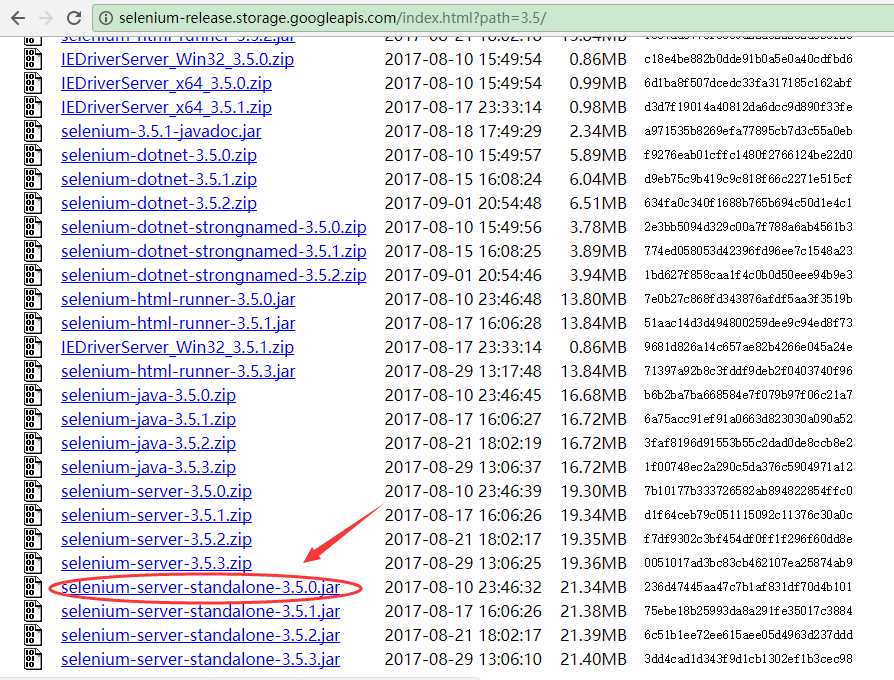
2. 下载与本机selenium 3.5.0匹配的版本:selenium-server-standalone-3.5.0.jar
2. 拷贝selenium-server-standalone-3.5.0.jar至本地工作目录下,如D:\\grid
3.3 webdriver下载
3.3.1 IE
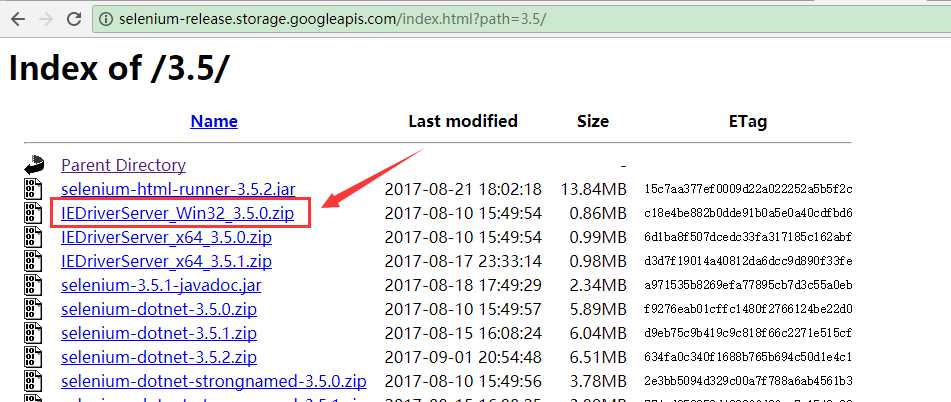
2) 下载与selenium版本、系统均匹配的IEDriver版本:IEDriverServer_Win32_3.5.0.zip
3.3.2 Chrome
2) 下载与系统及浏览器版本匹配的driver版本:chromedriver_win32.zip
3.3.3 Firefox
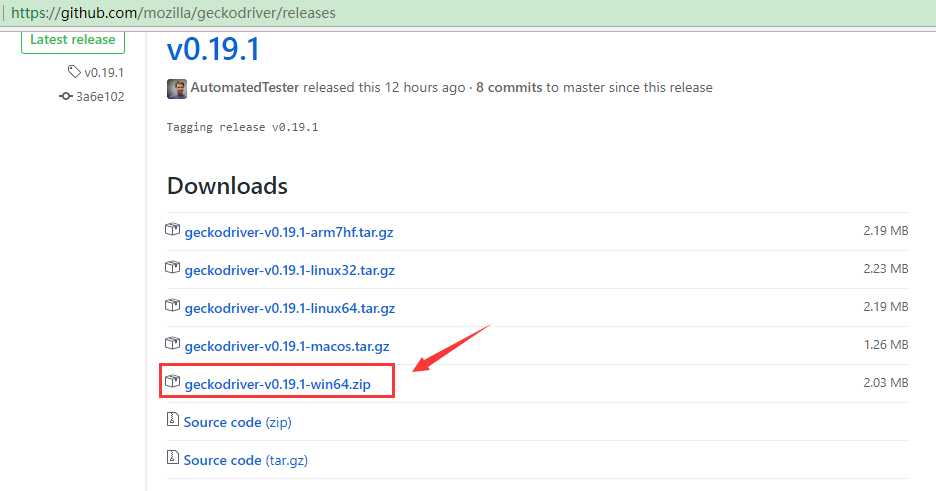
2) 下载与系统及浏览器版本匹配的driver版本:geckodriver-v0.19.1-win64.zip
driver下载完成解压后,分别拷贝IEDriverServer.exe,geckodriver.exe,chromedriver.exe至Python安装路径(如C:\\Python27\\)下即可
上述selenium-server-standalone 及webdriver,我已上传至百度网盘,下载链接: https://pan.baidu.com/s/1i4MBpXF 密码: ygdy
4. Selenium Grid启动
4.1 启动hub
hub启动命令如下:
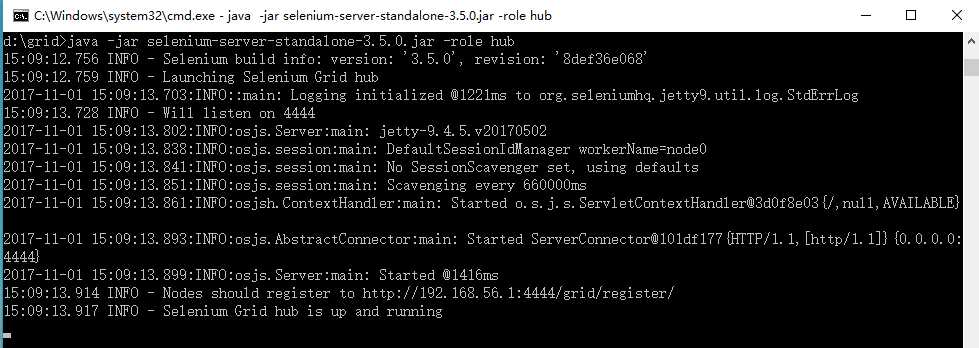
java -jar selenium-server-standalone-3.5.0.jar -role hub
其中 -role指定角色为hub,通过下图可以看到:hub已使用默认4444端口启动成功,且node可以通过http://localhost:4444/grid/register/进行注册
4.2 启动node
node启动命令如下:
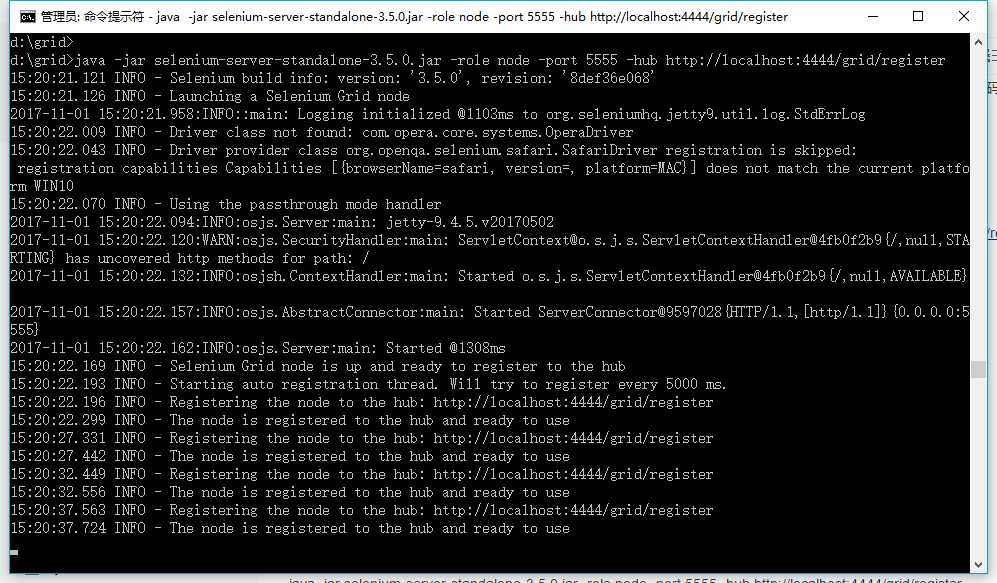
java -jar selenium-server-standalone-3.5.0.jar -role node -port 5555 -hub http://localhost:4444/grid/register
其中 -role指定角色为node, -port指定端口为 5555, -hub指定连接hub地址,通过下图可以看到node已成功连接hub
同理我们另外启动两个 node(使用端口号分别为5556/5557):
java -jar selenium-server-standalone-3.5.0.jar -role node -port 5556 -hub http://localhost:4444/grid/register
java -jar selenium-server-standalone-3.5.0.jar -role node -port 5557 -hub http://localhost:4444/grid/register
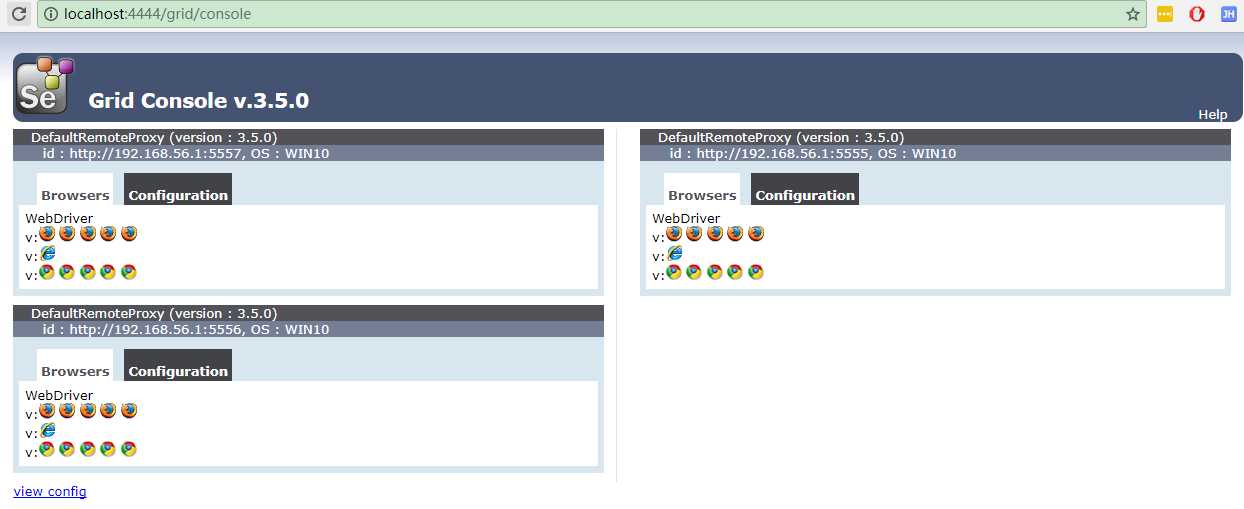
此时打开页面http://localhost:4444/grid/console,可以看到我们启动的三个node:
4.3 更好的启动方法——bat文件
1. 新建一个selenium_grid.bat文件,写入我们刚才启动Grid hub及node的命令:
cd /d D:\\grid
start java -jar selenium-server-standalone-3.5.0.jar -role hub
start java -jar selenium-server-standalone-3.5.0.jar -role node -port 5555 -hub http://localhost:4444/grid/register
start java -jar selenium-server-standalone-3.5.0.jar -role node -port 5556 -hub http://localhost:4444/grid/register
start java -jar selenium-server-standalone-3.5.0.jar -role node -port 5557 -hub http://localhost:4444/grid/register
其中,第一行是进入并修改当前目录为存放 selenium-server-standalone-3.5.0.jar的目录D:\\grid
后面三行stat java...是分别打开新的cmd窗口用以启动hub及node
2. 双击selenium_grid.bat即可启动hub及node
4.4 更多选项
关于Selenium Grid更多命令选项,可运行--help查看:
d:\\grid>java -jar selenium-server-standalone-3.5.0.jar --help
Usage: <main class> [options]
  Options:
    --version, -version
       Displays the version and exits.
       Default: false
    -browserTimeout
       <Integer> in seconds : number of seconds a browser session is allowed to
       hang while a WebDriver command is running (example: driver.get(url)). If the
       timeout is reached while a WebDriver command is still processing, the session
       will quit. Minimum value is 60. An unspecified, zero, or negative value means
       wait indefinitely.
       Default: 0
    -debug
       <Boolean> : enables LogLevel.FINE.
       Default: false
    -enablePassThrough
       <Boolean>: Whether or not to use the experimental passthrough mode.
       Defaults to true.
       Default: true
    -jettyThreads, -jettyMaxThreads
       <Integer> : max number of threads for Jetty. An unspecified, zero, or
       negative value means the Jetty default value (200) will be used.
    -log
       <String> filename : the filename to use for logging. If omitted, will log
       to STDOUT
    -port
       <Integer> : the port number the server will use.
       Default: 4444
    -role
       <String> options are [hub], [node], or [standalone].
       Default: standalone
    -timeout, -sessionTimeout
       <Integer> in seconds : Specifies the timeout before the server
       automatically kills a session that hasn‘t had any activity in the last X seconds. The
       test slot will then be released for another test to use. This is typically
       used to take care of client crashes. For grid hub/node roles, cleanUpCycle
       must also be set.
       Default: 1800
5. Selenium Grid 分布式测试脚本
下面,我们编写一个Selenium Grid自动化测试脚本,分别在3个node上运行Chrome,Firefox及IE浏览器,执行WEB页面自动化测试。
示例脚本如下:
# coding:utf-8


from selenium.webdriver import Remote
import time

# 定义node_hub与浏览器对应关系
nodes = {
    ‘http://127.0.0.1:5555/wd/hub‘: ‘chrome‘,
    ‘http://127.0.0.1:5556/wd/hub‘: ‘internet explorer‘,
    ‘http://127.0.0.1:5557/wd/hub‘: ‘firefox‘
}

# 通过不同的浏览器执行测试脚本
for host, browser in nodes.items():
    print(host, browser)
    # 调用remote方法
    driver = Remote(command_executor=host,
                    desired_capabilities={‘platform‘: ‘ANY‘, ‘browserName‘: browser, ‘version‘: ‘‘, ‘javascriptEnabled‘: True})

    # 打开百度首页并搜索词语,最后判断搜索跳转页面标题是否含有搜索词
    wd = ‘lovesoo‘
    driver.get(‘https://www.baidu.com‘)
    driver.find_element_by_id("kw").send_keys(wd)
    driver.find_element_by_id("su").click()
    time.sleep(1)
    assert wd in driver.title, ‘{0} not in {1}‘.format(wd, driver.title.encode(‘utf-8‘))
    driver.quit()
运行结果如下:
(‘http://127.0.0.1:5555/wd/hub‘, ‘chrome‘)
(‘http://127.0.0.1:5557/wd/hub‘, ‘firefox‘)
(‘http://127.0.0.1:5556/wd/hub‘, ‘internet explorer‘)
6. 常见问题
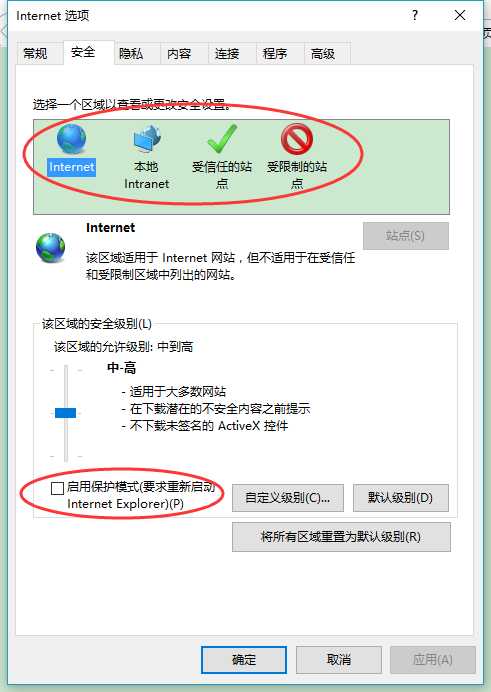
脚本运行过程中若IE浏览器报错找不到元素,而Chrome及Firefox浏览器正常,原因是IE浏览器的保护模式没有关闭:
1) 打开IE浏览器,在浏览器的菜单栏上点击“工具”选项,然后点击“Internet选项”
2) 在“Internet选项”中,切换到“安全”选项,取消“启用保护模式”的勾选
3) 并且上面四个区域的保护模式都需要关闭
以上是关于Selenium Grid分布式测试入门详解的主要内容,如果未能解决你的问题,请参考以下文章