Flask实战第48天:首页轮播图实现
Posted sellsa
tags:
篇首语:本文由小常识网(cha138.com)小编为大家整理,主要介绍了Flask实战第48天:首页轮播图实现相关的知识,希望对你有一定的参考价值。
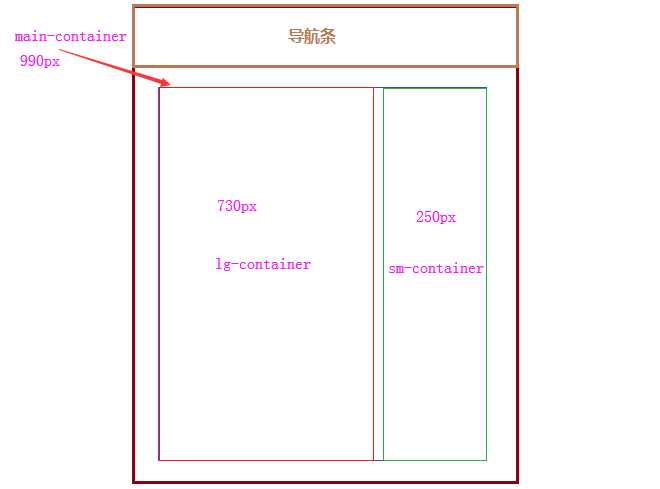
首页的布局如下

因为以后所有的内容都是在main-container里面,所以这里我们修改front_base.html,把{% block body%}{% endblock%}放到里面去
<div class="main-container">
        {% block body %}{% endblock %}
</div>
创建static/front/css/front_base.css, 并且在front_base.html中引入它
.main-container{
    width: 990px;
    margin: 0 auto;
    overflow: hidden;
}

.lg-container{
    width: 730px;
    float: left;
}

.sm-container{
    width: 250px;
    float: right;
}
编辑front_index.html
{% block body %}
    <div class="lg-container"></div>
    <div class="sm-container"></div>
{% endblock %}
轮播图的代码在bootstrap v3中文文档中可以拷贝当到 lg-container中,然后进行修改如下


    <div class="lg-container">
        <div id="carousel-example-generic" class="carousel slide" data-ride="carousel">
              <!-- 指示器 -->
              <ol class="carousel-indicators">
                <li data-target="#carousel-example-generic" data-slide-to="0" class="active"></li>
                <li data-target="#carousel-example-generic" data-slide-to="1"></li>
                <li data-target="#carousel-example-generic" data-slide-to="2"></li>
                <li data-target="#carousel-example-generic" data-slide-to="3"></li>
              </ol>

              <!-- 轮播图 -->
              <div class="carousel-inner" role="listbox">
                <div class="item active">
                    <a href="#">
                        <img src="https://i1.mifile.cn/a4/xmad_15338857534213_DaEjU.jpg" alt="...">
                    </a>
                </div>
                <div class="item">
                  <a href="#">
                        <img src="https://i1.mifile.cn/a4/xmad_1535103285321_fPlOK.jpg" alt="...">
                    </a>
                </div>
                <div class="item">
                  <a href="#">
                        <img src="https://i1.mifile.cn/a4/xmad_15349329950127_PVrya.jpg" alt="...">
                    </a>
                </div>
                <div class="item">
                  <a href="#">
                        <img src="https://i1.mifile.cn/a4/xmad_15338982677936_eQTJk.jpg" alt="...">
                    </a>
                </div>
              </div>

              <!-- 左右切换的控制按钮 -->
              <a class="left carousel-control" href="#carousel-example-generic" role="button" data-slide="prev">
                <span class="glyphicon glyphicon-chevron-left" aria-hidden="true"></span>
                <span class="sr-only">Previous</span>
              </a>
              <a class="right carousel-control" href="#carousel-example-generic" role="button" data-slide="next">
                <span class="glyphicon glyphicon-chevron-right" aria-hidden="true"></span>
                <span class="sr-only">Next</span>
              </a>
        </div>
    </div>

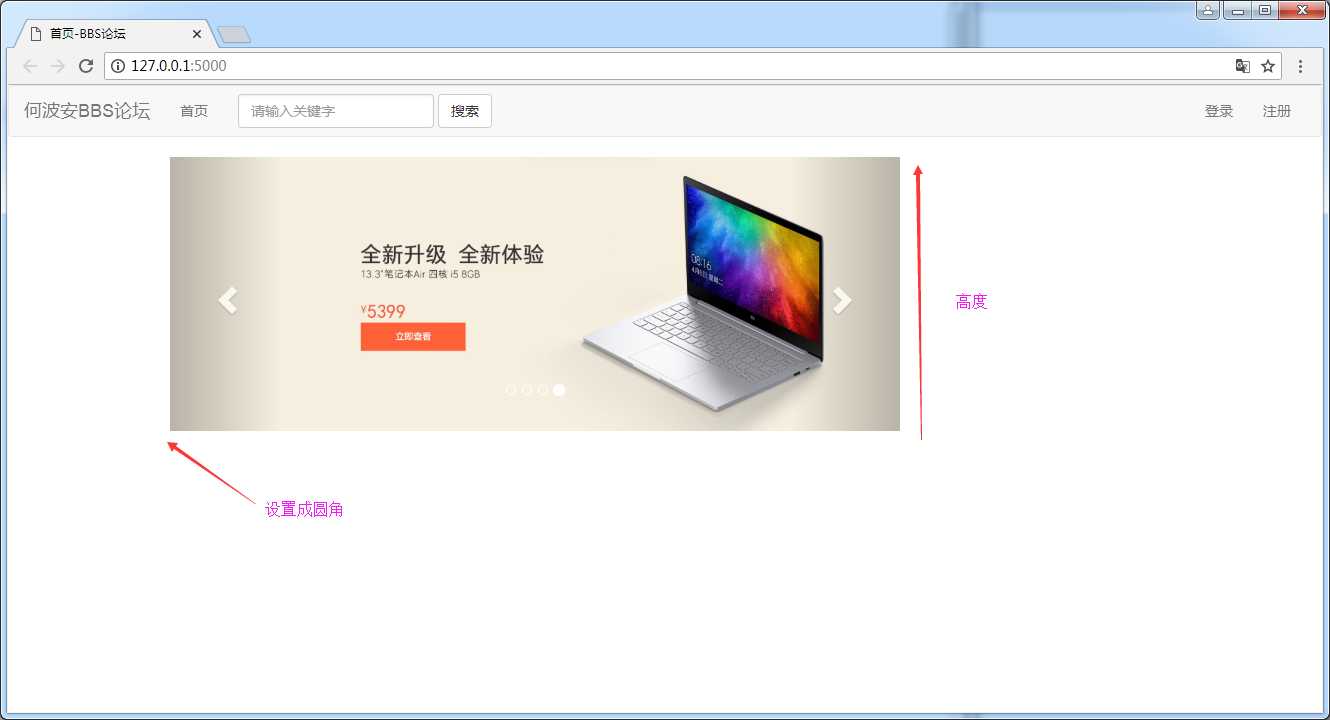
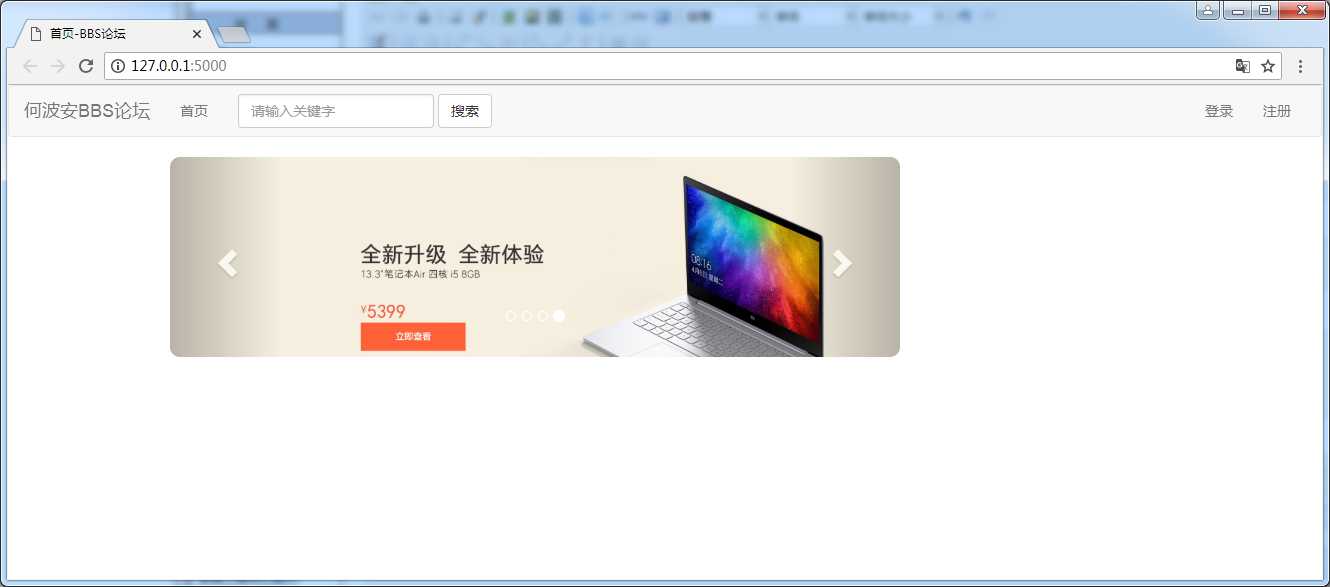
我们来写个static/front/css/front_index.css来设置轮播图的边角位圆角和它的高度
.index-banner{
    border-radius: 10px;
    overflow: hidden;
    height: 200px;
}

/*需要把图片的高度和轮播的一致*/
.index-banner img{
    height: 200px;
}
在轮播图的 div加上类index-banner
<div id="carousel-example-generic" class="carousel slide index-banner" data-ride="carousel">
并引入static/front/css/front_index.css
{% block head %}
    <link href="{{ url_for(‘static‘, filename=‘front/css/front_index.css‘) }}" rel="stylesheet">
{% endblock %

以上是关于Flask实战第48天:首页轮播图实现的主要内容,如果未能解决你的问题,请参考以下文章
