一篇搞定vue请求和跨域
Posted xinsiwei18
tags:
篇首语:本文由小常识网(cha138.com)小编为大家整理,主要介绍了一篇搞定vue请求和跨域相关的知识,希望对你有一定的参考价值。
vue本身不支持发送AJAX请求,需要使用vue-resource、axios等插件实现
axios是一个基本Promise的HTTP请求客户端,用来发送请求,也是vue2.0官方推荐的,同时不再对vue-resource进行更新和维护
axios发送AJAX请求
安装axios
- npm install axios -S
基本用法
- axios([options])
- axios.get(url[,options]) 传参方式:1.通过url 传参 2.通过params选项传参
- axios.post(url,data,[options]) axios默认发送数据时,数据格式是Request Payload(也就是对象传入,后台接收json数据),并非我们常用的Form Data格式(字符串拼接参数的形式传入),所以参数必须要以键值对形式传递,不能以json形式传参,传参方式:
- 自己拼接为键值对
- 使用transformRequest,在请求发送前将请求数据进行转换
- 如果使用模块化开发,可以使用qs模块进行转换
<!DOCTYPE html>
<html lang="en">
<head>
	<meta charset="UTF-8">
	<title>发送AJAX请求</title>
	<script src="js/vue.js"></script>
	<script src="js/axios.min.js"></script>
	<script src="js/vue-resource.min.js"></script>
	<script>
		window.onload=function(){
			new Vue({
				el:‘#itany‘,
				data:{
					user:{
						// name:‘alice‘,
						// age:19
					},
					uid:‘‘
				},
				methods:{
					send(){
						axios({
							method:‘get‘,
							url:‘user.jsonaaa‘
						}).then(function(resp){
							console.log(resp.data);
						}).catch(resp => {
							// console.log(resp);
							console.log(‘请求失败:‘+resp.status+‘,‘+resp.statusText);
						});
					},
					sendGet(){
						// axios.get(‘server.php?name=tom&age=23‘)
						axios.get(‘server.php‘,{
							params:{
								name:‘alice‘,
								age:19
							}
						})
						.then(resp => {
							console.log(resp.data);
						}).catch(err => {
							console.log(‘请求失败:‘+err.status+‘,‘+err.statusText);
						});
					},
					sendPost(){
						// axios.post(‘server.php‘,{
						// 		name:‘alice‘,
						// 		age:19
						// })
						// axios.post(‘server.php‘,‘name=alice&age=20&‘) //方式1
						axios.post(‘server.php‘,this.user,{
							transformRequest:[
								function(data){
									let params=‘‘;
									for(let index in data){
										params+=index+‘=‘+data[index]+‘&‘;
									}
									return params;
								}
							]
						})
						.then(resp => {
							console.log(resp.data);
						}).catch(err => {
							console.log(‘请求失败:‘+err.status+‘,‘+err.statusText);
						});
					},
					getUserById(uid){
						axios.get(`https://api.github.com/users/${uid}`)
						.then(resp => {
							// console.log(resp.data);
							this.user=resp.data;
						});
					},
					sendJSONP(){
						//https://sug.so.360.cn/suggest?callback=suggest_so&encodein=utf-8&encodeout=utf-8&format=json&fields=word&word=a
						this.$http.jsonp(‘https://sug.so.360.cn/suggest‘,{
							params:{
								word:‘a‘
							}
						}).then(resp => {
							console.log(resp.data.s);
						});
					},
					sendJSONP2(){
						//https://sp0.baidu.com/5a1Fazu8AA54nxGko9WTAnF6hhy/su?wd=a&json=1&p=3&sid=1420_21118_17001_21931_23632_22072&req=2&csor=1&cb=jQuery110208075694879886905_1498805938134&_=1498805938138
						this.$http.jsonp(‘https://sp0.baidu.com/5a1Fazu8AA54nxGko9WTAnF6hhy/su‘,{
							params:{
								wd:‘a‘
							},
							jsonp:‘cb‘ //百度使用的jsonp参数名为cb,所以需要修改
						}).then(resp => {
							console.log(resp.data.s);
						});
					}
				}
			});
		}
	</script>
</head>
<body>
	<div id="itany">
		<button @click="send">发送AJAX请求</button>

		<button @click="sendGet">GET方式发送AJAX请求</button>

		<button @click="sendPost">POST方式发送AJAX请求</button>
		<hr>
		<br>

		GitHub ID: <input type="text" v-model="uid">
		<button @click="getUserById(uid)">获取指定GitHub账户信息并显示</button>
		<br>
		姓名:{{user.name}} <br>
		头像:<img :src="user.avatar_url" >

		<hr>

		<button @click="sendJSONP">向360搜索发送JSONP请求</button>

		<button @click="sendJSONP2">向百度搜索发送JSONP请求</button>

	</div>
</body>
</html>
另外axios不是全局组件,需要使用时,在每个文件都要引入,如果想达到全局效果,可以在main.js用原型进行绑定Vue.prototype.$http=axios
Proxy代理
对于前后端分离模式下,前端请求后端存在跨域问题,除了后端主动设置允许跨域请求的类型,前端也可使用proxy代理来转发请求实现跨域
项目准备
-
vue init webpack proxy-demo
-
cd proxy-demo
-
npm install
-
npm install axios -S
-
npm run dev
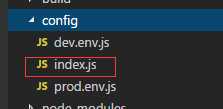
在下面文件下的proxyTable配置代理

‘use strict‘
// Template version: 1.3.1
// see http://vuejs-templates.github.io/webpack for documentation.

const path = require(‘path‘)

module.exports = {
    dev: {

        // Paths
        assetsSubDirectory: ‘static‘,
        assetsPublicPath: ‘/‘,
        proxyTable: {
            ‘/flask-api‘: {//前端路由匹配模式
                target: ‘http://localhost:9001‘,  //后端请求服务域名和端口
                changeOrigin: true,   //设置请求头
                pathRewrite: {
                    ‘^/flask-api‘: ‘/‘   //路径重写  前端/flask-api 对应 后端/
                },
            }
        },

        // Various Dev Server settings
        host: ‘localhost‘, // can be overwritten by process.env.HOST
        port: 8080, // can be overwritten by process.env.PORT, if port is in use, a free one will be determined
        autoOpenBrowser: true,  //运行npm run dev 打开浏览器
        errorOverlay: true,
        notifyOnErrors: true,
        poll: false, // https://webpack.js.org/configuration/dev-server/#devserver-watchoptions-


        /**
         * Source Maps
         */

        // https://webpack.js.org/configuration/devtool/#development
        devtool: ‘cheap-module-eval-source-map‘,

        // If you have problems debugging vue-files in devtools,
        // set this to false - it *may* help
        // https://vue-loader.vuejs.org/en/options.html#cachebusting
        cacheBusting: true,

        cssSourceMap: true
    },

    build: {
        // Template for index.html
        index: path.resolve(__dirname, ‘../dist/index.html‘),

        // Paths
        assetsRoot: path.resolve(__dirname, ‘../dist‘),
        assetsSubDirectory: ‘static‘,
        assetsPublicPath: ‘/‘,

        /**
         * Source Maps
         */

        productionSourceMap: true,
        // https://webpack.js.org/configuration/devtool/#production
        devtool: ‘#source-map‘,

        // Gzip off by default as many popular static hosts such as
        // Surge or Netlify already gzip all static assets for you.
        // Before setting to `true`, make sure to:
        // npm install --save-dev compression-webpack-plugin
        productionGzip: false,
        productionGzipExtensions: [‘js‘, ‘css‘],

        // Run the build command with an extra argument to
        // View the bundle analyzer report after build finishes:
        // `npm run build --report`
        // Set to `true` or `false` to always turn it on or off
        bundleAnalyzerReport: process.env.npm_config_report
    }
}
就拿login举例,前端localhost:8080/flask-api/login --> 后端http://localhost:9001/login,而在用axios发送请求时,不用写localhost:8080,直接写/flask-api/login就可以了
<script>
import axios from "axios";

export default {
  name: "App",
  mounted() {
    axios
      .get("/flask-api/task/get")
      .then(resp => {
        console.log(resp.data);
      })
      .catch(err => {
        console.log("request fail");
      });
  },
  methods: {
    send() {
      axios
        .post("/flask-api/task/get", { "hello": "hello" })
        .then(resp => {
          console.log(‘sucees‘)
          // this.$message.success("success");
        })
        .catch(err => {
          console.log(err);
          console.log(err.status);
          console.log(err.statusText);
          console.log("request fail");
        });
    }
  }
};
</script>
其他
axios本身并不支持发送跨域请求,需要使用vue-resource发送跨域请求
安装
- npm install vue-resource -S
基本用法
使用this.$http发送请求
this.$http.get(url, [options])
this.$http.head(url, [options])
this.$http.delete(url, [options])
this.$http.jsonp(url, [options])
this.$http.post(url, [body], [options])
this.$http.put(url, [body], [options])
this.$http.patch(url, [body], [options])
以上是关于一篇搞定vue请求和跨域的主要内容,如果未能解决你的问题,请参考以下文章