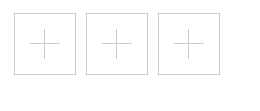
图片上传 显示
Posted chenzxl
tags:
篇首语:本文由小常识网(cha138.com)小编为大家整理,主要介绍了图片上传 显示相关的知识,希望对你有一定的参考价值。
<!DOCTYPE html>
<html lang="en">

<head>
    <meta charset="UTF-8">
    <title>Document</title>
    <style type="text/css">
        .list { padding: 10px;list-style: none}
        .list:after { content: ""; display: block; clear: both; height: 0; line-height: 0; font-size: 0;}
        .list li { position: relative; float: left; width: 60px; height: 60px; margin-right: 10px; border: 1px solid #ccc;}
        .list li:before { content: ""; position: absolute; top: 50%; left: 50%; width: 30px; height: 1px; margin-top: -1px; margin-left: -15px; background-color: #ccc;}
        .list li:after { content: ""; position: absolute; top: 50%; left: 50%; width: 1px; height: 30px; margin-top: -15px; margin-left: -1px; background-color: #ccc;}
        .list li img { position: relative; z-index: 2; display: block; width: 100%; height: 100%;}
        .list input[type="file"] { position: absolute; left: 0; top: 0; z-index: 3; display: block; width: 100%; height: 100%; cursor: pointer; opacity: 0;}
        </style>
</head>

<body>
  <ul class="list">
      <li>
          <input type="file" onchange="handleFiles(this.files,this.parentNode)">
      </li>
      <li>
          <input type="file" onchange="handleFiles(this.files,this.parentNode)">
      </li>
      <li>
          <input type="file" onchange="handleFiles(this.files,this)">
      </li>
  </ul>
</body>
  <script>
    //构建预览上传图片的函数,并接收传递过来的2个变量参数
    function handleFiles(file,obj) {
        console.log(file)
        console.log(obj)
        //获取当前点击的元素的所有同级元素的html内容
        var con = obj.innerHTML;
        //判断当前点击元素内是否已经存在img图片元素,如果有则先全部清除后再添加,如果没有就直接添加
        if (con.indexOf("img") > 0) {
            var pic = obj.getElementsByTagName("img");
            for (var i=0; i<pic.length; i++) {
                obj.removeChild(pic[i]);
            }
            //调用添加img图片的函数
            creatImg();
        } else {
            creatImg();
        }
        function creatImg() {
            //创建一个img元素
            var img = document.createElement("img");
            //设置img元素的源文件路径,window.URL.createObjectURL() 方法会根据传入的参数创建一个指向该参数对象的URL. 这个URL的生命仅存在于它被创建的这个文档里
            // img.src = window.URL.createObjectURL(file[0]);
            // //window.URL.revokeObjectURL() 释放一个通过URL.createObjectURL()创建的对象URL,在图片被显示出来后,我们就不再需要再次使用这个URL了,因此必须要在加载后释放它
            // img.onload = function() {
            //     window.URL.revokeObjectURL(this.src);
            // }
            //第二种方式
            var canvas = document.createElement(‘canvas‘);
            var ctx = canvas.getContext(‘2d‘);
            // var srcimg = new Image();
            var quality = 0.5;
            var tmp_srcimgdata = URL.createObjectURL(file[0])
             img.src = tmp_srcimgdata;
            img.onload = function(){
              canvas.width = img.width;
              canvas.height = img.height;
              ctx.drawImage(img, 0, 0, img.width, img.height, 0, 0, img.width, img.height);
              var dataUrl = canvas.toDataURL(file[0].type, quality);
              //转成Blob对象  FormData上传用
              var fs=dataURItoBlob(dataUrl)
              var fd = new FormData(document.forms[0]);
              fd.append("canvasImage", blob);
              console.log(fs)
//               console.log(dataUrl);
            }
            //在当前点击的input元素后添加刚刚创建的img图片元素
            obj.appendChild(img);

        }


    }
    //转 Bole函数
    function dataURItoBlob(dataURI) {
      // convert base64/URLEncoded data component to raw binary data held in a string
      let byteString;
      if (dataURI.split(‘,‘)[0].indexOf(‘base64‘) >= 0){
        byteString = atob(dataURI.split(‘,‘)[1]);
      }else{
        byteString = unescape(dataURI.split(‘,‘)[1]);
      }
      // separate out the mime component
      let mimeString = dataURI.split(‘,‘)[0].split(‘:‘)[1].split(‘;‘)[0];

      // write the bytes of the string to a typed array
      let ia = new Uint8Array(byteString.length);
      for (let i = 0; i < byteString.length; i++) {
        ia[i] = byteString.charCodeAt(i);
      }

      return new Blob([ia], {type:mimeString});
    }
    // 第二种
    function handleFiles(file){
      var files =file;
      var img = new Image();
      var reader =new FileReader();
      reader.readAsDataURL(files[0]);
      reader.onload =function(e){
        var dx =(e.total/1024)/1024;
        if(dx>=2){
          alert("文件大小大于2M");
          return;
        }
        img.src =this.result;
        img.style.width ="100%";
        img.style.height ="90%";
        document.querySelector(‘.container‘).appendChild(img);
      }
    }
</script

</html>

以上是关于图片上传 显示的主要内容,如果未能解决你的问题,请参考以下文章