运行时更改Connections的target
Posted linkyip
tags:
篇首语:本文由小常识网(cha138.com)小编为大家整理,主要介绍了运行时更改Connections的target相关的知识,希望对你有一定的参考价值。
运行时更改Connections的target
使用QML时, 有时需要在运行时, 监控不同的对象的信号. 可采用以下方法动态更改Connections的target属性实现.
代码如下
Rectangle {
    id: container
    width: 600
    height: 400
    color: "white"
    //左侧两个矩形布局
    Column {
        anchors.top: parent.top
        anchors.left: parent.left
        spacing: 20
        Rectangle {
            width: 290
            height: 50
            color: "lightGray"
            MouseArea {
                anchors.fill: parent
                onClicked: container.state = "left"
            }
            Text {
                anchors.centerIn: parent
                font.pixelSize: 30
                text: container.state==="left"?"Active":"inactive";
            }
        }
        // M1>>
        Rectangle {
            id: leftRectangle
            width: 290
            height: 200
            color: "green"
            MouseArea {
                id: leftMouseArea
                anchors.fill: parent
                onClicked: leftClickedAnimation.start();
            }
            Text {
                anchors.centerIn: parent
                font.pixelSize: 30
                color: "white"
                text: "Click me!"
            }
        }
        // <<M1
    }
    //右侧两个矩形布局
    Column {
        anchors.top: parent.top
        anchors.right: parent.right
        spacing: 20
        Rectangle {
            width: 290
            height: 50
            color: "lightGray"
            MouseArea {
                anchors.fill: parent
                onClicked: container.state = "right"
            }
            Text {
                anchors.centerIn: parent
                font.pixelSize: 30
                text: container.state==="right"?"Active":"inactive";
            }
        }
        Rectangle {
            id: rightRectangle
            width: 290
            height: 200
            color: "blue"
            MouseArea {
                id: rightMouseArea
                anchors.fill: parent
                onClicked: rightClickedAnimation.start();
            }
            Text {
                anchors.centerIn: parent
                font.pixelSize: 30
                color: "white"
                text: "Click me!"
            }
        }
    }
    //下方字体
    Text {
        id: activeText
        anchors.horizontalCenter: parent.horizontalCenter
        anchors.bottom: parent.bottom
        anchors.bottomMargin: 50
        font.pixelSize: 30
        color: "red"
        text: "Active area clicked!"
        opacity: 0
    }
    //左侧矩形由白变绿动画
    SequentialAnimation {
        id: leftClickedAnimation
        PropertyAction {
            target: leftRectangle
            property: "color"
            value: "white"
        }
        ColorAnimation {
             target: leftRectangle
             property: "color"
             to: "green"
             duration: 3000
         }
     }
     //右侧矩形从白变蓝动画
     SequentialAnimation {
         id: rightClickedAnimation
         PropertyAction {
             target: rightRectangle
             property: "color"
             value: "white"
         }
         ColorAnimation {
             target: rightRectangle
             property: "color"
             to: "blue"
             duration: 3000
         }
     }
     //下方字体从完全透明变到不透明动画
     SequentialAnimation {
         id: activeClickedAnimation
         PropertyAction {
             target: activeText
             property: "opacity"
            value: 1
        }
        PropertyAnimation {
            target: activeText
            property: "opacity"
            to: 0
            duration: 3000
        }
    }
    // M2>>
    Connections {
        id: connections
        target: rightMouseArea
        onClicked: activeClickedAnimation.start();
    }
    // <<M2
    // M3>>
    states: [
        State {
            name: "left"
            StateChangeScript {
                script: connections.target = leftMouseArea
            }
        },
        State {
            name: "right"
            StateChangeScript {
                script: connections.target = rightMouseArea
            }
        }
    ]
    // <<M3
    Component.onCompleted: {
        state = "left";
    }
}
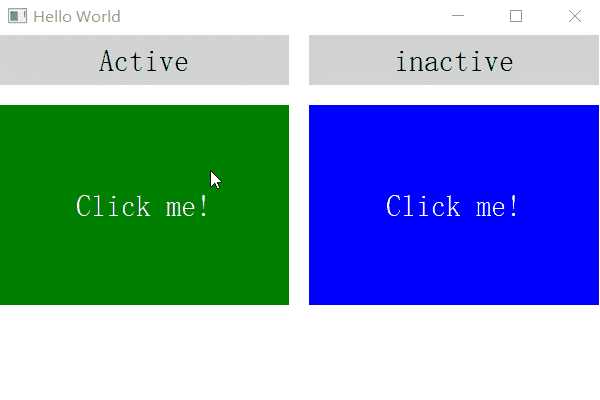
可以看到Connections中本来连接的是右侧矩形的点击区域, 但在Component.onCompleted中, 我们使用State(注意也只能使用State)修改了Connections的target属性, 将其target修改为左侧矩形的点击区域. 最终效果如下(下侧文字动画链接到了左侧点击区域):

代码摘录自: <<QML book (ch14)>>
以上是关于运行时更改Connections的target的主要内容,如果未能解决你的问题,请参考以下文章
Vue.js + Element UI:在更改时获取“event.target”