WPF 动态添加带样式按钮
Posted gkxg
tags:
篇首语:本文由小常识网(cha138.com)小编为大家整理,主要介绍了WPF 动态添加带样式按钮相关的知识,希望对你有一定的参考价值。
1.添加字典
<ResourceDictionary
xmlns="http://schemas.microsoft.com/winfx/2006/xaml/presentation"
xmlns:local="clr-namespace:GenerateLogo"
xmlns:Microsoft_Windows_Themes="clr-namespace:Microsoft.Windows.Themes;assembly=PresentationFramework.Classic"
xmlns:x="http://schemas.microsoft.com/winfx/2006/xaml">
<Style x:Key="GlassYButton" TargetType="{x:Type Button}">
<Setter Property="SnapsToDevicePixels" Value="True"/>
<Setter Property="OverridesDefaultStyle" Value="True"/>
<Setter Property="FontSize" Value="15" />
<Setter Property="Template">
<Setter.Value>
<ControlTemplate TargetType="{x:Type Button}">
<Grid>
<Grid.Background>
<ImageBrush ImageSource="/Images/logo.png"/>
</Grid.Background>
<!-- Background Layer -->
<Ellipse
x:Name="RefractionLayer"
Fill="#A7FF0000"
StrokeThickness="3">
<Ellipse.Stroke>
<LinearGradientBrush EndPoint="0.5,1" StartPoint="0.5,0">
<GradientStop Color="#7A000000" Offset="0.145" />
<GradientStop Color="White" Offset="0.634" />
</LinearGradientBrush>
</Ellipse.Stroke>
</Ellipse>
<!-- Reflection Layer -->
<Path x:Name="ReflectionLayer" VerticalAlignment="Top" Stretch="Fill">
<Path.RenderTransform>
<ScaleTransform ScaleY="0.5" />
</Path.RenderTransform>
<Path.Data>
<PathGeometry>
<PathFigure IsClosed="True" StartPoint="98.999,45.499">
<BezierSegment Point1="98.999,54.170" Point2="89.046,52.258" Point3="85.502,51.029"/>
<BezierSegment
IsSmoothJoin="True"
Point1="75.860,47.685"
Point2="69.111,45.196"
Point3="50.167,45.196"/>
<BezierSegment Point1="30.805,45.196" Point2="20.173,47.741" Point3="10.665,51.363"/>
<BezierSegment
IsSmoothJoin="True"
Point1="7.469,52.580"
Point2="1.000,53.252"
Point3="1.000,44.999"/>
<BezierSegment Point1="1.000,39.510" Point2="0.884,39.227" Point3="2.519,34.286"/>
<BezierSegment
IsSmoothJoin="True"
Point1="9.106,14.370"
Point2="27.875,0"
Point3="50,0"/>
<BezierSegment Point1="72.198,0" Point2="91.018,14.466" Point3="97.546,34.485"/>
<BezierSegment
IsSmoothJoin="True"
Point1="99.139,39.369"
Point2="98.999,40.084"
Point3="98.999,45.499"/>
</PathFigure>
</PathGeometry>
</Path.Data>
<Path.Fill>
<RadialGradientBrush GradientOrigin="0.498,0.526">
<RadialGradientBrush.RelativeTransform>
<TransformGroup>
<ScaleTransform
CenterX="0.5"
CenterY="0.5"
ScaleX="1"
ScaleY="1.997"/>
<TranslateTransform X="0" Y="0.5"/>
</TransformGroup>
</RadialGradientBrush.RelativeTransform>
<GradientStop Offset="1" Color="#FFFFFFFF"/>
<GradientStop Offset="0.85" Color="#92FFFFFF"/>
<GradientStop Offset="0" Color="#00000000"/>
</RadialGradientBrush>
</Path.Fill>
</Path>
<!-- ContentPresenter -->
<ContentPresenter Margin="0,2,0,0" HorizontalAlignment="Center" VerticalAlignment="Center"/>
</Grid>
<ControlTemplate.Triggers>
<Trigger Property="IsMouseOver" Value="True">
<Setter TargetName="RefractionLayer" Property="Fill">
<Setter.Value>
<RadialGradientBrush GradientOrigin="0.496,1.052">
<RadialGradientBrush.RelativeTransform>
<TransformGroup>
<ScaleTransform
CenterX="0.5"
CenterY="0.5"
ScaleX="1.5"
ScaleY="1.5"/>
<TranslateTransform X="0.02" Y="0.3"/>
</TransformGroup>
</RadialGradientBrush.RelativeTransform>
<GradientStop Offset="1" Color="#00000000"/>
<GradientStop Offset="0.45" Color="#FFFFFFFF"/>
</RadialGradientBrush>
</Setter.Value>
</Setter>
<Setter TargetName="ReflectionLayer" Property="Fill">
<Setter.Value>
<RadialGradientBrush GradientOrigin="0.498,0.526">
<RadialGradientBrush.RelativeTransform>
<TransformGroup>
<ScaleTransform
CenterX="0.5"
CenterY="0.5"
ScaleX="1"
ScaleY="1.997"/>
<TranslateTransform X="0" Y="0.5"/>
</TransformGroup>
</RadialGradientBrush.RelativeTransform>
<GradientStop Offset="1" Color="#FFFFFFFF"/>
<GradientStop Offset="0.85" Color="#BBFFFFFF"/>
<GradientStop Offset="0" Color="#00000000"/>
</RadialGradientBrush>
</Setter.Value>
</Setter>
</Trigger>
<Trigger Property="IsPressed" Value="True">
<Setter TargetName="RefractionLayer" Property="Fill">
<Setter.Value>
<RadialGradientBrush GradientOrigin="0.496,1.052">
<RadialGradientBrush.RelativeTransform>
<TransformGroup>
<ScaleTransform
CenterX="0.5"
CenterY="0.5"
ScaleX="1.5"
ScaleY="1.5"/>
<TranslateTransform X="0.02" Y="0.3"/>
</TransformGroup>
</RadialGradientBrush.RelativeTransform>
<GradientStop Offset="1" Color="#00000000"/>
<GradientStop Offset="0.3" Color="#FFFFFFFF"/>
</RadialGradientBrush>
</Setter.Value>
</Setter>
<Setter TargetName="ReflectionLayer" Property="Fill">
<Setter.Value>
<RadialGradientBrush GradientOrigin="0.498,0.526">
<RadialGradientBrush.RelativeTransform>
<TransformGroup>
<ScaleTransform
CenterX="0.5"
CenterY="0.5"
ScaleX="1"
ScaleY="1.997"/>
<TranslateTransform X="0" Y="0.5"/>
</TransformGroup>
</RadialGradientBrush.RelativeTransform>
<GradientStop Offset="1" Color="#CCFFFFFF"/>
<GradientStop Offset="0.85" Color="#66FFFFFF"/>
<GradientStop Offset="0" Color="#00000000"/>
</RadialGradientBrush>
</Setter.Value>
</Setter>
</Trigger>
</ControlTemplate.Triggers>
</ControlTemplate>
</Setter.Value>
</Setter>
</Style>
<Style x:Key="GlassYButton2" TargetType="{x:Type Button}">
<Setter Property="SnapsToDevicePixels" Value="True"/>
<Setter Property="OverridesDefaultStyle" Value="True"/>
<Setter Property="FontSize" Value="15" />
<Setter Property="Template">
<Setter.Value>
<ControlTemplate TargetType="{x:Type Button}">
<Grid Background="Transparent">
<Ellipse
Fill="#A7FF0000"
StrokeThickness="3">
<Ellipse.Stroke>
<LinearGradientBrush EndPoint="0.5,1" StartPoint="0.5,0">
<GradientStop Color="#7A000000" Offset="0.145" />
<GradientStop Color="White" Offset="0.634" />
</LinearGradientBrush>
</Ellipse.Stroke>
</Ellipse>
</Grid>
</ControlTemplate>
</Setter.Value>
</Setter>
</Style>
</ResourceDictionary>
2.App.Xmal中添加创建的字典
<Application.Resources>
<ResourceDictionary>
<ResourceDictionary.MergedDictionaries>
<ResourceDictionary Source="Dictionary1.xaml"></ResourceDictionary>
<ResourceDictionary Source="Dictionary2.xaml"></ResourceDictionary>
</ResourceDictionary.MergedDictionaries>
</ResourceDictionary>
</Application.Resources>
3.动态添加按钮的方法
private void GetUiElement_F()
{
//Uri resourceUri = new Uri("Images/logo.png", UriKind.Relative);
//StreamResourceInfo streamInfo = Application.GetResourceStream(resourceUri);
//BitmapFrame temp = BitmapFrame.Create(streamInfo.Stream);
//var brush = new ImageBrush();
//brush.ImageSource = temp;
var tb = new Button
{
VerticalAlignment = VerticalAlignment.Top,
HorizontalAlignment = HorizontalAlignment.Left,
FontSize = 11,
FontWeight = FontWeights.Bold,
Foreground = Brushes.Transparent,
Width = 100,
Height = 100,
Margin = new Thickness(10),
};
// logo.RegisterName("btn1", tb);
tb.SetResourceReference(StyleProperty, "GlassYButton");
// tb.Background = brush;
tb.Click += new RoutedEventHandler(btnEvent_Click);
logo.Children.Add(tb);
}
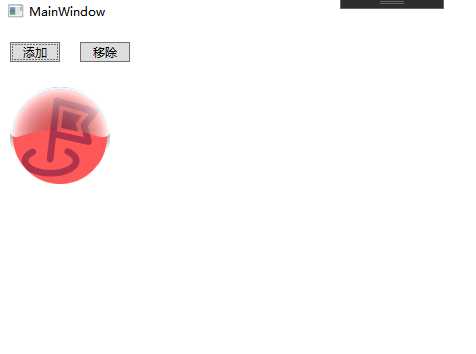
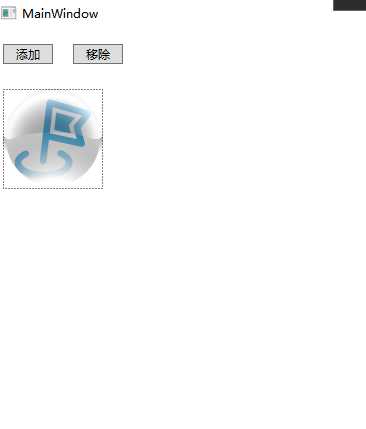
4.效果图


以上是关于WPF 动态添加带样式按钮的主要内容,如果未能解决你的问题,请参考以下文章
WPF 动态添加控件以及样式字典的引用(Style introduction)
c#winfrom应用程序中怎么向DataGridView控件添加带图片的按钮列
WPF/Silverlight的问题:在后台代码动态生成的控件,怎么设置动态样式 Style="DynamicResource sbStyle