图像透视变换原理与实现
Posted baby-lily
tags:
篇首语:本文由小常识网(cha138.com)小编为大家整理,主要介绍了图像透视变换原理与实现相关的知识,希望对你有一定的参考价值。
仿射变换和透视变换
仿射变换是把一个二维坐标系转换到另一个二维坐标系的过程,转换过程坐标点的相对位置和属性不发生变换,是一个线性变换,该过程只发生旋转和平移过程。因此,一个平行四边形经过仿射变换后还是一个平行四边形。
所以,仿射= 旋转 + 平移
透视变换是把一个图像投影到一个新的视平面的过程,该过程包括:把一个二维坐标系转换为三维坐标系,然后把三维坐标系投影到新的二维坐标系。该过程是一个非线性变换过程,因此,一个平行四边形经过透视变换后只得到四边形,但不平行。

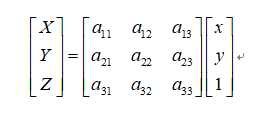
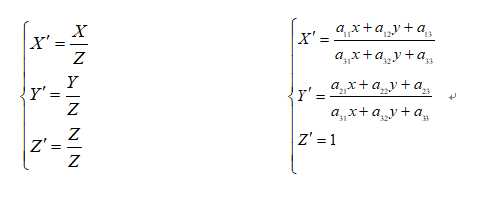
透视变换的变换关系如下:

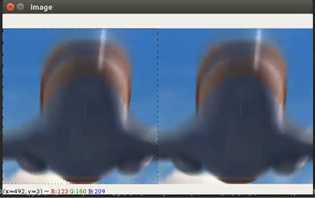
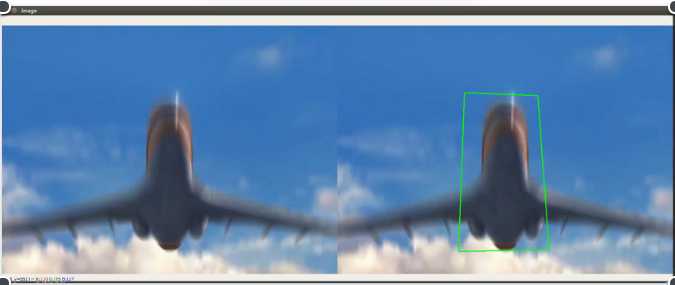
下面是通过变换关系和调用opencv得到的透视变换的代码例子:
import cv2
import numpy as np


path = ‘img/a.png‘


def show(image):
    # image = cv2.resize(image, (0, 0), fx=0.5, fy=0.5)
    cv2.imshow(‘image‘, image)
    cv2.waitKey(0)
    cv2.destroyAllWindows()


def pointInPolygon(x, y, point):
    j = len(point) - 1
    flag = False
    for i in range(len(point)):
        if (point[i][1] < y <= point[j][1] or point[j][1] < y <= point[i][1]) and (point[i][0] <= x or point[j][0] <= x):
            if point[i][0] + (y - point[i][1]) / (point[j][1] - point[i][1]) * (point[j][0] - point[i][0]) < x:
                flag = not flag
        j = i
    return flag


def draw_line(image, point, color=(0, 255, 0), w=2):
    image = cv2.line(image, (point[0][0], point[0][1]), (point[1][0], point[1][1]), color, w)
    image = cv2.line(image, (point[1][0], point[1][1]), (point[2][0], point[2][1]), color, w)
    image = cv2.line(image, (point[2][0], point[2][1]), (point[3][0], point[3][1]), color, w)
    image = cv2.line(image, (point[3][0], point[3][1]), (point[0][0], point[0][1]), color, w)
    return image


def warp(image, point1, point2):
    h, w = image.shape[:2]
    print(h, w)
    img1 = np.zeros((int(point2[2][0]), int(point2[2][1]), 3), dtype=np.uint8)
    M = cv2.getPerspectiveTransform(point1, point2)
    for i in range(h):
        for j in range(w):
            # if pointInPolygon(j, i, point1):
                x = (M[0][0]*j + M[0][1]*i + M[0][2]) / (M[2][0]*j + M[2][1]*i + M[2][2]) + 0.5
                y = (M[1][0]*j + M[1][1]*i + M[1][2]) / (M[2][0]*j + M[2][1]*i + M[2][2]) + 0.5
                x, y = int(x), int(y)
                # print(x, y)
                if 1 <= x < point2[2][0]-1 and 1 <= y < point2[2][1]-1:
                    img1[y, x, :] = image[i, j, :]
                    img1[y, x-1, :] = image[i, j, :]
                    img1[y, x+1, :] = image[i, j, :]
                    img1[y-1, x, :] = image[i, j, :]
                    img1[y+1, x, :] = image[i, j, :]
    img2 = cv2.warpPerspective(image, M, (300, 300))
    img = np.hstack((img1, img2))
    show(img)


def main():
    image = cv2.imread(path)
    img = image.copy()
    point1 = np.float32([[348, 183], [549, 191], [580, 613], [332, 618]])
    point2 = np.float32([[0, 0], [300, 0], [300, 300], [0, 300]])
    warp(image, point1, point2)


    img = draw_line(img, point1)
    images = np.hstack((image, img))
    show(images)


    # point1 = np.float32([[348, 183], [549, 191], [580, 613], [332, 618]])
    # point2 = np.float32([[0, 0], [300, 0], [300, 300], [0, 300]])
    # M = cv2.getPerspectiveTransform(point1, point2)
    # print(M.shape)
    # print(M)
    # img = cv2.warpPerspective(image, M, (300, 300))
    # show(img)


if __name__ == ‘__main__‘:
  main()


以上是关于图像透视变换原理与实现的主要内容,如果未能解决你的问题,请参考以下文章