Spring总结三:DI(依赖注入)
Posted alex-zqzy
tags:
篇首语:本文由小常识网(cha138.com)小编为大家整理,主要介绍了Spring总结三:DI(依赖注入)相关的知识,希望对你有一定的参考价值。
简介:
所谓的依赖注入,其实是当一个bean实例引用到了另外一个bean实例时spring容器帮助我们创建依赖bean实例并注入(传递)到另一个bean中,比如你使用Spring容器创建的对象A里面需要引用对象B或者集合之类的,Spring容器会在创建A的实现类和B的实现类后,把B的实现类注入A实例中(通过反射),而且这些其他的对象怎么创建什么时候创建A实不需要知道的,这样就完成了各个对象之间的关系控制。
依赖注入的三种方式:
1,构造方法参数注入
2,属性setter方法注入
3,接口注入
Spring 在配置方面只支持 构造器参数注入和属性setter方法注入
构造方法参数注入:
JavaBean:(Person类)
public class Person {
    private String name;
    private int age;

    public Person(String name, int age) {
        this.name = name;
        this.age = age;
    }

    @Override
    public String toString() {
        return "Person{" +
                "name=‘" + name + ‘‘‘ +
                ", age=" + age +
                ‘}‘;
    }
}
applicationContext.xml配置:
    <!--构造方法注入-->
    <bean id="person" class="com.zy.spring.Person">
        <constructor-arg name="name" value="张学友"></constructor-arg>
        <constructor-arg name="age" value="18"></constructor-arg>
    </bean>
测试:
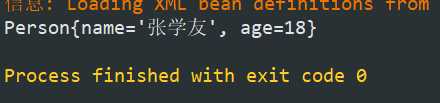
    @Test
    public void setProByConstructor(){
        ApplicationContext ac = new ClassPathXmlApplicationContext("applicationContext.xml");
        Person person = ac.getBean("person", Person.class);
        System.out.println(person);
    }
运行结果:
属性setter方法注入:
JavaBean:(Man类)
public class Man {
    private String name;
    private int age;

    public void setName(String name) {
        this.name = name;
    }

    public void setAge(int age) {
        this.age = age;
    }

    @Override
    public String toString() {
        return "Man{" +
                "name=‘" + name + ‘‘‘ +
                ", age=" + age +
                ‘}‘;
    }
}
applicationContext.xml配置:
    <!--属性setter方法注入-->
    <bean id="man" class="com.zy.spring.Man">
        <property name="name" value="刘德华"></property>
        <property name="age" value="20"></property>
    </bean>
测试:
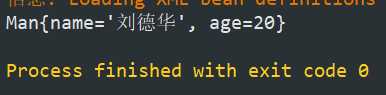
    @Test
    public void setProBySetter(){
        ApplicationContext ac = new ClassPathXmlApplicationContext("applicationContext.xml");
        Man man = ac.getBean("man", Man.class);
        System.out.println(man);
    }
运行结果:
p名称空间的使用:
Spring2.5 版本之后,为了简化属性setter依赖注入,提供虚拟名称空间 p !
首先配置文件的上方需要添加引用:
<?xml version="1.0" encoding="UTF-8"?>
<beans xmlns="http://www.springframework.org/schema/beans"
       xmlns:p="http://www.springframework.org/schema/p"
       xmlns:xsi="http://www.w3.org/2001/XMLSchema-instance"
       xsi:schemaLocation="http://www.springframework.org/schema/beans http://www.springframework.org/schema/beans/spring-beans.xsd">
并且改写成这样:
<bean id="man2" class="com.zy.spring.Man" p:name="郭富城" p:age="25"></bean>
复杂类型属性注入:
JavaBean:
public class ComplexType {
    private Man man;
    private List<String> list;
    private Set<Integer> set;
    private Map<String, Integer> map;
    private Properties properties;

    public void setMan(Man man) {
        this.man = man;
    }

    public void setList(List<String> list) {
        this.list = list;
    }

    public void setSet(Set<Integer> set) {
        this.set = set;
    }

    public void setMap(Map<String, Integer> map) {
        this.map = map;
    }

    public void setProperties(Properties properties) {
        this.properties = properties;
    }

    @Override
    public String toString() {
        return "ComplexType{" +
                "man=" + man +
                ", list=" + list +
                ", set=" + set +
                ", map=" + map +
                ", properties=" + properties +
                ‘}‘;
    }
}
applicationContext.xml:
    <bean id="man" class="com.zy.spring.Man">
        <property name="name" value="刘德华"></property>
        <property name="age" value="20"></property>
    </bean>

    <!--复杂类型注入  p:man-ref 表示引用赋值-->
    <bean id="complexType" class="com.zy.spring.ComplexType" p:man-ref="man">
        <property name="list">
            <list>
                <!-- value注入简单类型值, ref注入复杂对象引用 -->
                <value>abc</value>
                <value>def</value>
            </list>
        </property>
        <property name="set">
            <set>
                <value>10</value>
                <value>20</value>
            </set>
        </property>
        <property name="map">
            <map>
                <entry key="aa" value="11"/>
                <entry key="bb" value="22"/>
            </map>
        </property>
        <property name="properties">
            <props>
                <prop key="qwe">111</prop>
                <prop key="asd">222</prop>
            </props>
        </property>
    </bean>
测试:
    @Test
    public void setComplexType(){
        ApplicationContext ac = new ClassPathXmlApplicationContext("applicationContext.xml");
        ComplexType complexType = ac.getBean("complexType", ComplexType.class);
        System.out.println(complexType);
    }
运行结果:

以上是关于Spring总结三:DI(依赖注入)的主要内容,如果未能解决你的问题,请参考以下文章