Springboot + Swagger3 配置
Posted 十字路口的遇见
tags:
篇首语:本文由小常识网(cha138.com)小编为大家整理,主要介绍了Springboot + Swagger3 配置相关的知识,希望对你有一定的参考价值。
1.添加swagger3的starter依赖包
<dependency>
     <groupId>io.springfox</groupId>
     <artifactId>springfox-boot-starter</artifactId>
     <version>3.0.0</version>
 </dependency>
2.在springboot主程序类添加@EnableOpenApi开关注解。
@EnableOpenApi
@SpringBootApplication
public class SpringbootApplication

    public static void main(String[] args)
        SpringApplication.run(SpringbootApplication.class, args);
3.(可选)添加静态资源映射
2.x版本swagger的静态资源路径符合springboot添加的静态资源映射默认配置规则,3.0.0由于swagger首页的资源路径变更后不再符合springboot的默认规则,需要手动添加。(我项目中注释掉静态资源映射也是可以正常访问swagger3的)
package com.example.springboottest.config;

import org.springframework.context.annotation.Configuration;
import org.springframework.web.servlet.config.annotation.ResourceHandlerRegistry;
import org.springframework.web.servlet.config.annotation.WebMvcConfigurer;
@Configuration
public class WebMvcConfig implements WebMvcConfigurer

    public void addResourceHandlers(ResourceHandlerRegistry registry)
        //所有项目基础路径 + /swagger-ui/** 的url访问
    //都将从classpath:/META-INF/resources/webjars/springfox-swagger-ui/目录下获取静态资源
        registry.addResourceHandler("/swagger-ui/**")
                .addResourceLocations("classpath:/META-INF/resources/webjars/springfox-swagger-ui/")
                .resourceChain(false);
4.(可选)自定义首页属性 Docket配置
import org.springframework.context.annotation.Bean;
import org.springframework.context.annotation.Configuration;
import springfox.documentation.builders.ApiInfoBuilder;
import springfox.documentation.service.Contact;
import springfox.documentation.spi.DocumentationType;
import springfox.documentation.spring.web.plugins.Docket;

@Configuration
public class Swagger3
    @Bean
    public Docket docket()
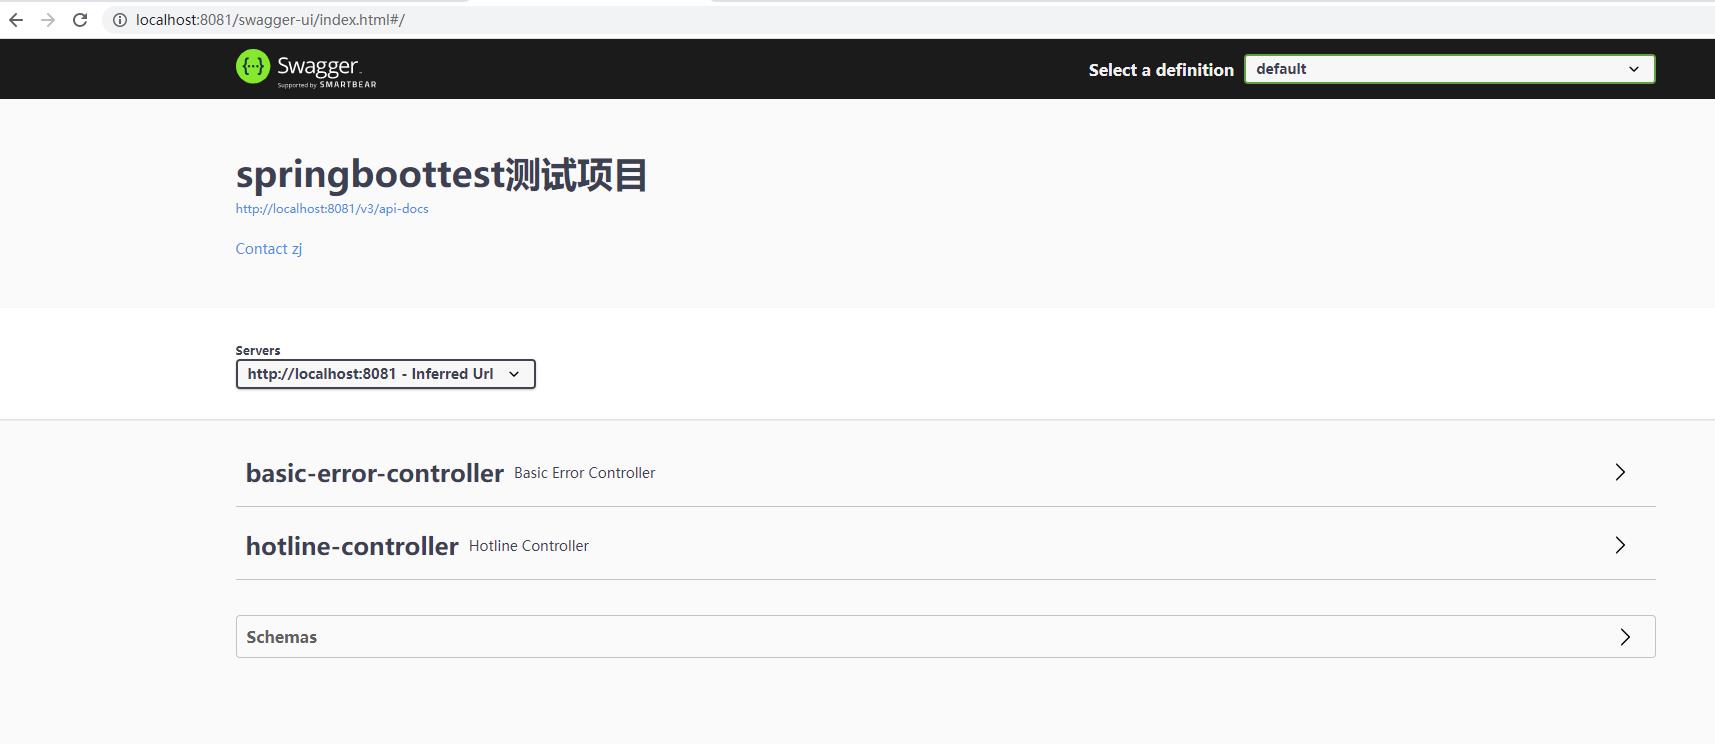
        return new Docket(DocumentationType.OAS_30).apiInfo(
                new ApiInfoBuilder()
                .contact(new Contact("zhangsan","","99***@qq.com"))
                .title("springboot测试项目")
                .build()
        );
输入访问路径http://localhost:8081/swagger-ui/index.html

补充
我启动项目的时候,spring-plugin-core报错,提示Correct the classpath of your application so that it contains a single, compatible version of org.springframework.plugin.core.PluginRegistry
解决方案:强制将依赖版本升级到2.0,问题解决
 <!--swagger3接口文档生成器-->
       <dependency>
            <groupId>io.springfox</groupId>
            <artifactId>springfox-boot-starter</artifactId>
            <version>3.0.0</version>
           <exclusions>
               <exclusion>
                   <groupId>org.springframework.plugin</groupId>
                   <artifactId>spring-plugin-core</artifactId>
               </exclusion>
               <exclusion>
                   <groupId>org.springframework.plugin</groupId>
                   <artifactId>spring-plugin-metadata</artifactId>
               </exclusion>
           </exclusions>
        </dependency>
        <dependency>
            <groupId>org.springframework.plugin</groupId>
            <artifactId>spring-plugin-core</artifactId>
            <version>2.0.0.RELEASE</version>
        </dependency>
        <dependency>
            <groupId>org.springframework.plugin</groupId>
            <artifactId>spring-plugin-metadata</artifactId>
            <version>2.0.0.RELEASE</version>
        </dependency>
以上是关于Springboot + Swagger3 配置的主要内容,如果未能解决你的问题,请参考以下文章
3 Swagger3 常用配置注解讲解 结合SpringBoot2
3 Swagger3 常用配置注解讲解 结合SpringBoot2
SpringBoot: 后台接口文档 - 基于Swagger3
SpringBoot: 后台接口文档 - 基于Swagger3