k8s持久化存储
Posted Qiao_Zhi
tags:
篇首语:本文由小常识网(cha138.com)小编为大家整理,主要介绍了k8s持久化存储相关的知识,希望对你有一定的参考价值。
k8s持久化存储
1. 以前数据持久化方式
通过volumes 数据卷挂载
1. web3.yaml 内容如下:
apiVersion: apps/v1
kind: Deployment
metadata:
  creationTimestamp: null
  labels:
    app: web3
  name: web3
spec:
  replicas: 1
  selector:
    matchLabels:
      app: web3
  strategy:
  template:
    metadata:
      creationTimestamp: null
      labels:
        app: web3
    spec:
      containers:
      - image: nginx
        name: nginx
        resources:
        volumeMounts:
        - name: varlog
          mountPath: /tmp/log
      volumes:
      - name: varlog
        hostPath:
          path: /tmp/log/web3log
status:
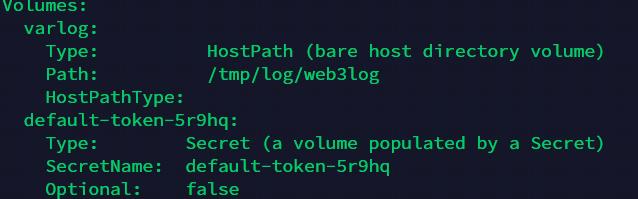
2. 创建资源后查看
[root@k8smaster1 volumestest]# kubectl get pods | grep web3
web3-6c6557674d-xt7kr                           1/1     Running   0          6m38s
[root@k8smaster1 volumestest]# kubectl describe pods web3-6c6557674d-xt7kr
相关挂载信息如下:
3. 到容器内部创建一个文件
[root@k8smaster1 volumestest]# kubectl exec -it web3-6c6557674d-xt7kr
error: you must specify at least one command for the container
[root@k8smaster1 volumestest]# kubectl exec -it web3-6c6557674d-xt7kr -- bash
root@web3-6c6557674d-xt7kr:/# echo "123" > /tmp/log/test.txt
root@web3-6c6557674d-xt7kr:/# exit
exit
4. 到pod 调度的节点查看宿主机目录是否挂载成功
(1) master 节点查看pod 调度节点
[root@k8smaster1 volumestest]# kubectl get pods -o wide | grep web3
web3-6c6557674d-xt7kr                           1/1     Running   0          11m     10.244.2.108     k8snode2     <none>           <none>
(2) 到k8snode2 节点查看
[root@k8snode2 web3log]# ll
total 4
-rw-r--r-- 1 root root 4 Jan 21 05:49 test.txt
[root@k8snode2 web3log]# cat test.txt
123
5. 测试k8snode2 节点宕机,pod 自动调度到k8snode1 节点再次查看
[root@k8smaster1 volumestest]# kubectl get pods -o wide | grep web3
web3-6c6557674d-6wlh4                           1/1     Running       0          4m22s   10.244.1.110     k8snode1     <none>           <none>
web3-6c6557674d-xt7kr                           1/1     Terminating   0          22m     10.244.2.108     k8snode2     <none>           <none>
[root@k8smaster1 volumestest]# kubectl exec -it web3-6c6557674d-6wlh4 -- bash
root@web3-6c6557674d-6wlh4:/# ls /tmp/log/
root@web3-6c6557674d-6wlh4:/#
发现自动调度到k8snode1 节点,进入容器之后发现之前新建的文件丢失。
6. 从k8snode1 宿主机查看发现也没有文件
[root@k8snode1 web3log]# pwd
/tmp/log/web3log
[root@k8snode1 web3log]# ls
[root@k8snode1 web3log]#
造成的现象就是pod 所在的节点宕机后,volume 数据卷挂载的文件也丢失,因此需要一种解决方案。
1. nfs 持久化存储
网络文件系统,是一种共享文件系统,实际上相当于客户端将文件上传到服务器,实现共享。
1. 下载nfs
1. 找一台服务器安装nfs
(1) 安装nfs以及查看nfs 服务状态
yum install -y nfs-utils
(2) 设置挂载路径, 注意需要将挂载路径创建出来
[root@k8smaster2 logs]# cat /etc/exports
/data/nfs *(rw,no_root_squash)
解释: rw 代表读写访问, no_root_squash 代表root 用户具有根目录的完全管理访问权限
2. k8s 集群node 节点安装nfs-utils
yum install -y nfs-utils
3. nfs 服务器启动nfs 服务且查看服务状态
[root@k8smaster2 nfs]# systemctl start nfs    # 启动nfs
[root@k8smaster2 nfs]# systemctl status nfs    # 查看状态
● nfs-server.service - NFS server and services
   Loaded: loaded (/usr/lib/systemd/system/nfs-server.service; disabled; vendor preset: disabled)
   Active: active (exited) since Fri 2022-01-21 19:55:38 EST; 5min ago
  Process: 51947 ExecStopPost=/usr/sbin/exportfs -f (code=exited, status=0/SUCCESS)
  Process: 51943 ExecStopPost=/usr/sbin/exportfs -au (code=exited, status=0/SUCCESS)
  Process: 51941 ExecStop=/usr/sbin/rpc.nfsd 0 (code=exited, status=0/SUCCESS)
  Process: 51977 ExecStartPost=/bin/sh -c if systemctl -q is-active gssproxy; then systemctl reload gssproxy ; fi (code=exited, status=0/SUCCESS)
  Process: 51960 ExecStart=/usr/sbin/rpc.nfsd $RPCNFSDARGS (code=exited, status=0/SUCCESS)
  Process: 51958 ExecStartPre=/usr/sbin/exportfs -r (code=exited, status=0/SUCCESS)
 Main PID: 51960 (code=exited, status=0/SUCCESS)
    Tasks: 0
   Memory: 0B
   CGroup: /system.slice/nfs-server.service

Jan 21 19:55:38 k8smaster2 systemd[1]: Starting NFS server and services...
Jan 21 19:55:38 k8smaster2 systemd[1]: Started NFS server and services.
[root@k8smaster2 nfs]# showmount -e localhost    # 查看挂载的nfs 信息
Export list for localhost:
/data/nfs *
也可以查看nfs 的进程信息
[root@k8smaster2 nfs]# ps -ef | grep nfs
root      51962      2  0 19:55 ?        00:00:00 [nfsd4_callbacks]
root      51968      2  0 19:55 ?        00:00:00 [nfsd]
root      51969      2  0 19:55 ?        00:00:00 [nfsd]
root      51970      2  0 19:55 ?        00:00:00 [nfsd]
root      51971      2  0 19:55 ?        00:00:00 [nfsd]
root      51972      2  0 19:55 ?        00:00:00 [nfsd]
root      51973      2  0 19:55 ?        00:00:00 [nfsd]
root      51974      2  0 19:55 ?        00:00:00 [nfsd]
root      51975      2  0 19:55 ?        00:00:00 [nfsd]
root      54774  45013  0 20:02 pts/2    00:00:00 grep --color=auto nfs
2. 客户端安装
1. 在所有k8snode 节点安装客户端,并且查看远程nfs 信息
yum install -y nfs-utils
2. 查看远程信息
[root@k8snode1 ~]# showmount -e 192.168.13.106
Export list for 192.168.13.106:
/data/nfs *
3. 本地测试nfs
(1) 创建挂载并进行测试
[root@k8snode1 ~]# mkdir /share
[root@k8snode1 ~]# mount 192.168.13.106:/data/nfs /share
[root@k8snode1 ~]# df -h | grep 13.106
192.168.13.106:/data/nfs   17G   12G  5.4G  69% /share
(2) node 节点创建文件
[root@k8snode1 ~]# echo "hello from 104" >> /share/104.txt
[root@k8snode1 ~]# cat /share/104.txt
hello from 104
(3) nfs 服务器查看
[root@k8smaster2 nfs]# cat 104.txt
hello from 104
(4) 客户端取消挂载
[root@k8snode1 ~]# umount /share
[root@k8snode1 ~]# df -h | grep 13.106
取消挂载之后,nfs 服务器上的文件仍然存在。
3. k8s 集群使用nfs
1. 编写nfs-nginx.yaml
apiVersion: apps/v1
kind: Deployment
metadata:
  name: nginx-dep1
spec:
  replicas: 1
  selector:
    matchLabels:
      app: nginx
  template:
    metadata:
      labels:
        app: nginx
    spec:
      containers:
      - name: nginx
        image: nginx
        volumeMounts:
        - name: wwwroot
          mountPath: /usr/share/nginx/html
        ports:
        - containerPort: 80
      volumes:
        - name: wwwroot
          nfs:
            server: 192.168.13.106
            path: /data/nfs
2. 创建资源
[root@k8smaster1 nfs]# kubectl apply -f nfs-nginx.yaml
deployment.apps/nginx-dep1 created
然后查看pod describe 信息

3. 我们进入容器然后创建一个文件导/usr/share/nginx/html
root@nginx-dep1-6d7f9c85dc-lqfbf:/# cat /usr/share/nginx/html/index.html
hello
4. 然后到nfs 服务器查看
[root@k8smaster2 nfs]# pwd
/data/nfs
[root@k8smaster2 nfs]# ls
104.txt  index.html
[root@k8smaster2 nfs]# cat index.html
hello
4. pv 和 pvc
上面使用nfs 有一个问题,就是每个需要持久化的都需要知道远程nfs 服务器的地址以及相关权限,可能不太安全。下面研究pv和pvc 使用。
pv pvc 对应PersistentVolume和PersistentVolumeClaim。 pv 类似于一个声明nfs 地址等信息,抽象成配置文件; pvc 通过引用pv 中声明的信息,然后即可实现nfs 持久化存储。
pv 有好多实现方式,实际上是对nfs进行一层包装,因为我们已经安装了nfs, 所以基于nfs 实现。
参考: https://kubernetes.io/docs/concepts/storage/persistent-volumes/
1. 创建pv
1. 创建 pv.yaml
apiVersion: v1
kind: PersistentVolume
metadata:
  name: my-pv
spec:
  capacity:
    storage: 5Gi
  accessModes:
    - ReadWriteMany
  nfs:
    path: /data/nfs
    server: 192.168.13.106
2. 创建并查看
[root@k8smaster1 nfs]# kubectl apply -f pv.yaml
persistentvolume/my-pv created
[root@k8smaster1 nfs]# kubectl get pv -o wide
NAME    CAPACITY   ACCESS MODES   RECLAIM POLICY   STATUS      CLAIM   STORAGECLASS   REASON   AGE    VOLUMEMODE
my-pv   5Gi        RWX            Retain           Available                                   2m4s   Filesystem
2. 创建pvc 使用上面的pv
1. 创建pvc.yaml
apiVersion: apps/v1
kind: Deployment
metadata:
  name: nginx-dep1
spec:
  replicas: 3
  selector:
    matchLabels:
      app: nginx
  template:
    metadata:
      labels:
        app: nginx
    spec:
      containers:
      - name: nginx
        image: nginx
        volumeMounts:
        - name: wwwroot
          mountPath: /usr/share/nginx/html
        ports:
        - containerPort: 80
      volumes:
      - name: wwwroot
        persistentVolumeClaim:
          claimName: my-pvc

---

apiVersion: v1
kind: PersistentVolumeClaim
metadata:
  name: my-pvc
spec:
  accessModes:
    - ReadWriteMany
  resources:
    requests:
      storage: 5Gi
2. 创建并查看
[root@k8smaster1 nfs]# kubectl apply -f pvc.yaml
deployment.apps/nginx-dep1 created
persistentvolumeclaim/my-pvc created
[root@k8smaster1 nfs]# kubectl get pvc -o wide
NAME     STATUS   VOLUME   CAPACITY   ACCESS MODES   STORAGECLASS   AGE   VOLUMEMODE
my-pvc   Bound    my-pv    5Gi        RWX                           60s   Filesystem
[root@k8smaster1 nfs]# kubectl get pods -o wide
NAME                                            READY   STATUS    RESTARTS   AGE     IP               NODE         NOMINATED NODE   READINESS GATES
nginx-dep1-58b7bf955f-4jhbq                     1/1     Running   0          75s     10.244.2.112     k8snode2     <none>           <none>
nginx-dep1-58b7bf955f-m69dm                     1/1     Running   0          75s     10.244.2.110     k8snode2     <none>           <none>
nginx-dep1-58b7bf955f-qh6pg                     1/1     Running   0          75s     10.244.2.111     k8snode2     <none>           <none>
nginx-f89759699-vkf7d                           1/1     Running   3          4d16h   10.244.1.106     k8snode1     <none>           <none>
tomcat-58767d5b5-f5qwj                          1/1     Running   2          4d15h   10.244.1.103     k8snode1     <none>           <none>
weave-scope-agent-ui-kbq7b                      1/1     Running   2          45h     192.168.13.105   k8snode2     <none>           <none>
weave-scope-agent-ui-tg5q4                      1/1     Running   2          45h     192.168.13.103   k8smaster1   <none>           <none>
weave-scope-agent-ui-xwh2b                      1/1     Running   2          45h     192.168.13.104   k8snode1     <none>           <none>
weave-scope-cluster-agent-ui-7498b8d4f4-zdlk7   1/1     Running   2          45h     10.244.1.104     k8snode1     <none>           <none>
weave-scope-frontend-ui-649c7dcd5d-7gb9s        1/1     Running   2          45h     10.244.1.107     k8snode1     <none>           <none>
web3-6c6557674d-6wlh4                           1/1     Running   0          14h     10.244.1.110     k8snode1     <none>           <none>
[root@k8smaster1 nfs]#
3. 随便进入一个pod的第一个容器,然后创建文件
[root@k8smaster1 nfs]# kubectl exec -it nginx-dep1-58b7bf955f-4jhbq -- bash
root@nginx-dep1-58b7bf955f-4jhbq:/# echo "111222" >> /usr/share/nginx/html/1.txt
root@nginx-dep1-58b7bf955f-4jhbq:/# exit
exit
4. 到nfs 服务器查看与其他容器查看
(1) nfs 服务器查看
[root@k8smaster2 nfs]# ls
104.txt  1.txt  index.html
[root@k8smaster2 nfs]# cat 1.txt
111222
(2) 进入其他pod 的第一个容器查看
[root@k8smaster1 nfs]# kubectl exec -it nginx-dep1-58b7bf955f-qh6pg -- bash
root@nginx-dep1-58b7bf955f-qh6pg:/# ls /usr/share/nginx/html/
1.txt  104.txt  index.html
至此简单实现了基于nfs 和 pv、pvc 的持久化存储。
以上是关于k8s持久化存储的主要内容,如果未能解决你的问题,请参考以下文章