mybatis
Posted 浅浅的园子
tags:
篇首语:本文由小常识网(cha138.com)小编为大家整理,主要介绍了mybatis相关的知识,希望对你有一定的参考价值。
MyBatis的基本使用
MyBatis类中编写:
//1、加载mybatis的核心配置文件,获取 SqlSessionFactory
String resource = "mybatis-config.xml";
InputStream inputStream = Resources.getResourceAsStream(resource);
SqlSessionFactory sqlSessionFactory = new SqlSessionFactoryBuilder().build(inputStream);

//2、使用 SqlSessionFactory 获取 SqlSession 对象,用它来执行sql
SqlSession sqlSession = sqlSessionFactory.openSession();

//3、执行sql
List<User> user = sqlSession.selectList("test.selectAll");
System.out.println(user);

//4、释放资源
sqlSession.close();
Mapper代理开发
优势;
首先它不依赖于字符串字面值,会更安全一点;其次,如果你的 IDE 有代码补全功能,那么代码补全可以帮你快速选择到映射好的 SQL 语句。
Mapper代理方式
1、定义与SQL映射文件同名的Mapper接口,并且将Mapper接口和SQL映射文件放置在同一目录下
2、设置SQL映射文件的namespace属性为Mapper接口全限定名
3、在Mapper接口中定义方法,方法名就是SQL映射文件中sql语句的id,并保持参数类型和返回值类型一致
4、编码
1、通过SqlSession的getMapper方法获取Mapper接口的代理对象
2、调用对应方法完成sql的执行
注:如果Mapper接口名称和SQL映射文件名称相同,并在同一目录下,则可以使用包扫描的方式简化SQL映射文件的加载
MyBatis核心文件配置:
mybatis-config.xml:
<?xml version="1.0" encoding="UTF-8" ?>
<!DOCTYPE configuration
        PUBLIC "-//mybatis.org//DTD Config 3.0//EN"
        "https://mybatis.org/dtd/mybatis-3-config.dtd">
<configuration>
    <!--
    注意:顺序不能弄错 顺序查看 https://mybatis.org/mybatis-3/zh/configuration.html#typeAliases

    类型别名(typeAliases) 可为 Java 类型设置一个缩写名字。 它仅用于 XML 配置,意在降低冗余的全限定类名书写 。在此加上之后,mybatis会扫描这个包下的实体类,并起别名
    每一个在包 com.song.pojo 中的实体类,在没有注解的情况下,会使用实体类的首字母小写的非限定类名来作为它的别名。
    -->
    <typeAliases>
        <package name="com.song.pojo"/>
    </typeAliases>
    <!-- environments:配置数据库连接环境信息。可以配置多个environment,通过default属性切换不同的environment -->
    <environments default="development">
        <environment id="development">
            <transactionManager type="JDBC"/>
            <dataSource type="POOLED">
                <!--数据库连接信息-->
                <property name="driver" value="com.mysql.cj.jdbc.Driver"/>
                <property name="url" value="jdbc:mysql:///ssm?useSSL=false"/>
                <property name="username" value="root"/>
                <property name="password" value="12345678"/>
            </dataSource>
        </environment>
    </environments>
    <mappers>
        <!--加载sql映射文件-->
        <mapper resource="com/song/mapper/UserMapper.xml"/>
    </mappers>
</configuration>
SQL映射文件配置:
如查询User表
UserMapper.xml:
<?xml version="1.0" encoding="UTF-8" ?>
<!DOCTYPE mapper
        PUBLIC "-//mybatis.org//DTD Mapper 3.0//EN"
        "https://mybatis.org/dtd/mybatis-3-mapper.dtd">
<!--namespace:名称空间-->
<mapper namespace="com.song.mapper.UserMapper">
    <!--查User全部-->
    <select id="selectAll" resultType="user"> <!--别名不区分大小写 若不使用别名,此处则需填写 com.song.pojo.User 否则报错-->
        select * from user
    </select>

</mapper>


处理数据库中表字段名称与实体类名称不一致的情况,使它自动封装数据
注意:下面代码放在mapper标签中
<!--数据库表的字段名称  和    实体类的属性名称   不一致,不能自动封装数据
  处理方式
    1、起别名:对不一样的列名起别名,让别名和实体类的属性名一样
      缺点:每次查询都要定义一次别名
    2、sql片段
      缺点:不灵活
    3、resultMap:
      定义<result Map>标签
      在<select>标签中,使用resultMap属性替换 resultType属性-->
<!-- id:唯一标识  type:映射的类型,支持别名 -->
<resultMap id="userResultMap" type="com.song.pojo.User">
    <!--
        id:完成主键字段的映射
            column:表的列名
            property:实体类的属性名
        result:完成一般字段的映射
            column:表的列名
            property:实体类的属性名
    -->
    <result column="user_name" property="username"/>
</resultMap>
MyBatis1:MyBatis入门
MyBatis是什么
MyBatis是什么,MyBatis的jar包中有它的官方文档,文档是这么描述MyBatis的:
MyBatis is a first class persistence framework with support for custom SQL, stored procedures
and advanced mappings. MyBatis eliminates almost all of the JDBC code and manual setting of
parameters and retrieval of results. MyBatis can use simple XML or Annotations for configuration
and map primitives, Map interfaces and Java POJOs (Plain Old Java Objects) to database records.
翻译过来就是:MyBatis是一款支持普通SQL查询、存储过程和高级映射的持久层框架。MyBatis消除了几乎所有的JDBC代码、参数的设置和结果集的检索。MyBatis可以使用简单的XML或注解用于参数配置和原始映射,将接口和Java POJO(普通Java对象)映射成数据库中的记录。
本文先入门地搭建表、建立实体类、写基础的配置文件、写简单的Java类,从数据库中查出数据,深入的内容后面的文章再逐一研究。
建表、建立实体类
从简单表开始研究MyBatis,所以我们先建立一张简单的表:

create table student
(
  studentId          int                        primary key     auto_increment    not null,
  studentName        varchar(20)                                                  not null,
  studentAge         int                                                          not null,
  studentPhone       varchar(20)                                                  not null
)charset=utf8

insert into student values(null, \'Jack\', 20, \'000000\');
insert into student values(null, \'Mark\', 21, \'111111\');
insert into student values(null, \'Lily\', 22, \'222222\');
insert into student values(null, \'Lucy\', 23, \'333333\');
commit;
一个名为student的表格,里面存放了student相关字段,当然此时我们需要有一个Java实体类与之对应:
public class Student
{
    private int        studentId;
    private String     studentName;
    private int        studentAge;
    private String    studentPhone;

    public Student()
    {
        super();
    }

    public Student(int studentId, String studentName, int studentAge,
            String studentPhone)
    {
        this.studentId = studentId;
        this.studentName = studentName;
        this.studentAge = studentAge;
        this.studentPhone = studentPhone;
    }

    public int getStudentId()
    {
        return studentId;
    }

    public void setStudentId(int studentId)
    {
        this.studentId = studentId;
    }

    public String getStudentName()
    {
        return studentName;
    }

    public void setStudentName(String studentName)
    {
        this.studentName = studentName;
    }

    public int getStudentAge()
    {
        return studentAge;
    }

    public void setStudentAge(int studentAge)
    {
        this.studentAge = studentAge;
    }

    public String getStudentPhone()
    {
        return studentPhone;
    }

    public void setStudentPhone(String studentPhone)
    {
        this.studentPhone = studentPhone;
    }

    public String toString()
    {
        return "StudentId:" + studentId + "\\tStudentName:" + studentName +
            "\\tStudentAge:" + studentAge + "\\tStudentPhone:" + studentAge;
    }
}
注意,这里空构造方法必须要有,SqlSession的selectOne方法查询一条信息的时候会调用空构造方法去实例化一个domain出来。OK,这样student表及其对应的实体类Student.java就创建好了。
写config.xml文件
在写SQL语句之前,首先得有SQL运行环境,因此第一步是配置SQL运行的环境。创建一个Java工程,右键src文件夹,创建一个普通文件,取个名字叫做config.xml,config.xml里这么写:
<?xml version="1.0" encoding="UTF-8" ?>
<!DOCTYPE configuration PUBLIC "-//mybatis.org//DTD Config 3.0//EN"
"http://mybatis.org/dtd/mybatis-3-config.dtd">

<configuration>
    <typeAliases>
        <typeAlias alias="Student" type="com.xrq.domain.Student"/>
    </typeAliases>

    <environments default="development">
        <environment id="development">
            <transactionManager type="JDBC"/>
            <dataSource type="POOLED">
                <property name="driver" value="com.mysql.jdbc.Driver"/>
                <property name="url" value="jdbc:mysql://localhost:3306/test"/>
                <property name="username" value="root"/>
                <property name="password" value="root"/>
            </dataSource>
        </environment>
    </environments>

    <mappers>
        <mapper resource="student.xml"/>
    </mappers>
</configuration>
这就是一个最简单的config.xml的写法。接着右键src,创建一个普通文件,命名为student.xml,和mapper里面的一致(resource没有任何的路径则表示student.xml和config.xml同路径),student.xml这么写:
<?xml version="1.0" encoding="UTF-8" ?>
<!DOCTYPE mapper PUBLIC "-//mybatis.org//DTD Mapper 3.0//EN"
"http://mybatis.org/dtd/mybatis-3-mapper.dtd">

<mapper namespace="com.xrq.StudentMapper">
    <select id="selectStudentById" parameterType="int" resultType="Student">
        <![CDATA[
            select * from student where studentId = #{id}
        ]]>
    </select>
</mapper>
专门有一个student.xml表示student表的sql语句,当然也可以几张表共用一个.xml文件,这个看自己的项目和个人喜好。至此,MyBatis需要的两个.xml文件都已经建立好,接下来需要做的就是写Java代码了。
Java代码实现
首先要进入MyBatis的jar包:
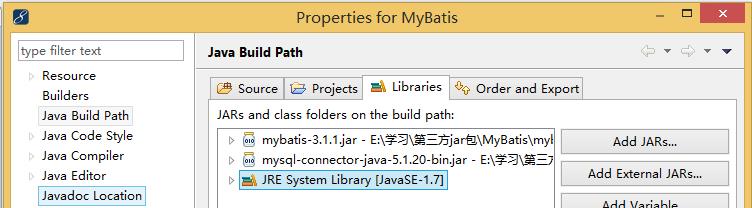
第二个MySql-JDBC的jar包注意一下要引入,这个很容易忘记。
接着创建一个类,我起名字叫做StudentOperator,由于这种操作数据 库的类被调用频繁但是调用者之间又不存在数据共享的问题,因此使用单例会比较节省资源。为了好看,写一个父类 BaseOperator,SqlSessionFactory和Reader都定义在父类里面,子类去继承这个父类:
public class BaseOperator
{
    protected static SqlSessionFactory ssf;
    protected static Reader reader;

    static
    {
        try
        {
            reader = Resources.getResourceAsReader("config.xml");
            ssf = new SqlSessionFactoryBuilder().build(reader);
        }
        catch (IOException e)
        {
            e.printStackTrace();
        }
    }
}
然后创建子类StudentOperator:
public class StudentOperator extends BaseOperator
{
    private static StudentOperator instance = new StudentOperator();

    private StudentOperator()
    {

    }

    public static StudentOperator getInstance()
    {
        return instance;
    }

    public Student selectStudentById(int studentId)
    {
        SqlSession ss = ssf.openSession();
        Student student = null;
        try
        {
            student = ss.selectOne("com.xrq.StudentMapper.selectStudentById", 1);
        }
        finally
        {
            ss.close();
        }
        return student;
    }
}
这个类里面做了两件事情:
1、构造一个StudentOperator的单实例
2、写一个方法根据studentId查询出一个指定的Student
验证
至此,所有步骤全部就绪,接着写一个类来验证一下:
public class MyBatisTest
{
    public static void main(String[] args)
    {
        System.out.println(StudentOperator.getInstance().selectStudentById(1));
    }
}
运行结果为:
StudentId:1 StudentName:Jack StudentAge:20 StudentPhone:20
看一下数据库中的数据:

数据一致,说明以上的步骤都OK,MyBatis入门完成,后面的章节,将会针对MyBatis的使用细节分别进行研究。
以上是关于mybatis的主要内容,如果未能解决你的问题,请参考以下文章