Python PIL, Image生成验证图片
Posted youmeetmehere
tags:
篇首语:本文由小常识网(cha138.com)小编为大家整理,主要介绍了Python PIL, Image生成验证图片相关的知识,希望对你有一定的参考价值。
Python(三) PIL, Image生成验证图片
安装好PIL,开始使用。
在PyCharm中新建一个文件:PIL_Test1.py
 1 #  PIL 应用练习
 2 #
 3 # import PIL
 4 # from PIL import Image
 5 # a = Image.open("E:\\\\照片\\\\2017-8-6_北海公园\\\\QQ图片20170806213744.jpg")
 6 # a.rotate(30).show()
 7
 8 # ---------------------
 9 # 作者:门下平章
10 # 来源:CSDN
11 # 原文:https://blog.csdn.net/u013180339/article/details/77363680
12 # 版权声明:本文为博主原创文章,转载请附上博文链接!
13
14 from PIL import Image, ImageDraw, ImageFont, ImageFilter
15 import random
16
17 # 随机字母:
18 def rndChar():
19     return chr(random.randint(65, 90))
20
21 # 随机颜色1:
22 def rndColor():
23     return (random.randint(64, 255), random.randint(64, 255), random.randint(64, 255))
24
25 # 随机颜色2:
26 def rndColor2():
27     return (random.randint(32, 127), random.randint(32, 127), random.randint(32, 127))
28
29 # 240 x 60:
30 width = 60 * 4
31 height = 60
32 image = Image.new(\'RGB\', (width, height), (255, 255, 255))
33 # 创建Font对象:
34 font = ImageFont.truetype(\'arial.ttf\', 36)
35 # 创建Draw对象:
36 draw = ImageDraw.Draw(image)
37 # 填充每个像素:
38 for x in range(width):
39     for y in range(height):
40         draw.point((x, y), fill=rndColor())
41 # 输出文字:
42 for t in range(4):
43     draw.text((60 * t + 10, 10), rndChar(), font=font, fill=rndColor2())
44 # 模糊:
45 image = image.filter(ImageFilter.BLUR)
46 image.show()
47 image.save(\'code.jpg\', \'jpeg\')
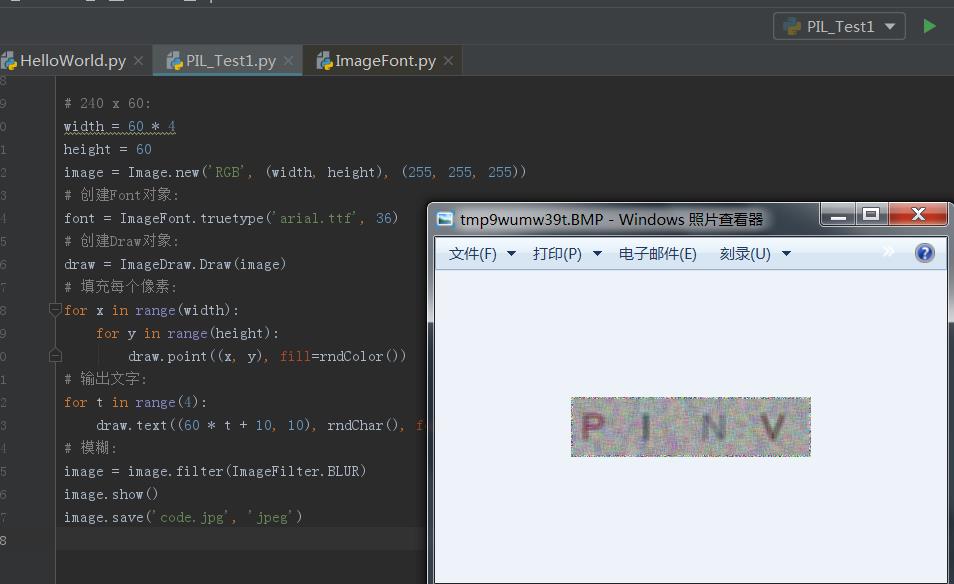
运行结果:

插曲:
中间出现编译错误:
Traceback (most recent call last):
File "E:/python_pycharm/PIL_Test1.py", line 35, in <module>
font = ImageFont.truetype(\'Arial.ttf\', 36)
File "E:\\python_pycharm\\venv\\lib\\site-packages\\PIL\\ImageFont.py", line 280, in truetype
return FreeTypeFont(font, size, index, encoding, layout_engine)
File "E:\\python_pycharm\\venv\\lib\\site-packages\\PIL\\ImageFont.py", line 145, in __init__
layout_engine=layout_engine)
OSError: cannot open resource
改为font = ImageFont.truetype(\'arial.ttf\', 36)即可
以上是关于Python PIL, Image生成验证图片的主要内容,如果未能解决你的问题,请参考以下文章