使用 PySide2 开发 Maya 插件系列一:QT Designer 设计GUI, pyside-uic 把 .ui 文件转为 .py 文件
Posted ibingshan
tags:
篇首语:本文由小常识网(cha138.com)小编为大家整理,主要介绍了使用 PySide2 开发 Maya 插件系列一:QT Designer 设计GUI, pyside-uic 把 .ui 文件转为 .py 文件相关的知识,希望对你有一定的参考价值。
使用 PySide2 开发 Maya 插件系列一:QT Designer 设计GUI, pyside-uic 把 .ui 文件转为 .py 文件
前期准备:
安装 python:https://www.python.org/downloads/
安装 PySide2:安装 python 后,在安装目录下有 /script 文件夹,里面有 pip.exe ,cmd执行:pip install PySide,pip install PySide2(注意: python2.x 对应 PySide,python3.x 对应PySide2)
启动 QT Designer:
1.在 python 安装目录下搜寻 designer.exe,发送到桌面快捷键
2.或者在 Maya(2015以上版本) 安装目录下搜寻 designer.exe,发送到桌面快捷键
参考:Maya Max python PySide集成 shiboken版本对应关系
QT Designer 设计 GUI
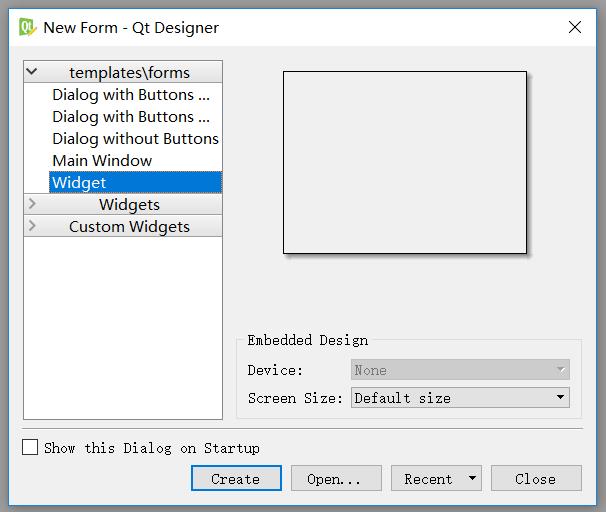
1. 打开 designer,选择 Widget作为例子。注意:也可以选择其它 templete,Widget 和 Main Window 是有区别的,自己查找 QWidget 和 QMainWindow 的区别。

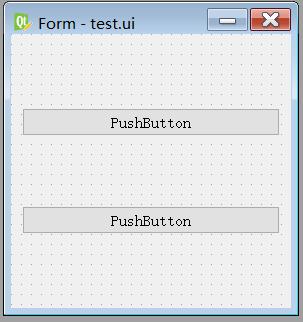
2. 随便添加一些控件,保存为 test.ui

pyside-uic 把 .ui 文件转为 .py 文件
如同 designer.exe, pyside-uic.exe,pyside2-uic.exe 也可以在 python 或者 Maya 的安装目录下找到
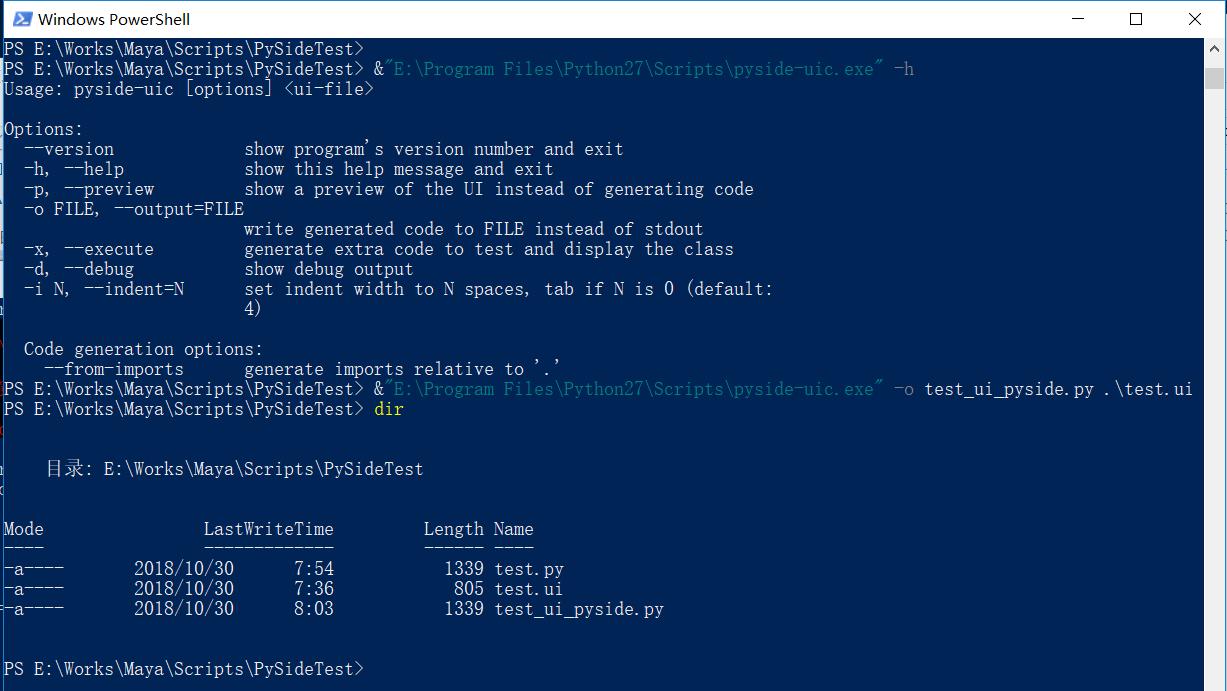
Tips:cmd路径 cd 为开发路径(.ui,.py文件所在的路径),把 pyside-uic.exe 拖到 cmd 窗口中即可。
cmd命令 :pyside-uic.exe -o test_ui_pyside.py test.ui (自己注意路径和命名)
查看 pyside-uic 的用法:pyside-uic.exe -h

下面是使用 maya2017 集成的 pyside2 来生成 test_ui_pyside.py

以下是生成的代码:

 1 # -*- coding: utf-8 -*-
 2
 3 # Form implementation generated from reading ui file \'.\\test.ui\'
 4 #
 5 # Created: Tue Oct 30 08:03:48 2018
 6 #      by: pyside-uic 0.2.15 running on PySide 1.2.4
 7 #
 8 # WARNING! All changes made in this file will be lost!
 9
10 from PySide import QtCore, QtGui
11
12 class Ui_Form(object):
13     def setupUi(self, Form):
14         Form.setObjectName("Form")
15         Form.resize(280, 274)
16         self.verticalLayout = QtGui.QVBoxLayout(Form)
17         self.verticalLayout.setObjectName("verticalLayout")
18         self.pushButton = QtGui.QPushButton(Form)
19         self.pushButton.setObjectName("pushButton")
20         self.verticalLayout.addWidget(self.pushButton)
21         self.pushButton_2 = QtGui.QPushButton(Form)
22         self.pushButton_2.setObjectName("pushButton_2")
23         self.verticalLayout.addWidget(self.pushButton_2)
24
25         self.retranslateUi(Form)
26         QtCore.QMetaObject.connectSlotsByName(Form)
27
28     def retranslateUi(self, Form):
29         Form.setWindowTitle(QtGui.QApplication.translate("Form", "Form", None, QtGui.QApplication.UnicodeUTF8))
30         self.pushButton.setText(QtGui.QApplication.translate("Form", "PushButton", None, QtGui.QApplication.UnicodeUTF8))
31         self.pushButton_2.setText(QtGui.QApplication.translate("Form", "PushButton", None, QtGui.QApplication.UnicodeUTF8))

 1 # -*- coding: utf-8 -*-
 2
 3 # Form implementation generated from reading ui file \'.\\test.ui\'
 4 #
 5 # Created: Thu Nov 01 18:39:09 2018
 6 #      by: pyside2-uic  running on PySide2 2.0.0~alpha0
 7 #
 8 # WARNING! All changes made in this file will be lost!
 9
10 from PySide2 import QtCore, QtGui, QtWidgets
11
12 class Ui_Form(object):
13     def setupUi(self, Form):
14         Form.setObjectName("Form")
15         Form.resize(280, 274)
16         self.verticalLayout = QtWidgets.QVBoxLayout(Form)
17         self.verticalLayout.setObjectName("verticalLayout")
18         self.pushButton = QtWidgets.QPushButton(Form)
19         self.pushButton.setObjectName("pushButton")
20         self.verticalLayout.addWidget(self.pushButton)
21         self.pushButton_2 = QtWidgets.QPushButton(Form)
22         self.pushButton_2.setObjectName("pushButton_2")
23         self.verticalLayout.addWidget(self.pushButton_2)
24
25         self.retranslateUi(Form)
26         QtCore.QMetaObject.connectSlotsByName(Form)
27
28     def retranslateUi(self, Form):
29         Form.setWindowTitle(QtWidgets.QApplication.translate("Form", "Form", None, -1))
30         self.pushButton.setText(QtWidgets.QApplication.translate("Form", "PushButton", None, -1))
31         self.pushButton_2.setText(QtWidgets.QApplication.translate("Form", "PushButton", None, -1))
ui 文件转换成 py 文件的好处是可读性好,以后方便语言国际化,后续的章节会提到
以上是关于使用 PySide2 开发 Maya 插件系列一:QT Designer 设计GUI, pyside-uic 把 .ui 文件转为 .py 文件的主要内容,如果未能解决你的问题,请参考以下文章
