Java之图片上传与删除功能的实现
Posted 罗毅豪
tags:
篇首语:本文由小常识网(cha138.com)小编为大家整理,主要介绍了Java之图片上传与删除功能的实现相关的知识,希望对你有一定的参考价值。
要实现Java图片上传与删除,并使本地和服务器上都能同时正常使用。
1.定义线上线下文件保存和显示路径
application-dev.properties
kapok.SHOW_PIC_PREFIX = http://localhost:8910/image/

#mac
#kapok.SAVE_PATH = /Users/luoyihao/images/

#win
kapok.SAVE_PATH = C:\\\\images\\\\
application-prod.properties
kapok.SHOW_PIC_PREFIX = http://xxxxx.com:8500/image/
kapok.SAVE_PATH = /projects/compositive-system/images/
2.在上面两个配置文件加上图片上传限制配置(不加则会报上传图片大小超出限制的错误)
spring.servlet.multipart.max-file-size = 5MB
spring.servlet.multipart.max-request-size = 20MB
3.在Controller导入配置变量
@Value("$kapok.SHOW_PIC_PREFIX")
private String showPicPrefix;

@Value("$kapok.SAVE_PATH")
private String savePath;
4.图片上传接口
@RequestMapping(value = "/uploadPic", method = RequestMethod.POST)
public Result uploadPic(@RequestParam("id") int id, @RequestParam("file") MultipartFile file)
    if (file == null || file.isEmpty())
        return ResultGenerator.genFailResult("上传文件为空");


    String fileName = file.getOriginalFilename();
    List<String> FILE_WHILE_EXT_LIST = Arrays.asList("JPG", "PNG", "JPEG", "GIF");
    String fileExtName = fileName.substring(fileName.lastIndexOf(".") + 1);
    if (FILE_WHILE_EXT_LIST.contains(fileExtName.toUpperCase()))
        String newFileName = UUID.randomUUID() + "." + fileExtName;
        File dest = new File(savePath + newFileName);
        if(!dest.getParentFile().exists())
            dest.getParentFile().mkdirs();

        try
            file.transferTo(dest);
            PointsExchange pointsExchange = pointsExchangeService.getById(id);
            pointsExchange.setPic(newFileName);
            pointsExchangeService.updateById(pointsExchange);
            return ResultGenerator.genSuccessResult();
         catch (IOException e)
            e.printStackTrace();
            return ResultGenerator.genFailResult("上传失败");


    return ResultGenerator.genFailResult("图片格式不正确");
5.图片删除接口
@RequestMapping(value = "/delPic", method = RequestMethod.POST)
public Result delPic(@RequestBody PointsExchange pointsExchange)
    File file = new File(savePath + pointsExchange.getPic());

    PointsExchange pe = pointsExchangeService.getById(pointsExchange.getId());
    pe.setPic(Constants.DEFAULT_IMG);
    pointsExchangeService.updateById(pe);

    //判断文件存不存在
    if (!file.exists())
        return ResultGenerator.genFailResult("删除文件失败:" + pointsExchange.getPic() + "不存在!");
     else if (Constants.DEFAULT_IMG.equals(pointsExchange.getPic()))
        return ResultGenerator.genFailResult("该奖品没有图片");
     else
        //判断这是不是一个文件,ps:有可能是文件夹
        if (file.isFile())
            boolean res = file.delete();
            return ResultGenerator.genSuccessResult(res);


    return ResultGenerator.genFailResult("删除文件失败");
6.图片展示接口
@RequestMapping(value = "/list", method = RequestMethod.GET)
public Result list(@RequestParam(defaultValue = "0") Integer page, @RequestParam(defaultValue = "0") Integer size)
    PageHelper.startPage(page, size);
    QueryWrapper qw = new QueryWrapper();
    qw.orderByAsc("points");
    List<PointsExchange> list = pointsExchangeService.list(qw);
    for (PointsExchange pe:list)
        pe.setPic(showPicPrefix + pe.getPic());

    PageInfo pageInfo = new PageInfo(list);
    return ResultGenerator.genSuccessResult(pageInfo);
7.给继承自WebMvcConfigurationSupport的KapokWebMvcConfigurer类的addResourceHandlers方法增加一条语句
作用:将启动的服务上的/images/作为虚拟路径,映射到真实的图片保存路径,用于图片展示。
registry.addResourceHandler("/image/**").addResourceLocations("file:"+savePath+"/");
8.如果是用Docker部署,部署的时候要给docker run命令加上 -v 服务器真实目录:容器内部目录,实现文件夹的挂载,同步两边的文件。
docker run -d -p 8005:8910 -v /projects/compositive-system/images:/projects/compositive-system/images compositive-system
9.前端增加图片上传按钮
<a-upload
  v-model:file-list="fileList"
  name="file"
  :headers="headers"
  :action="url"
  :before-upload="(file) => beforeUpload(file, record)"
  :showUploadList="false"
  @change="handleChange"
>
  <a-button type="primary">
    <upload-outlined></upload-outlined>
    上传图片
  </a-button>
</a-upload>
10.前端图片上传JS
const url = ref("");
const beforeUpload = (file, record) =>
  url.value =
    import.meta.env.VITE_APP_BASE_API +
    "/pointsexchange/uploadPic?id=" +
    record.id;
;

const fileList = ref([]);

const handleChange = (info) =>
  if (info.file.status !== "uploading")
    console.log(info.file, info.fileList);

  if (info.file.status === "done")
    console.log("info", info);
    if (info.file.response.code == 200)
      message.success(`$info.file.name上传成功`);
      query();
     else
      message.error(info.file.response.message);

   else if (info.file.status === "error")
    message.error(`$info.file.name上传失败`);

;

const headers =
  Authorization: getToken(),
  "trace-id": uuid.v1(),
  "trace-user": store.getters.userid,
;
11.前端增加删除图片按钮
<a-button type="primary" danger @click="delPic(record)">
  <template #icon>
    <delete-outlined />
  </template>
  删除图片
</a-button>
12.前端图片删除JS
// 删除图片
const delPic = (row) =>
  const modal = Modal.confirm();
  modal.update(
    title: "确认删除该图片吗?",
    icon: createVNode(ExclamationCircleOutlined),
    content: "",
    okText: "删除",
    okType: "danger",
    cancelText: "取消",
    closable: true,
    maskClosable: true,
    onOk(e)
      const param = Object.assign(, row);
      PointsExchangeApi.delPic(param)
        .then((response) =>
          const data = response.data;
          console.log(response);
          if (data.code === 200)
            message.success("删除成功");
           else
            message.warning(data.message);

          query();
          modal.destroy();
        )
        .catch((error) =>
          query();
        );
    ,
    onCancel()
      console.log("Cancel");
      modal.destroy();
    ,
  );
;
13.前端图片展示(404的时候显示默认图片)
<img :src="item.pic" alt="" class="img" onerror="this.src=\'../src/assets/default.png\'"/>
即可。
淘淘商城图片上传功能的实现
前提:
参考:集群环境下图片上传的功能分析、vmware的安装,linux的安装、nginx和ftp服务在linux的安装,ftp的客户端的使用。
图片上传是图片存储到ftp服务器上面,所以这里不需要操作mapper层。
这里用了几个工具类
ftp图片上传的工具类,图片名字的一种新的生成方式,json与java类的转换工具。
这里图片上传采用的是富文本编辑器的一个图片上传插件,在jsp页面实现的。
http://kindeditor.net/docs/upload.html


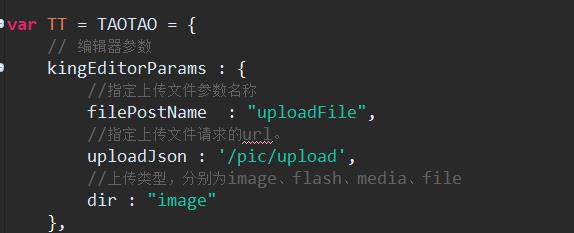
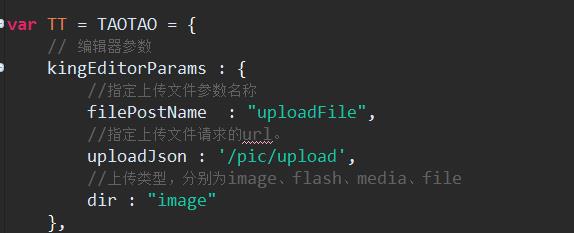
根据这几个jsp页面我们可以看到图片上传功能的url和传入的参数。
分析:
(1)图片是上传到ftp服务器,不是在数据库。所以我们搭建好服务的环境。
(2)是否有传入的参数和返回值

在这里我们看到参数即uploadFile,url为/pic/upload
这里注意使用的上传到服务器的一个MultiPartFile对象

springMVC实现图片的上传,需要依赖
导入common-fileupload的依赖
|
<!-- 文件上传组件 --> <dependency> <groupId>commons-fileupload</groupId> <artifactId>commons-fileupload</artifactId> </dependency> |
这里需要在springMVC中配置这个文件上传的bean
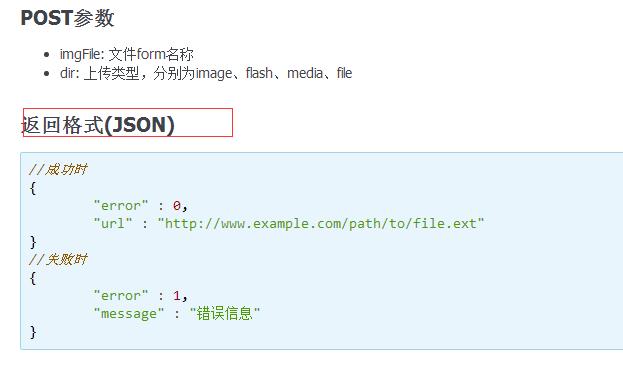
利用富文本编辑器上传图片返回的结果是也是json的格式,详细可以参考kindEditor的上传功能实现文档:
返回格式(JSON):

这里有返回成功时的情况和失败时的情况。我们可以采用两种方式来保存返回的json数据,一种是map集合的键值对形式,一种是pojo对象。下面看下两种方式:
Map的键值对形式如下:

pojo对象格式:
public class PictureResult {
/**
* 上传图片返回值,成功:0 失败:1
*/
private Integer error;
/**
* 回显图片使用的url
*/
private String url;
/**
* 错误时的错误消息
*/
}
(3)代码的编写实现:
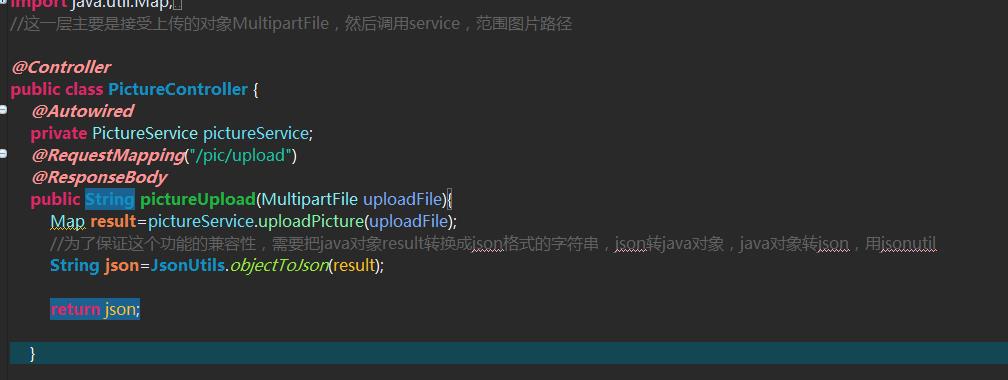
controller层:
这是采用map的形式存储返回值,因为图片上传这个插件有些缺陷会在有的浏览器显示不出来,所以需要将java对象转为json的数据形式。

service层:

这里的步骤是:
1、生成图片的名称,这里采用的是上面讲的利用时间的分秒来实现的命名,具体见下一章
2、利用FTPUtil工具实现图片的上传:
在这里需要获取ftp服务器的ip,用户名,密码,存储的路径。
用到了一个spring的新技术:
首先将这些ip端口等等写在一个文件中,然后利用spring来读取,因为在项目中不能将这些东西写死。

读取方式:

另外还有一个新技术,就是joda-time的日期类型转换的插件,在依赖的jar包那里添加依赖:

利用这个插件,可以直接生成所需要的格式:

这里是采用时间的形式来生成作为图片的文件夹
以上是关于Java之图片上传与删除功能的实现的主要内容,如果未能解决你的问题,请参考以下文章