LinuxSSH免密登录配置
Posted Janzen_Q
tags:
篇首语:本文由小常识网(cha138.com)小编为大家整理,主要介绍了LinuxSSH免密登录配置相关的知识,希望对你有一定的参考价值。
一、Ubuntu ssh免密登录
1、生成密钥对
[root@temp-ubuntu-1804-server:~]# ssh-keygen -t rsa
Generating public/private rsa key pair.
Enter file in which to save the key (/root/.ssh/id_rsa):
Enter passphrase (empty for no passphrase):
Enter same passphrase again:
Your identification has been saved in /root/.ssh/id_rsa.
Your public key has been saved in /root/.ssh/id_rsa.pub.
The key fingerprint is:
SHA256:XmlRk5OLf2gX9tUeE0OPbTCDG5jBWXLy6nbM02tfqps root@temp-ubuntu-1804-server.janzen.com
The key\'s randomart image is:
+---[RSA 2048]----+
|         .+*=+=. |
|          =**. O.|
|          ...=. B|
|          .+o o+o|
|        S =. o ++|
|       . + o+.o o|
|        . o.=o. .|
|         . . o.o.|
|            E+o..|
+----[SHA256]-----+
[root@temp-ubuntu-1804-server:~]# ls .ssh/
authorized_keys  id_rsa  id_rsa.pub  known_hosts
2、被控端导入公钥
[root@temp-ubuntu-1804-server:~]# cat .ssh/authorized_keys
ssh-rsa AAAAB3NzaC1yc2EAAAADAQABAAABAQCwohqZD2j3TYLokECPl0Tx3h7yMbEQubtFkr4Oy7MLOehZPIS6bwkbd7MwVORsC5wFc4lmu4+3N8ZH6hNarSeuKTRZRMg/RYmQcxaO2doXfpvTHTE+4A2Vcs3Tou0ugjXOi+wuY3878Kz9rxCucjlIyZDu6bNYcsFuA918HUOAMr4XqdzoXTYjYFs9hRR51T6nBk+eCNfj7EDULmkkOSd7uZOd5bmBw/KZjxkSbEIgr1dTAZCzwMjvzLAqXibYQ4QmOw0RIIS5EAouS0RN+ukdUNgHhYz4sdLkndXXqdwf6AkFj2N0d8+QEOco4Wpa2rVDpAzEViKIe9TtnaX/+OFp root@temp-ubuntu-1804-server.janzen.com
3、修改sshd配置
[root@temp-ubuntu-1804-server:~]# vim /etc/ssh/sshd_config
[root@temp-ubuntu-1804-server:~]# cat /etc/ssh/sshd_config | grep ^[^#]
PermitRootLogin yes
PubkeyAuthentication yes
AuthorizedKeysFile    .ssh/authorized_keys .ssh/authorized_keys2
ChallengeResponseAuthentication no
UsePAM yes
X11Forwarding yes
PrintMotd no
AcceptEnv LANG LC_*
Subsystem sftp    /usr/lib/openssh/sftp-server
PasswordAuthentication yes
[root@temp-ubuntu-1804-server:~]# systemctl restart sshd
4、客户端导入私钥
[root@temp-ubuntu-1804-server:~]# scp .ssh/id_rsa 10.0.0.250:~/.ssh/
id_rsa                                                                                                        100% 1675     2.3MB/s   00:00

[root@Client-Ubuntu1804-250:~]# ls .ssh/
authorized_keys  id_rsa  known_hosts
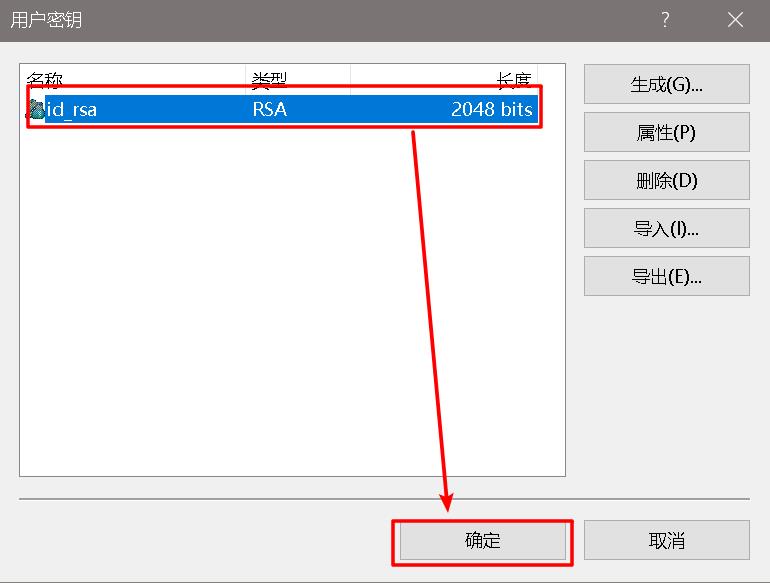
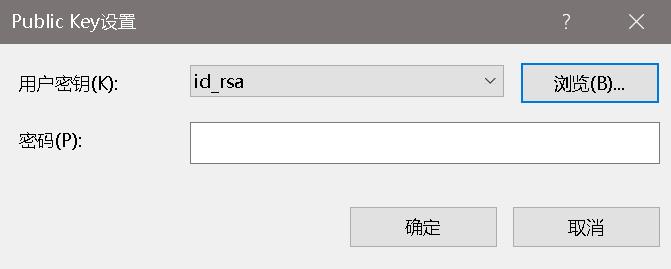
5、xshell 导入私钥
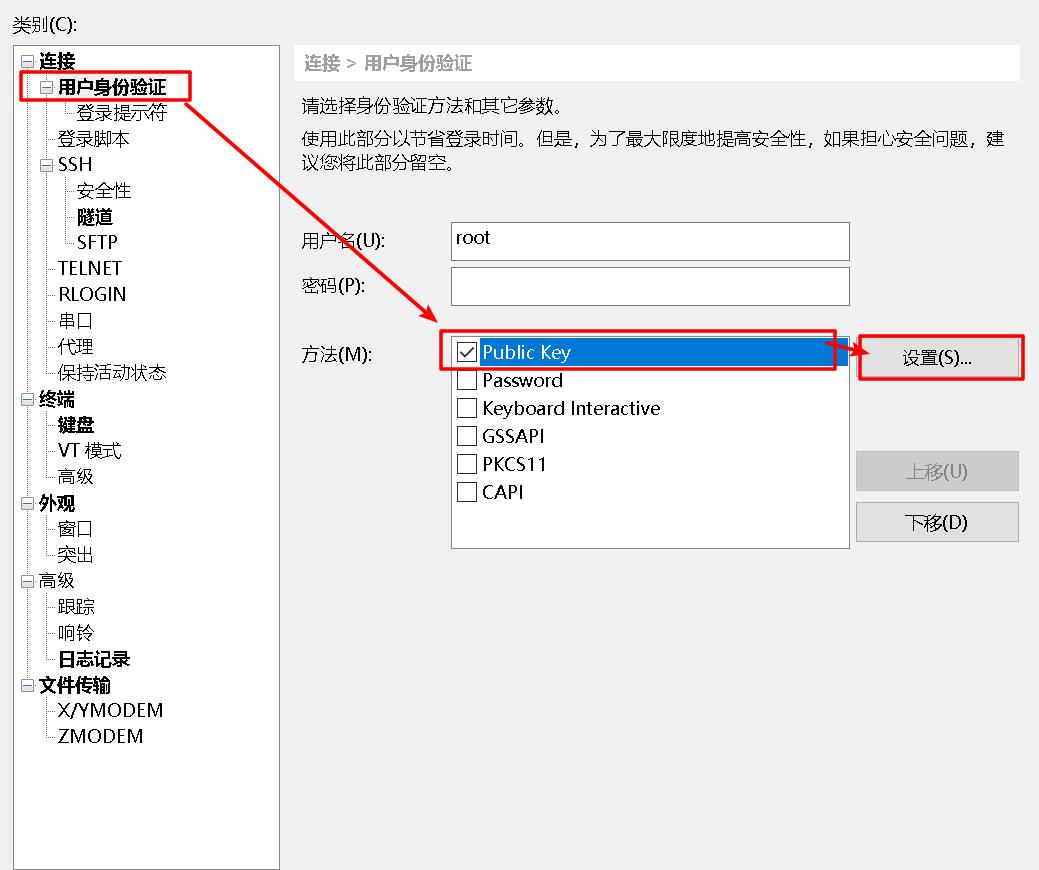
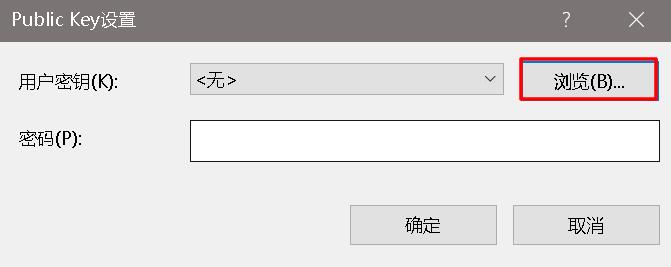
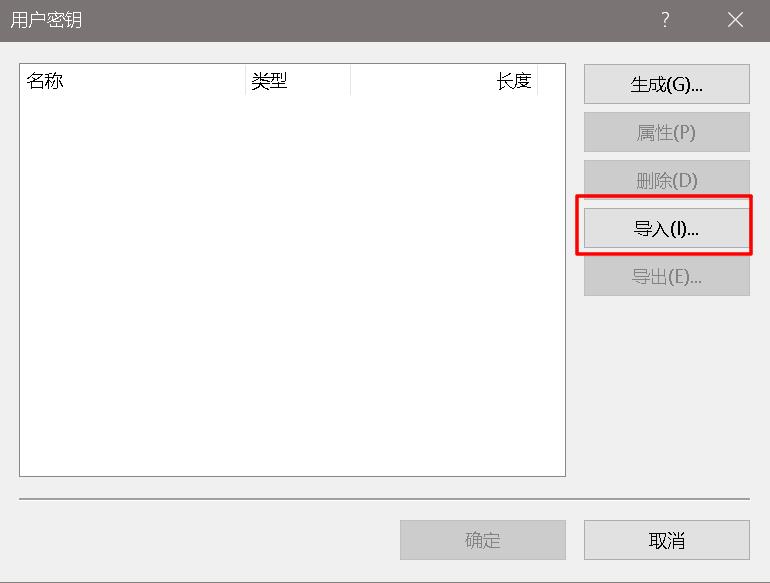
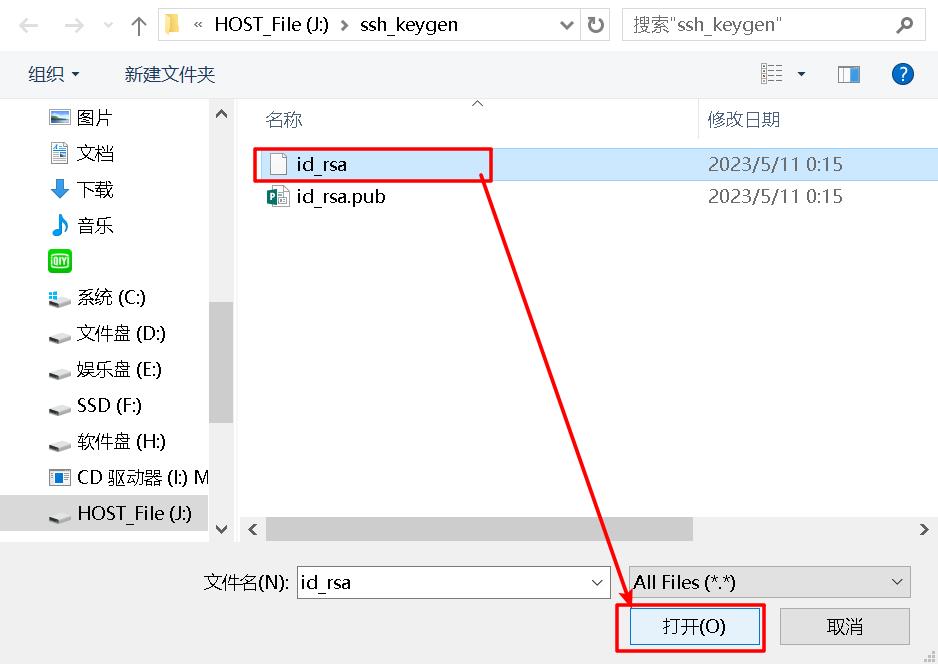
linux下怎样设置ssh无密码登录
在CentOS/RHEL上设置SSH免密码登录导读 作为系统管理员,你计划在 Linux 上使用 OpenSSH,完成日常工作的自动化,比如文件传输、备份数据库转储文件到另一台服务器等。为实现该目标,你需要从主机 A 能自动登录到主机 B。自动登录也就是说,要在 shell 脚本中使用ssh,而无需要输入任何密码。
本文会告诉你怎样在 CentOS/RHEL 上设置 SSH 免密码登录。自动登录配置好以后,你可以通过它使用 SSH (Secure Shell)和安全复制 (SCP)来移动文件。
SSH 是开源的,是用于远程登录的最为可靠的网络协议。系统管理员用它来执行命令,以及通过 SCP 协议在网络上向另一台电脑传输文件。
通过配置 SSH 免密码登录,你可以享受到如下的便利:
◆用脚本实现日常工作的自动化。
◆增强 Linux 服务器的安全性。这是防范虚拟专用服务器(VPS)遭受暴力破解攻击的一个推荐的方法,SSH 密钥单凭暴力破解 是几乎不可攻破的。
什么是 Ssh-Keygen
ssh-keygen 是一个用来生成、创建和管理 SSH 认证用的公私钥的工具。通过 ssh-keygen 命令,用户可以创建支持SSH1 和 SSH2 两个协议的密钥。ssh-keygen 为 SSH1 协议创建 RSA 密钥,SSH2 则可以是 RSA 或 DSA。
什么是 Ssh-Copy-Id
ssh-copy-id 是用来将本地公钥拷贝到远程的 authorized_keys 文件的脚本命令,它还会将身份标识文件追加到远程机器的 ~/.ssh/authorized_keys 文件中,并给远程主机的用户主目录适当的的权限。
SSH 密钥
SSH 密钥为登录 Linux 服务器提供了更好且安全的机制。运行 ssh-keygen 后,将会生成公私密钥对。你可以将公钥放置到任意服务器,从持有私钥的客户端连接到服务器的时,会用它来解锁。两者匹配时,系统无需密码就能解除锁定。
在 CentOS 和 RHEL 上设置免密码登录 SSH
以下步骤在 CentOS 5/6/7、RHEL 5/6/7 和 Oracle Linux 6/7 上测试通过。
节点1:192.168.0.9 节点2 : 192.168.0.10
本章目录结构 [收起]
步骤一 :
步骤二:
步骤三:
步骤四:
步骤一 :
测试节点1到节点2的连接和访问:
[root@node1 ~]# ssh root@192.168.0.10
The authenticity of host '192.168.0.10 (192.168.0.10)' can't be established.
RSA key fingerprint is 6d:8f:63:9b:3b:63:e1:72:b3:06:a4:e4:f4:37:21:42.
Are you sure you want to continue connecting (yes/no)? yes
Warning: Permanently added '192.168.0.10' (RSA) to the list of known hosts.
root@192.168.0.10's password:
Last login: Thu Dec 10 22:04:55 2015 from 192.168.0.1
[root@node2 ~]#
步骤二:
使用 ssh-key-gen 命令生成公钥和私钥,这里要注意的是可以对私钥进行加密保护以增强安全性。
[root@node1 ~]# ssh-keygen
Generating public/private rsa key pair.
Enter file in which to save the key (/root/.ssh/id_rsa):
Enter passphrase (empty for no passphrase):
Enter same passphrase again:
Your identification has been saved in /root/.ssh/id_rsa.
Your public key has been saved in /root/.ssh/id_rsa.pub.
The key fingerprint is:
b4:51:7e:1e:52:61:cd:fb:b2:98:4b:ad:a1:8b:31:6d root@node1.ehowstuff.local
The key's randomart image is:
+--[ RSA 2048]----+
| . ++ |
| o o o |
| o o o . |
| . o + .. |
| S . . |
| . .. .|
| o E oo.o |
| = ooo. |
| . o.o. |
+-----------------+
步骤三:
用 ssh-copy-id 命令将公钥复制或上传到远程主机,并将身份标识文件追加到节点2的 ~/.ssh/authorized_keys 中:
[root@node1 ~]# ssh-copy-id -i ~/.ssh/id_rsa.pub 192.168.0.10
root@192.168.0.10's password:
Now try logging into the machine, with "ssh '192.168.0.10'", and check in:
.ssh/authorized_keys
to make sure we haven't added extra keys that you weren't expecting.
步骤四:
验证免密码 SSH 登录节点2:
[root@node1 ~]# ssh root@192.168.0.10
Last login: Sun Dec 13 14:03:20 2015 from www.ehowstuff.local
百度搜索《linux就该这么学》,技术干货里面有,也可以看下这本书! 参考技术A
登陆Linux服务器
创建公钥文件存放位置并设置权限
mkdir /root/.ssh
chmod 700 /root/.ssh
vi /root/.ssh/authorized_keys 把公钥里边的内容复制到里边然后保存即出,只有一行的。注意哦。(这也是为什么我当时用puttygen创建公钥之后复制用记事本保存的原因,因为用软件保存的分几行。)
重启ssh service sshd restart
登录测试
禁用密码登录
# vi /etc/ssh/sshd_config
PasswordAuthentication no //禁止使用基于口令认证的方式登陆PubkeyAuthentication yes //允许使用基于密钥认证的方式登陆
# /etc/init.d/sshd reload
以上是关于LinuxSSH免密登录配置的主要内容,如果未能解决你的问题,请参考以下文章