python3+requests实现接口自动化1
Posted 给明天的自己
tags:
篇首语:本文由小常识网(cha138.com)小编为大家整理,主要介绍了python3+requests实现接口自动化1相关的知识,希望对你有一定的参考价值。
逐步完善中……
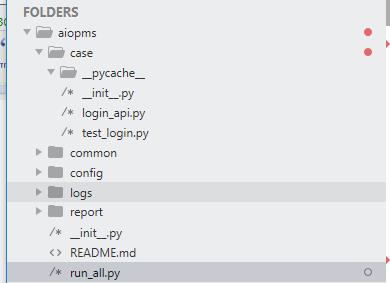
以一个登录接口为例,展示一下目录结构
目录
1、项目目录
2、登录接口和登录用例
3、配置文件
4、run_all.py
1、项目目录

以之前搭建的aiopms为平台写接口自动化,其中case中放模块和用例,common中放数据库连接信息等,config放邮箱登录信息,logs存放日志文件,report放报告文件,run_all.py执行脚本
2、登录接口和登录用例
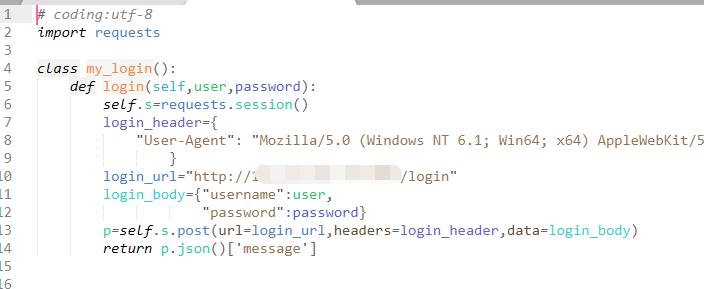
login_api.py

# coding:utf-8
import requests

class my_login():
	def login(self,user,password):
		self.s=requests.session()
		login_header={
            "User-Agent": "Mozilla/5.0 (Windows NT 6.1; Win64; x64) AppleWebKit/537.36 (KHTML, like Gecko) Chrome/65.0.3325.181 Safari/537.36"
                }
		login_url="http://nnn/login"
		login_body={"username":user,
                    "password":password}
		p=self.s.post(url=login_url,headers=login_header,data=login_body)
		return p.json()[\'message\']
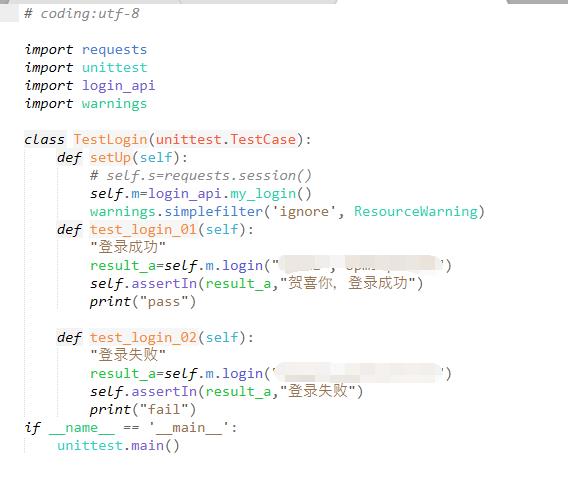
test_login.py

# coding:utf-8

import requests
import unittest
import login_api
import warnings

class TestLogin(unittest.TestCase):
	def setUp(self):
		# self.s=requests.session()
		self.m=login_api.my_login()
		warnings.simplefilter(\'ignore\', ResourceWarning)
	def test_login_01(self):
		"登录成功"
		result_a=self.m.login("11","11")
		self.assertIn(result_a,"贺喜你,登录成功")
		print("pass")

	def test_login_02(self):
		"登录失败"
		result_a=self.m.login("l11","111")
		self.assertIn(result_a,"登录失败")
		print("fail")
if __name__ == \'__main__\':
    unittest.main()
3、配置
主要是邮箱配置,结构:

read_email.py
# coding:utf-8

import os
import yaml


curPath=os.path.dirname(os.path.realpath(__file__))
yaml1=os.path.join(curPath,"email.yaml")

m=open(yaml1,\'r\', encoding=\'UTF-8\')
q=yaml.load(m)

smtpserver=q[\'smtpserver\']
port= q[\'port\']    #端口
sender=q[\'sender\'] #发件箱
psw=q[\'psw\']  #qq邮箱需要用授权码,163可以直接用密码
receiver=q[\'receiver\']
email.yaml
#qq邮箱

smtpserver: "smtp.qq.com" #发件服务器
port: 465    #端口
sender:  "11@qq.com" #发件箱
psw: "uycucbjroxwdbhgf"  #qq邮箱需要用授权码,163可以直接用密码
receiver:  "11@qq.com"
read_email.py读取email.yaml中的信息完成信息发送
4、run_all
# coding:utf-8
import smtplib
import os
import unittest
import  time
from email.mime.multipart import MIMEMultipart
from email.mime.text import MIMEText
from config import HTMLTestRunner
from config import read_email
import sys
if sys.getdefaultencoding() != \'utf-8\':
    reload(sys)
    sys.setdefaultencoding(\'utf-8\')


cur_path=os.path.dirname(os.path.realpath(__file__))
print (cur_path)

def add_case(caseName="case",rule="test*.py"):
    \'\'\'第一步:加载所有用例\'\'\'
    case_path=os.path.join(cur_path,caseName)#用例文件夹
    if not os.path.exists(case_path):os.mkdir(case_path)
    print ("test case path:%s"%case_path)
    #定义discover方法的参数
    discover = unittest.defaultTestLoader.discover(case_path,
                                                   pattern=rule )
    print (discover)
    return discover
\'\'\'2:生成html报告\'\'\'
def run_case(all_case,reportName="report"):
    \'\'\'第二步:执行所有的用例,并把结果写入HTML测试报告\'\'\'
    now=time.strftime("%Y_%m_%d_%H_%M_%S")
    report_path=os.path.join(cur_path,reportName)#报告文件夹
    if not os.path.exists(report_path):os.mkdir(report_path)
    report_abspath=os.path.join(report_path,now+"result.html")
    print ("report path:%s"%report_abspath)
    fp=open(report_abspath,"wb")
    runner=HTMLTestRunner.HTMLTestRunner(stream=fp,
                                         title=u\'自动化测试报告,测试结果如下:\',
                                         description=u\'用例执行情况\')

    runner.run(all_case)
    fp.close()

def get_report_file(report_path):
    \'\'\'第三步:获取最新的测试报告\'\'\'
    lists=os.listdir(report_path)
    lists.sort(key=lambda  fn:os.path.getatime(os.path.join(report_path,fn)))
    print (\'最新测试生成的报告:\'+lists[-1])
    report_file=os.path.join(report_path,lists[-1])
    return report_file


def send_mail(sender,psw,receiver,smtpserver,report_file,port):
    \'\'\'第四步:发送最新的测试报告内容\'\'\'
    with open(report_file,"rb") as f:
        mail_body=f.read()
    #定义邮件内容
    msg=MIMEMultipart()
    body=MIMEText(mail_body,_subtype=\'html\',_charset=\'utf-8\')
    msg["Subject"]=u"自动化测试报告"
    msg["from"]=sender
    msg["to"]=receiver
    msg.attach(body)
    #添加附件
    att=MIMEText(open(report_file,"rb").read(),"base64","utf-8")
    att["Content-Type"]="application/octet-stream"
    att["Content-Disposition"]=\'attachment;filename="report.html"\'
    msg.attach(att)
    try:
        smtp=smtplib.SMTP_SSL(smtpserver,port)
    except:
        smtp=smtplib.Smtp()
        smtp.connect(smtpserver,port)
    smtp.login(sender,psw)
    smtp.sendmail(sender,receiver,msg.as_string())
    smtp.quit()
    print ("test report email has send out!")

if __name__=="__main__":
    all_case=add_case()#1加载用例
    #生成测试报告的路径
    run_case(all_case)#2执行用例
    #获取最新的测试报告文件
    report_path=os.path.join(cur_path,"report")
    report_file=get_report_file(report_path)
    #邮箱配置
    smtpserver=read_email.smtpserver #发件服务器
    sender=read_email.sender #发件箱 #端口
    psw=read_email.psw #qq邮箱需要用授权码,163可以直接用密码
    receiver=read_email.receiver  #收件箱
    port=read_email.port  #端口
    send_mail(sender,psw,receiver,smtpserver,report_file,port)
以上是关于python3+requests实现接口自动化1的主要内容,如果未能解决你的问题,请参考以下文章