IDEA+Maven 打jar包
Posted sunny123456
tags:
篇首语:本文由小常识网(cha138.com)小编为大家整理,主要介绍了IDEA+Maven 打jar包相关的知识,希望对你有一定的参考价值。
IDEA+Maven 打jar包
原文链接:https://blog.csdn.net/qq_46416934/article/details/124146569
IDEA+Maven 打jar包 (包涵依赖jar)
最新修改
以前写的打包方式可能看起来有些繁琐,这里给出进一步简洁的解决方案简单粗暴
写在前面:
这两天一直在整(gu)理(dao)IDEA 用Maven打jar包,网上的教程是各式各样,但是都不能满足我的需求(或者 还没有找个正确的),因此 综合网上的内容 自己整理了一下(以下内容是在mac系统下 win 可能有一些地方不一样)。
软件环境:
IDEA:2017.1.5
Maven:3.3.9
打jar包:
-
IDEA 自带的打包工具使用
-
打无依赖jar包
- 如果工程目录中有以下文件夹 删掉
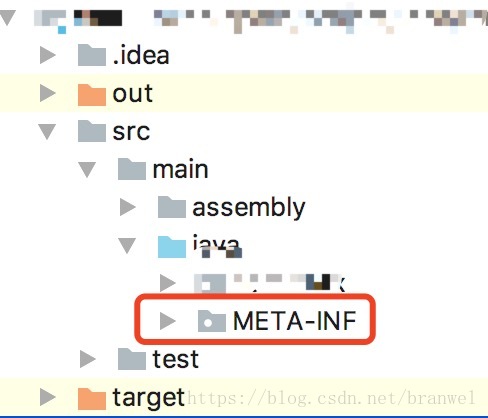
- 如果工程目录中有以下文件夹 删掉
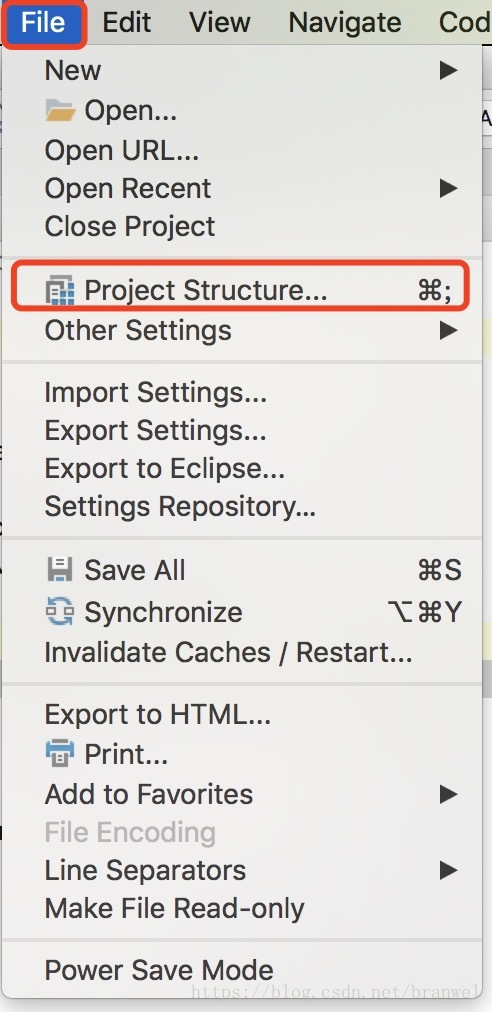
- 点击工程上方【File】菜单选择【Project Structure】
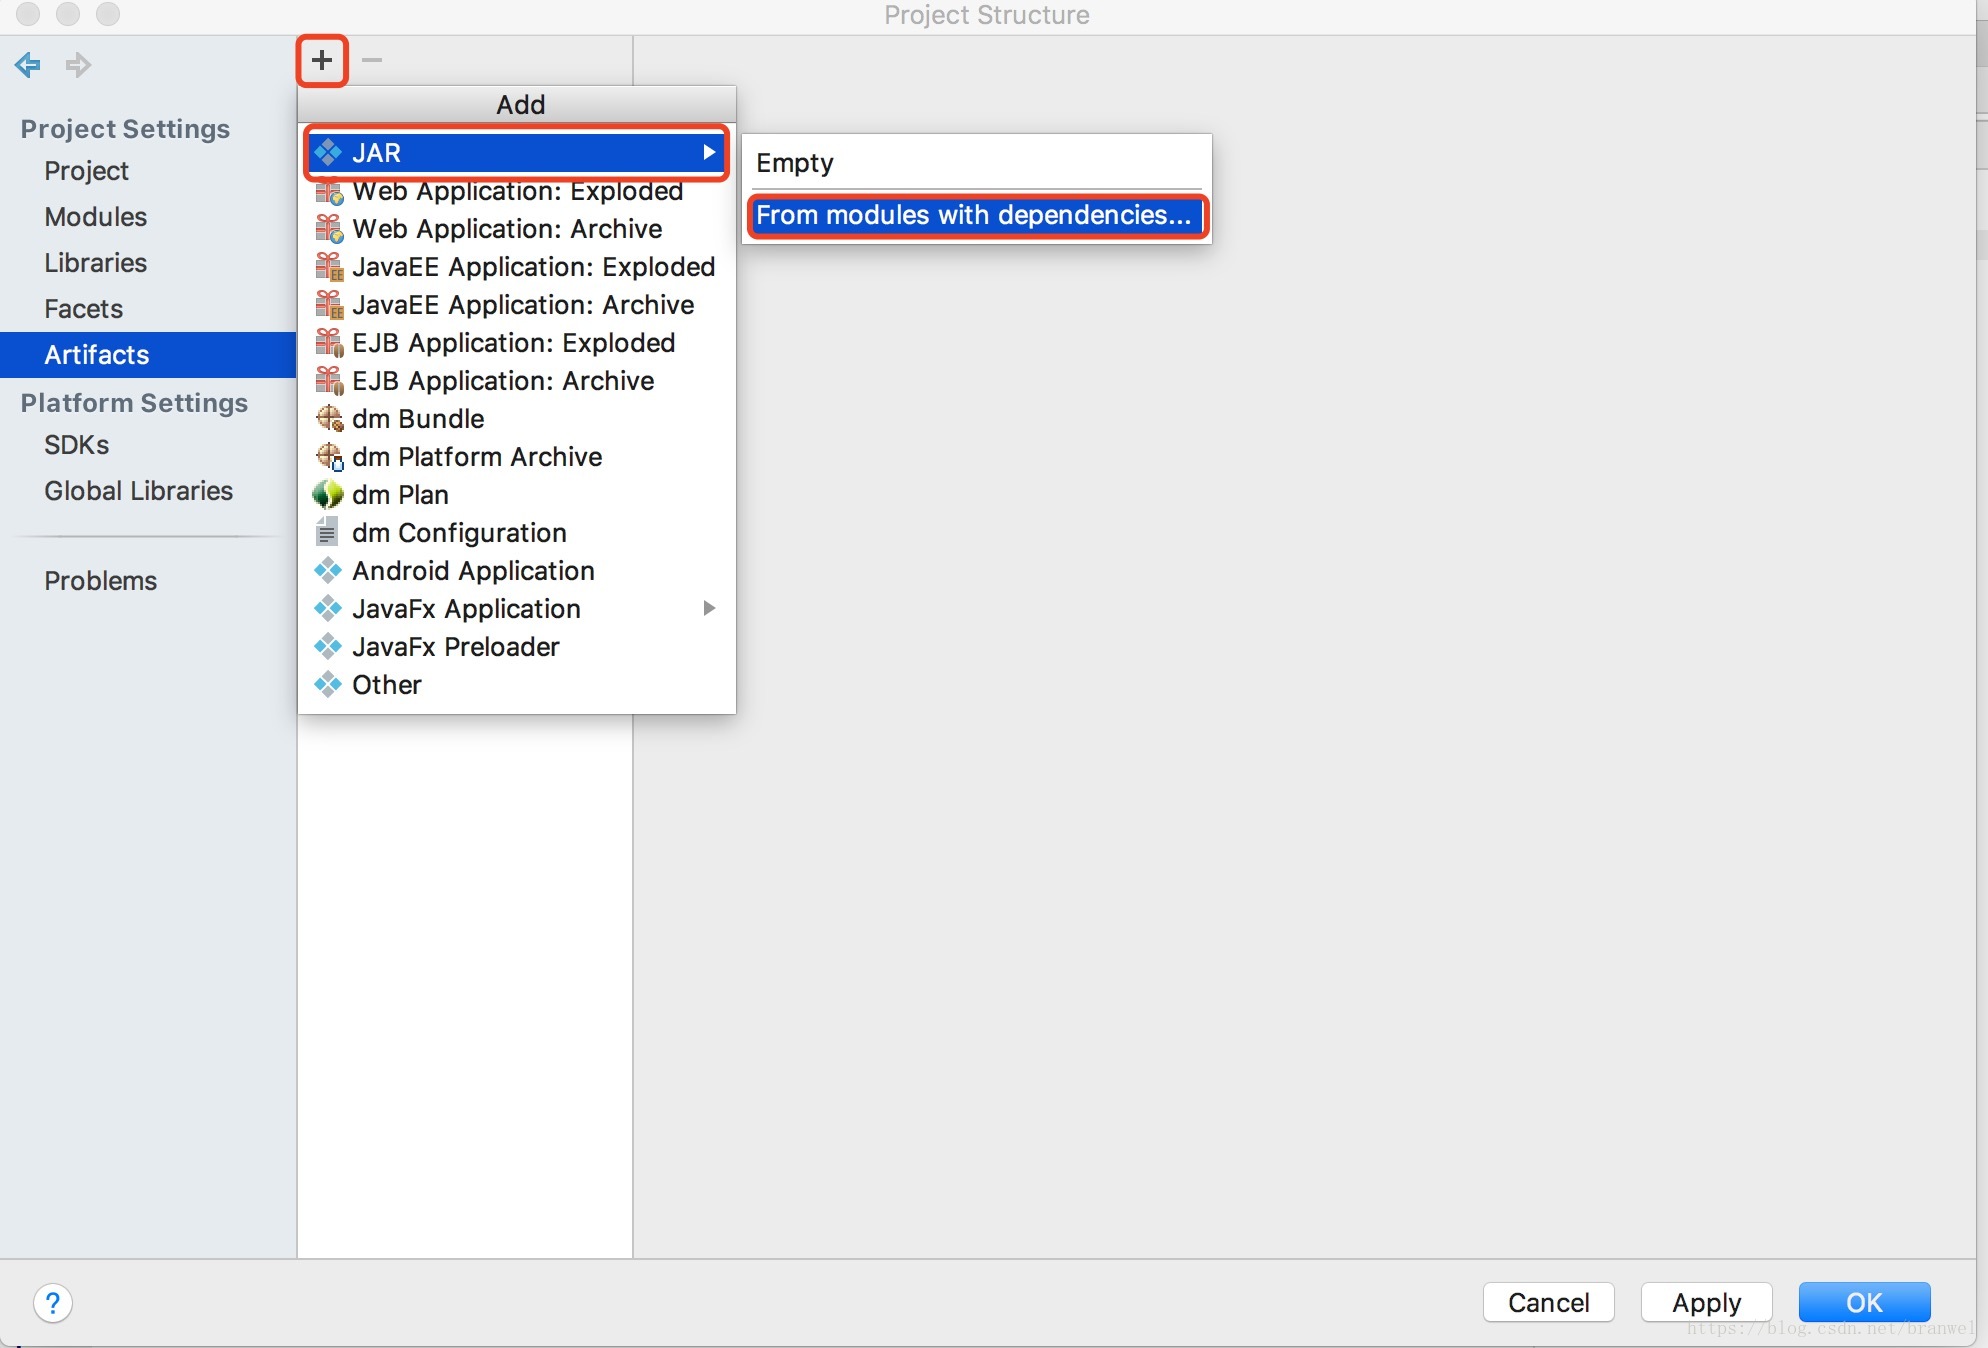
- 点击【+】 选择【JAR】,【From modules with dependencies】点击【ok】
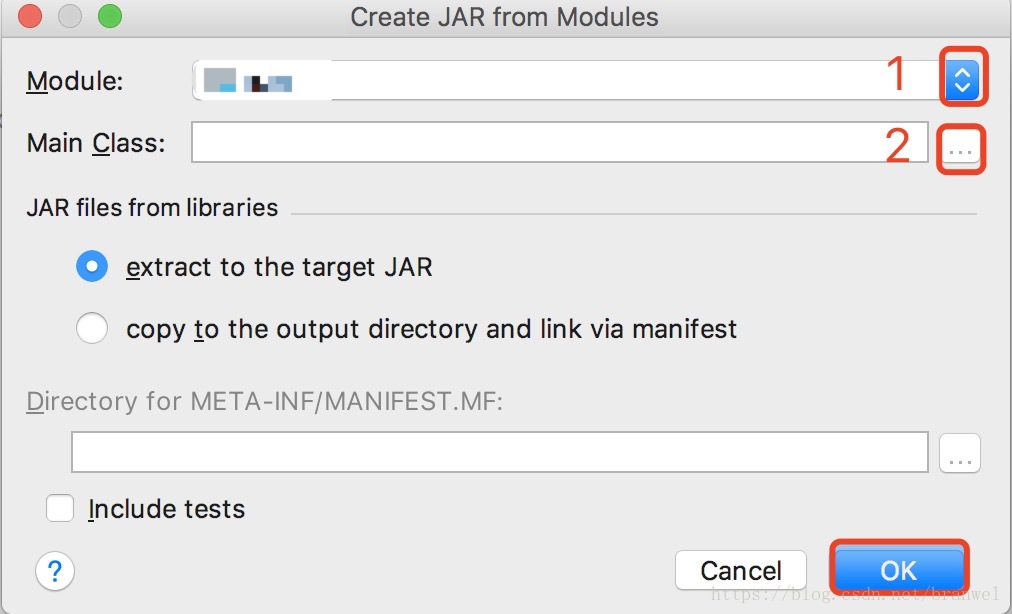
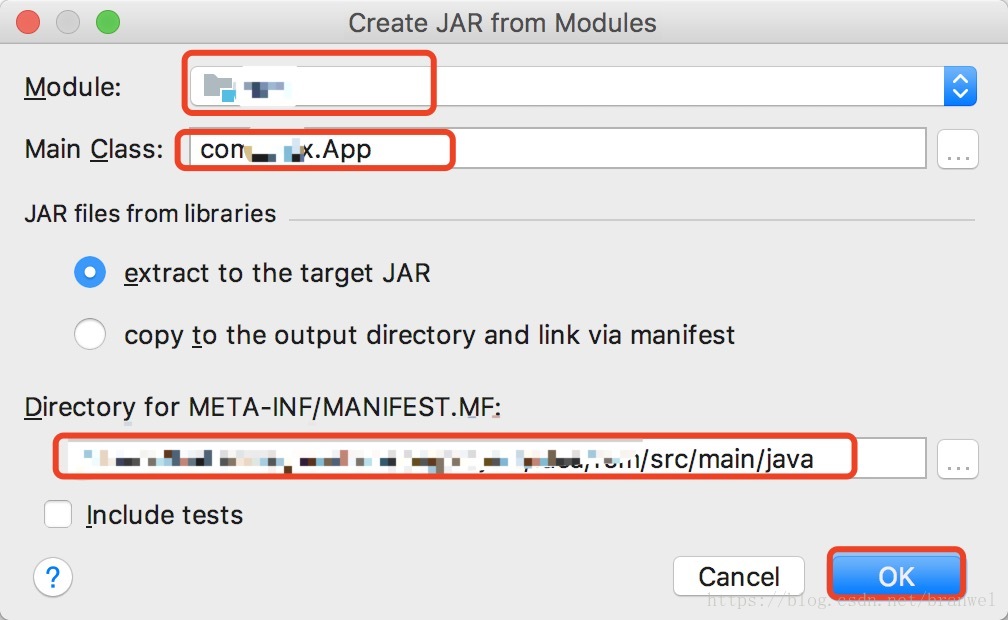
- 点击【1】选择你要打包的Module,点击【2】选择你的主类(也就是你的程序的入口)然后点击【ok】
- 点击【ok】
- 【1】是要打的jar包的名字,【2】是jar包的输出路径,【3】是程序所需要的jar依赖,【4】是程序主类的名称。因为这里是打没有依赖的jar包,所以将【3】里面不需要的jar包删掉就行。最后点击【ok】
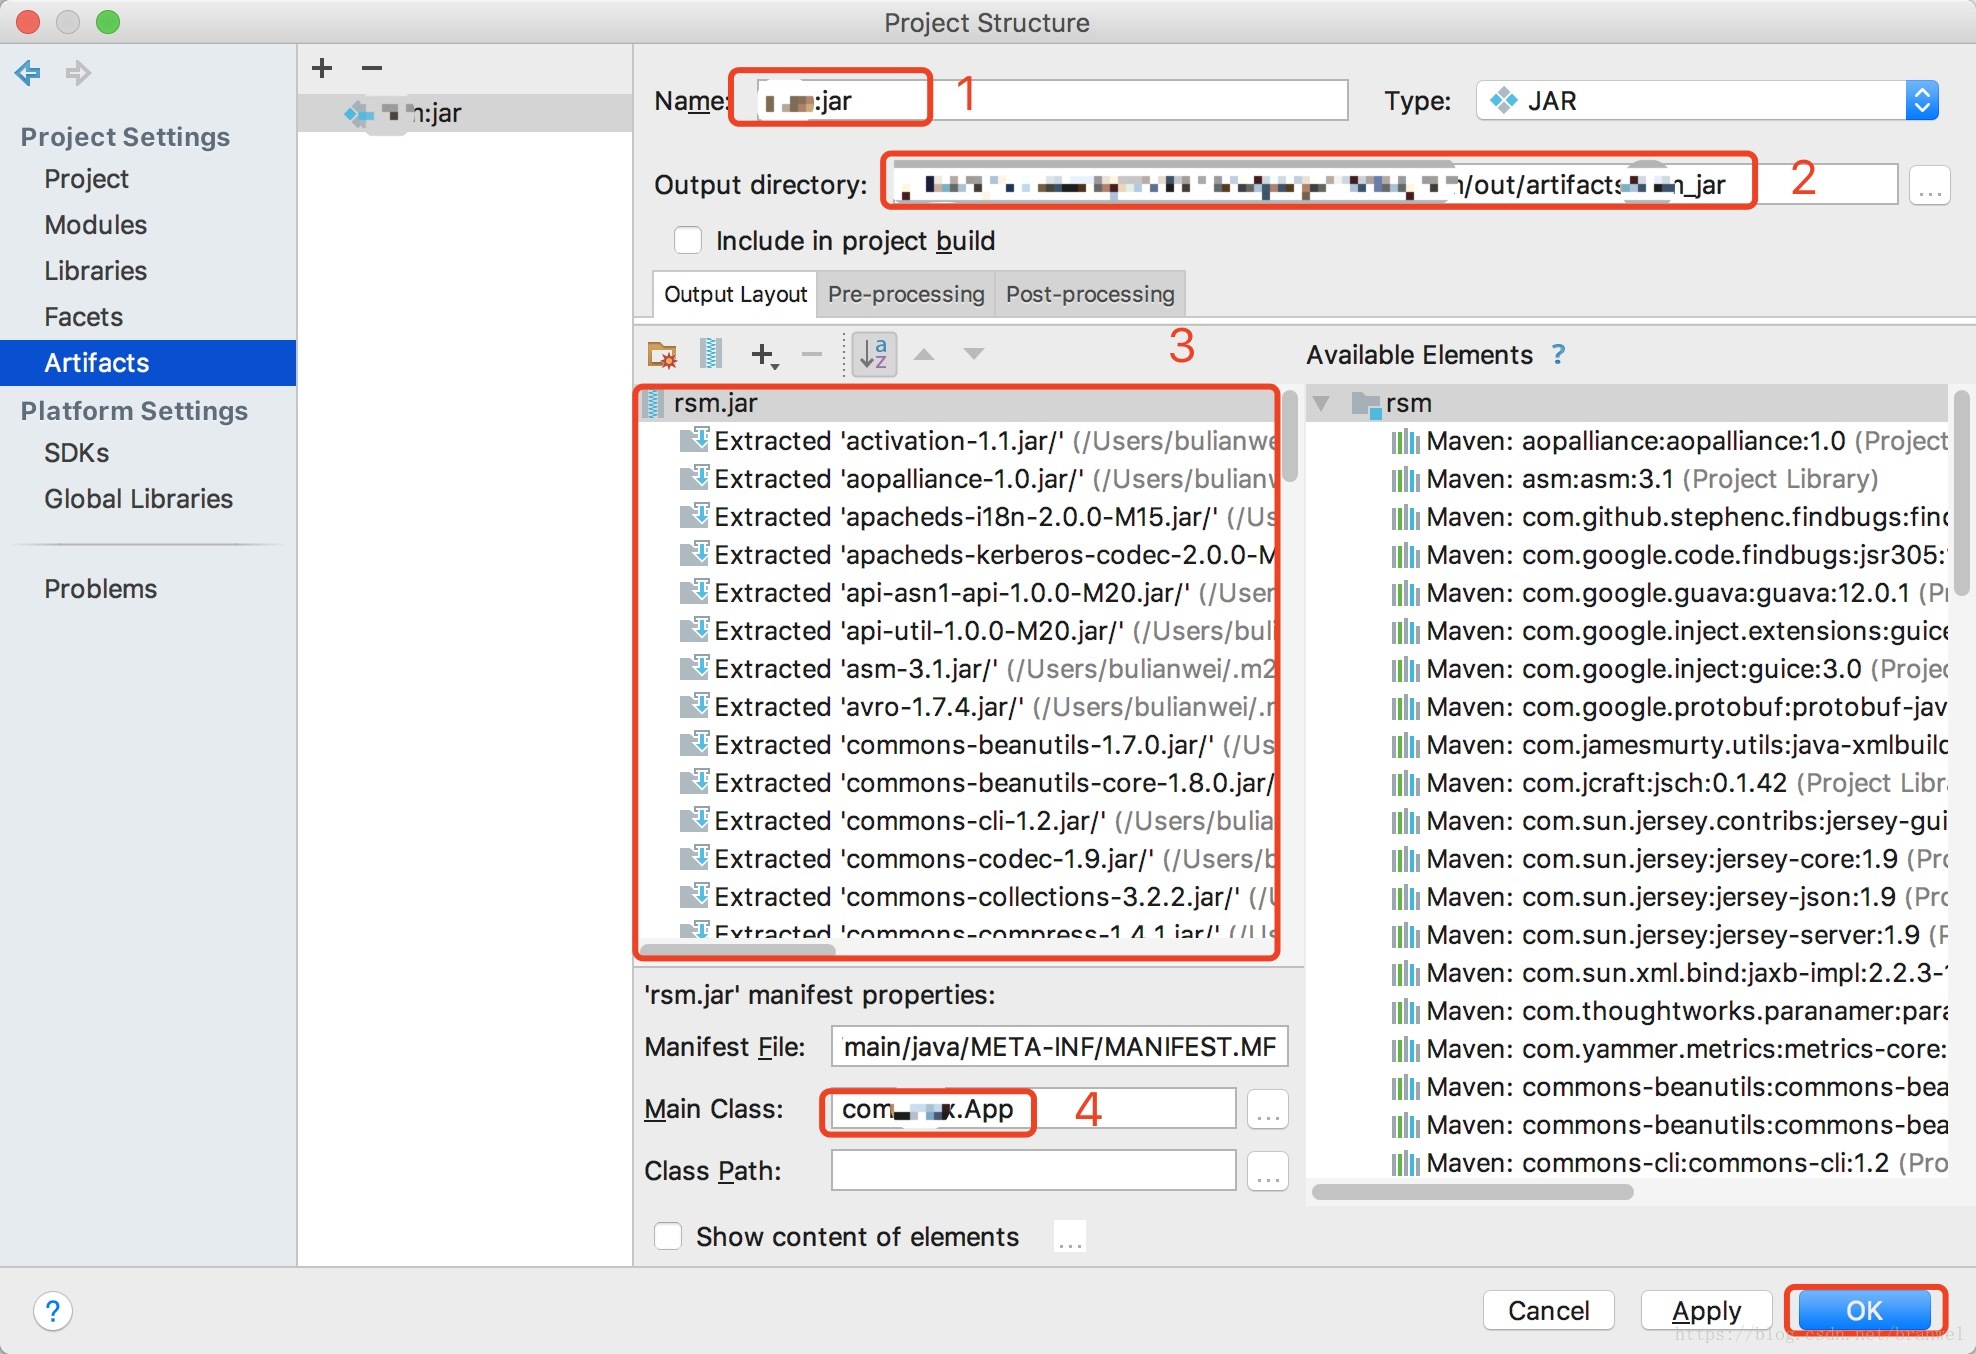
- 然后就会生成一个META-INF的文件夹,里面就是一些配置属性
- 打包涵依赖jar包
对以上的方式中的步骤6中 不做任何修改,然后执行步骤7
-
- Maven 打包
-
打无依赖jar包
-
在pom.xml 文件里加入
<plugin> <groupId>org.apache.maven.plugins</groupId> <artifactId>maven-jar-plugin</artifactId> <version>2.4</version> <configuration> <archive> 生成的jar中,不要包含pom.xml和pom.properties这两个文件 <addMavenDescriptor>false</addMavenDescriptor> <manifest> 是否要把第三方jar放到manifest的classpath中 <addClasspath>true</addClasspath> 生成的manifest中classpath的前缀,因为要把第三方jar放到lib目录下,所以classpath的前缀是lib/ <classpathPrefix>lib/</classpathPrefix> 应用的main class <mainClass>com.yourClass</mainClass> </manifest> </archive> 过滤掉不希望包含在jar中的文件 <excludes> <exclude>$project.basedir/xml/*</exclude> </excludes> </configuration> </plugin>- 1
- 2
- 3
- 4
- 5
- 6
- 7
- 8
- 9
- 10
- 11
- 12
- 13
- 14
- 15
- 16
- 17
- 18
- 19
- 20
- 21
- 22
- 23
-
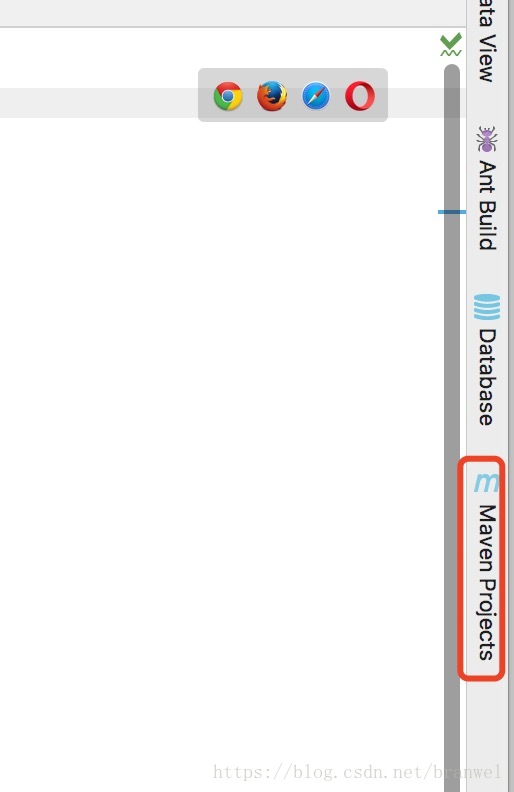
点开Maven管理工具
-
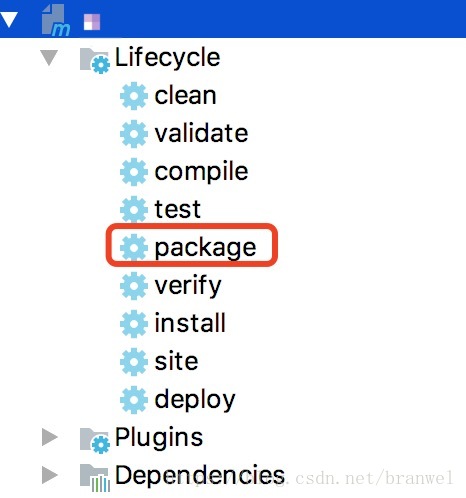
点击【package】
-
等运行完以后就会生成jar包了
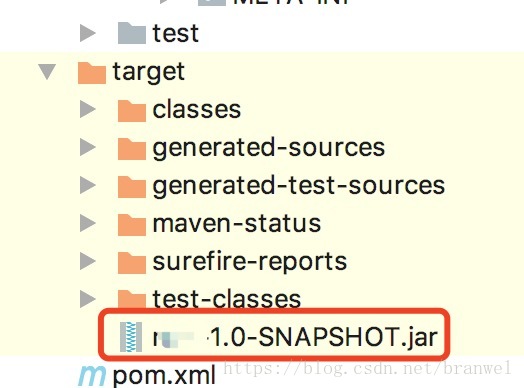
-
-
打包涵依赖jar包
第一种方法
1. 在pom.xml文件中写入<build> <plugins> <plugin> <groupId>org.apache.maven.plugins</groupId> <artifactId>maven-compiler-plugin</artifactId> <version>3.1</version> </plugin> <plugin> <artifactId>maven-assembly-plugin</artifactId> <configuration> <archive> <manifest> <mainClass>com.test.app</mainClass> </manifest> </archive> <descriptorRefs> <descriptorRef>jar-with-dependencies</descriptorRef> </descriptorRefs> </configuration> <!--下面是为了使用 mvn package命令,如果不加则使用mvn assembly--> <executions> <execution> <id>make-assemble</id> <phase>package</phase> <goals> <goal>single</goal> </goals> </execution> </executions> </plugin> </plugins> </build>- 1
- 2
- 3
- 4
- 5
- 6
- 7
- 8
- 9
- 10
- 11
- 12
- 13
- 14
- 15
- 16
- 17
- 18
- 19
- 20
- 21
- 22
- 23
- 24
- 25
- 26
- 27
- 28
- 29
- 30
- 31
- 32
- 然后执行上面【Maven 打无依赖包】步骤2到步骤4
第二种方法
-
在pom.xml文件中写入
<plugin> <groupId>org.apache.maven.plugins</groupId> <artifactId>maven-jar-plugin</artifactId> <version>2.4</version> <configuration> <archive> <!-- 生成的jar中,不要包含pom.xml和pom.properties这两个文件--> <addMavenDescriptor>false</addMavenDescriptor> <manifest> <!--是否要把第三方jar放到manifest的classpath中--> <addClasspath>true</addClasspath> <!--生成的manifest中classpath的前缀,因为要把第三方jar放到lib目录下,所以classpath的前缀是lib/--> <classpathPrefix>lib/</classpathPrefix> <!-- 应用的main class--> <mainClass>com.yourClass</mainClass> </manifest> </archive> <!-- 过滤掉不希望包含在jar中的文件--> <excludes> <exclude>$project.basedir/xml/*</exclude> </excludes> </configuration> </plugin><plugin>
<groupId>org.apache.maven.plugins</groupId>
<artifactId>maven-assembly-plugin</artifactId>
<version>2.4</version>
<configuration>
<descriptors>
<descriptor>src/main/assembly/package.xml</descriptor>
</descriptors>
</configuration>
<executions>
<execution>
<id>make-assembly</id>
<phase>package</phase>
<goals>
<goal>single</goal>
</goals>
</execution>
</executions>
</plugin>- 1
- 2
- 3
- 4
- 5
- 6
- 7
- 8
- 9
- 10
- 11
- 12
- 13
- 14
- 15
- 16
- 17
- 18
- 19
- 20
- 21
- 22
- 23
- 24
- 25
- 26
- 27
- 28
- 29
- 30
- 31
- 32
- 33
- 34
- 35
- 36
- 37
- 38
- 39
- 40
- 41
- 42
- 43
-
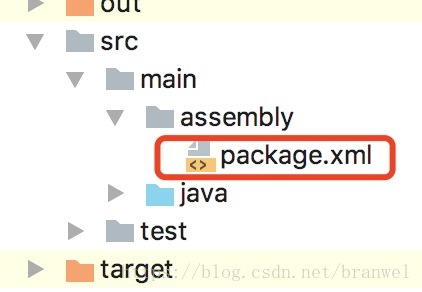
创建【src/main/assembly】目录
-
创建package.xml文件
<assembly> <id>bin</id> <!-- 最终打包成一个用于发布的zip文件 --> <formats> <format>zip</format> </formats> <!-- Adds dependencies to zip package under lib directory --> <dependencySets> <dependencySet> <!-- 不使用项目的artifact,第三方jar不要解压,打包进zip文件的lib目录 --> <useProjectArtifact>false</useProjectArtifact> <outputDirectory>lib</outputDirectory> <unpack>false</unpack> </dependencySet> </dependencySets><fileSets>
<!-- 把项目相关的说明文件,打包进zip文件的根目录 -->
<fileSet>
<directory>$project.basedir</directory>
<outputDirectory>/</outputDirectory>
<includes>
<include>README</include>
<include>LICENSE</include>
<include>NOTICE*</include>
</includes>
</fileSet><!-- 把项目的配置文件,打包进zip文件的config目录 --> <fileSet> <directory>$project.basedir/src/main/config</directory> <outputDirectory>config</outputDirectory> <includes> <include>*.xml</include> <include>*.properties</include> </includes> </fileSet> <!-- 把项目的脚本文件目录( src/main/scripts )中的启动脚本文件,打包进zip文件的跟目录 --> <fileSet> <directory>$project.build.scriptSourceDirectory</directory> <outputDirectory></outputDirectory> <includes> <include>startup.*</include> </includes> </fileSet> <!-- 把项目的脚本文件(除了启动脚本文件),打包进zip文件的script目录 --> <fileSet> <directory>$project.build.scriptSourceDirectory</directory> <outputDirectory></outputDirectory> <excludes> <exclude>startup.*</exclude> </excludes> </fileSet> <!-- 把项目自己编译出来的jar文件,打包进zip文件的根目录 --> <fileSet> <directory>$project.build.directory</directory> <outputDirectory></outputDirectory> <includes> <include>*.jar</include> </includes> </fileSet></fileSets>
</assembly>- 1
- 2
- 3
- 4
- 5
- 6
- 7
- 8
- 9
- 10
- 11
- 12
- 13
- 14
- 15
- 16
- 17
- 18
- 19
- 20
- 21
- 22
- 23
- 24
- 25
- 26
- 27
- 28
- 29
- 30
- 31
- 32
- 33
- 34
- 35
- 36
- 37
- 38
- 39
- 40
- 41
- 42
- 43
- 44
- 45
- 46
- 47
- 48
- 49
- 50
- 51
- 52
- 53
- 54
- 55
- 56
- 57
- 58
- 59
- 60
- 61
- 62
- 63
- 64
- 65
- 66
- 67
- 68
- 69
-
将【package.xml】文件放入【assembly】文件夹中
-
然后执行上面【Maven 打无依赖包】步骤2到步骤4
-
如果要打包scala代码需要添加插件:
方案一:
 <plugin>
     <groupId>net.alchim31.maven</groupId>
     <artifactId>scala-maven-plugin</artifactId>
     <version>3.4.0</version>
     <executions>
         <execution>
             <goals>
                 <goal>compile</goal>
                 <goal>testCompile</goal>
             </goals>
         </execution>
     </executions>
 </plugin>
- 1
- 2
- 3
- 4
- 5
- 6
- 7
- 8
- 9
- 10
- 11
- 12
- 13
方案二:
	<plugin>
		<groupId>org.scala-tools</groupId>
		<artifactId>maven-scala-plugin</artifactId>
 		<version>2.15.2</version>
 		<executions>
         	<execution>
            	 <goals>
                 	<goal>compile</goal>
                 	<goal>testCompile</goal>
            	 </goals>
         	</execution>
     	</executions>
	</plugin>
- 1
- 2
- 3
- 4
- 5
- 6
- 7
- 8
- 9
- 10
- 11
- 12
- 13
推荐方案一,方案二中的插件最新更新日期是2011年
简单粗暴
将下面的任意一种方案放到pom文件中,并修改成自己项目中的MainClass即可
</plugins>
    </build>
     方案一 or 方案二
     <build>
<plugins>
- 1
- 2
- 3
- 4
- 5
-
方案一:
org.apache.maven.plugins maven-shade-plugin 3.0.0 package shade com.test.MainClass -
方案二:
org.apache.maven.plugins maven-assembly-plugin 2.4 com.test.MainClass jar-with-dependencies<executions> <execution> <id>make-assembly</id> <phase>package</phase> <goals> <goal>single</goal> </goals> </execution> </executions>- 1
- 2
- 3
- 4
- 5
- 6
- 7
- 8
- 9
注:
本文属于作者原创,如需转载,请注明。
内部如果引用的文字,连接,图片等资源存在侵犯原作者的情况,请联系本人,立即删除。
Idea用maven给springboot打jar包
一、准备工作
1、工具:Idea2018,maven3.5
2、首先得保证pom有maven插件
 <plugin>
       <groupId>org.springframework.boot</groupId>
       <artifactId>spring-boot-maven-plugin</artifactId>
 </plugin>
二、开始打包
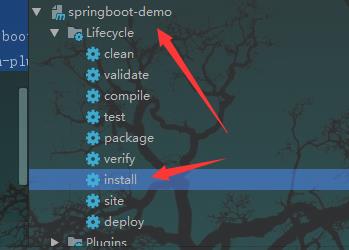
1、找到最右边的Maven Projects,点击进去

2、选择需要打包的项目,并点击install,就开始打包了。
3、等会儿后,会看到日志输出结果,说明打包成功!

4、找到jar包,复制到桌面,运行试试看是否打包成功!

C:\\Users\\Administrator>cd Desktop
C:\\Users\\Administrator\\Desktop>java -jar springboot-demo-0.0.1-SNAPSHOT.jar


可以看到能正常启动,在浏览器访问:local host:8761

能成功访问,说明打的包是没有问题的 。
GG
以上是关于IDEA+Maven 打jar包的主要内容,如果未能解决你的问题,请参考以下文章