el-tree筛选时不过滤非目标项
Posted RicardoX3
tags:
篇首语:本文由小常识网(cha138.com)小编为大家整理,主要介绍了el-tree筛选时不过滤非目标项相关的知识,希望对你有一定的参考价值。
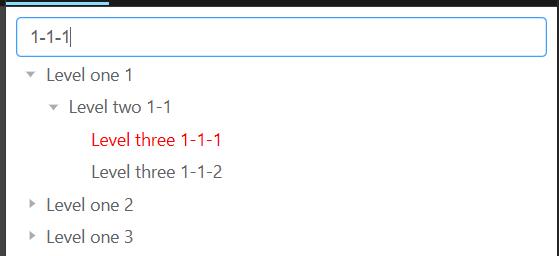
- 效果图:

-
案例
element给的api是一个遍历整个树元素的方法:
value为搜索值,可用$refs.tree.filter(value)来传递该参数,一般配合input组件使用;
data为该节点的内容。这里的data包括一开始构建树时的自定义参数(非children、id、label等props);
node为节点本身,能够获取节点的一些属性,譬如是否选中,是否叶节点,第几层等。
filter-node-method: function(value, data, node)
  if(!value) return true;
 //返回true则显示该节点,这里对应的属性时node里的visible属性
 //也就是说其实只是隐藏了其余节点,而非改变了树节点的treeData
  return data.label.indexOf(value) !== -1
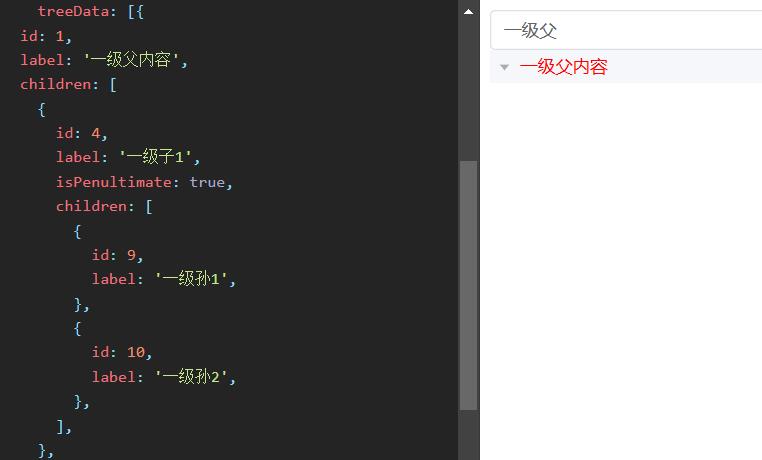
若是按照例子给的方法,则每次筛选时只会留下筛选内容(若是该字符只存在于父节点,它的子节点将不会自动展开)譬如:

-
解决方案
通过打印过滤方法中的data和node参数,我们可以在data中设定自定义属性,然后在el-tree组件的props中的class属性使用回调函数同样遍历树,符合条件的更改其样式;
而其余节点的显示则可以通过设置node.visible = true 来解决。譬如
filterNode(value, data, node)
      //这里设置slot为自定义属性,expanded为父节点是否展开
      //遍历先全部设为false,应对场景为首次查询后再次查询能够清除前一次查询的样式
      data.slot = false
      node.expanded = false
      if (!value) return true
      if(data.name.indexOf(value) !== -1)
        //对符合条件的节点设置额外样式
        data.slot = true
        return true

      //这里因为要操作实际dom样式,因此使用nextTick,使其余节点也能显示
      this.$nextTick(()=>
        node.visible = true
      )
    ,
//这里是绑定el-tree的props属性,即:props="defaultProps"
defaultProps:
        children: "children",
        label: "name",
        class: function (data, node)
          if(data.slot)
            // console.log(\'选中渲染\',data)
            return \'is-filter\'
           return null

      ,
<style>
.is-filter
    color: red;

</style>
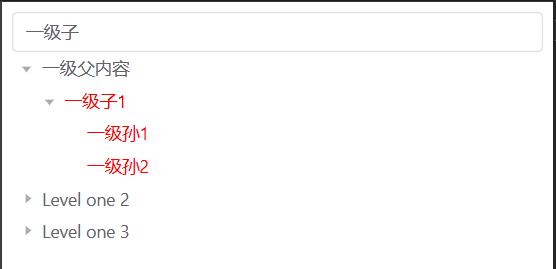
效果如下:

可以看出这里其下的子节点也改变样式了,因为color属性能够继承下去。所以可以加上其他类名来指定到底是哪个节点需要变色
(若是多组件页面涉及到data-v-xxxx的属性,请自行在样式中加入:deep()进行穿透,或者删掉scoped直接更改全局样式)
-
完整代码
<template>
  <el-input v-model="text" @change="filterText" placeholder="Filter keyword" />

  <el-tree
      ref="treeRef"
      class="filter-tree"
      node-key="id"
      :data="treeData"
      :props="defaultProps"
      @node-click="handleNodeClick"
      :filter-node-method="filterNode"
  />
</template>

<script>
export default
  data()
    return
      treeData: [
        id: 1,
        label: \'一级父内容\',
        children: [

            id: 4,
            label: \'一级子1\',
            isPenultimate: true,
            children: [

                id: 9,
                label: \'一级孙1\',
              ,

                id: 10,
                label: \'一级孙2\',
              ,
            ],
          ,
        ],
      ,

          id: 2,
          label: \'Level one 2\',
          isPenultimate: true,
        ,],
      text: \'\',
      defaultProps:
        children: "children",
        label: "label",
        class: function(data, node)
          if(data.slot) return \'redClass\'
        ,
      ,

  ,
  methods:
    handleNodeClick(data, node)
      console.log(data)
      data.slot = true
    ,
    filterNode(value, data, node)
      data.slot = false
      if(!value) return true
      if(data.label.indexOf(value) !== -1)
        console.log(data)
        data.slot = true
        return true

      this.$nextTick(()=>
        node.visible = true
      )
    ,
    filterText(value)
      this.$refs.treeRef.filter(value)

  ,

</script>

<style>
.el-tree-node.is-filter>.el-tree-node__content
  color: red!important;

</style>
这里是在element的实例页面写的,所以样式就没有加穿透了。
-
复选节点树
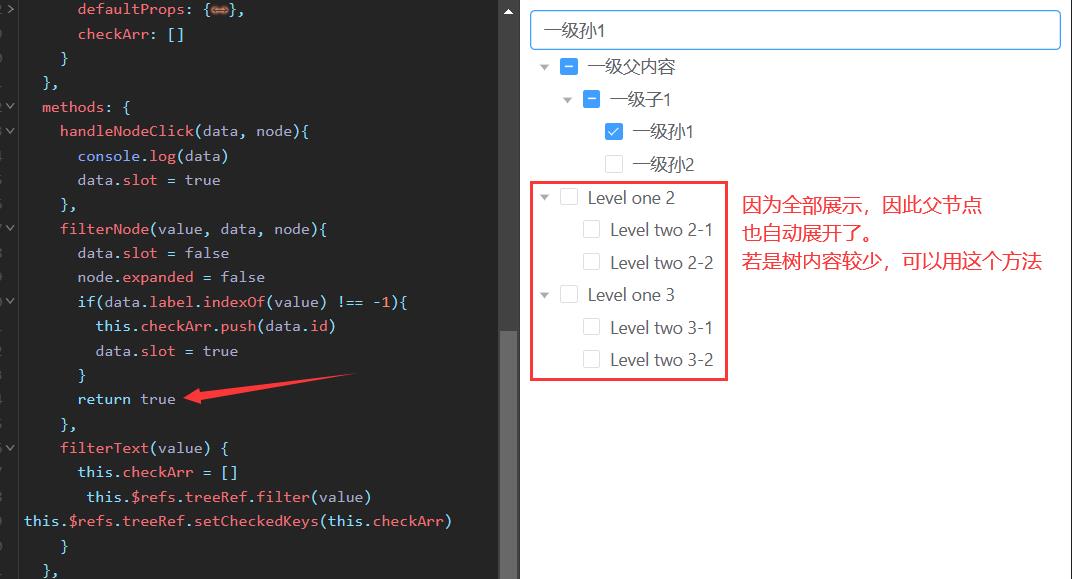
若是设置了show-checkbox,能够复选节点的话,那么同样是这种方法。
因为若是默认全部展示,然后再根据筛选节点的nodekey值调用方法选中(setCheckedKeys)的话,其余非过滤父节点会因return true自动展开,若是树内容过多的话会比较繁琐

element-ui el-tree的用法与过滤搜索,单选高亮效果
1、el-tree用法
<el-tree class="filter-tree"
@node-click="handleNodeClick" //点击事件
:data="data" //数据
:props="defaultProps"
default-expand-all //全部展开
:filter-node-method="filterNode" //过滤搜索
node-key="id" //绑定id
:highlight-current="true" //高亮效果
check-on-click-node //点击节点
:current-node-key="selectMrid" //当前选中节点
ref="tree" //ref
:indent="indentPx"
:render-content="renderContent">
</el-tree>
2、过滤搜索
watch: {
filterText(val) {
    this.$refs.tree.filter(val);
},
},
3、默认高亮效果,单选高亮效果,更改效果
this.$nextTick(() => {
this.$refs.tree.setCurrentKey(this.selectMrid); //一定要加这个选中了否则样式没有出来});
以上是关于el-tree筛选时不过滤非目标项的主要内容,如果未能解决你的问题,请参考以下文章